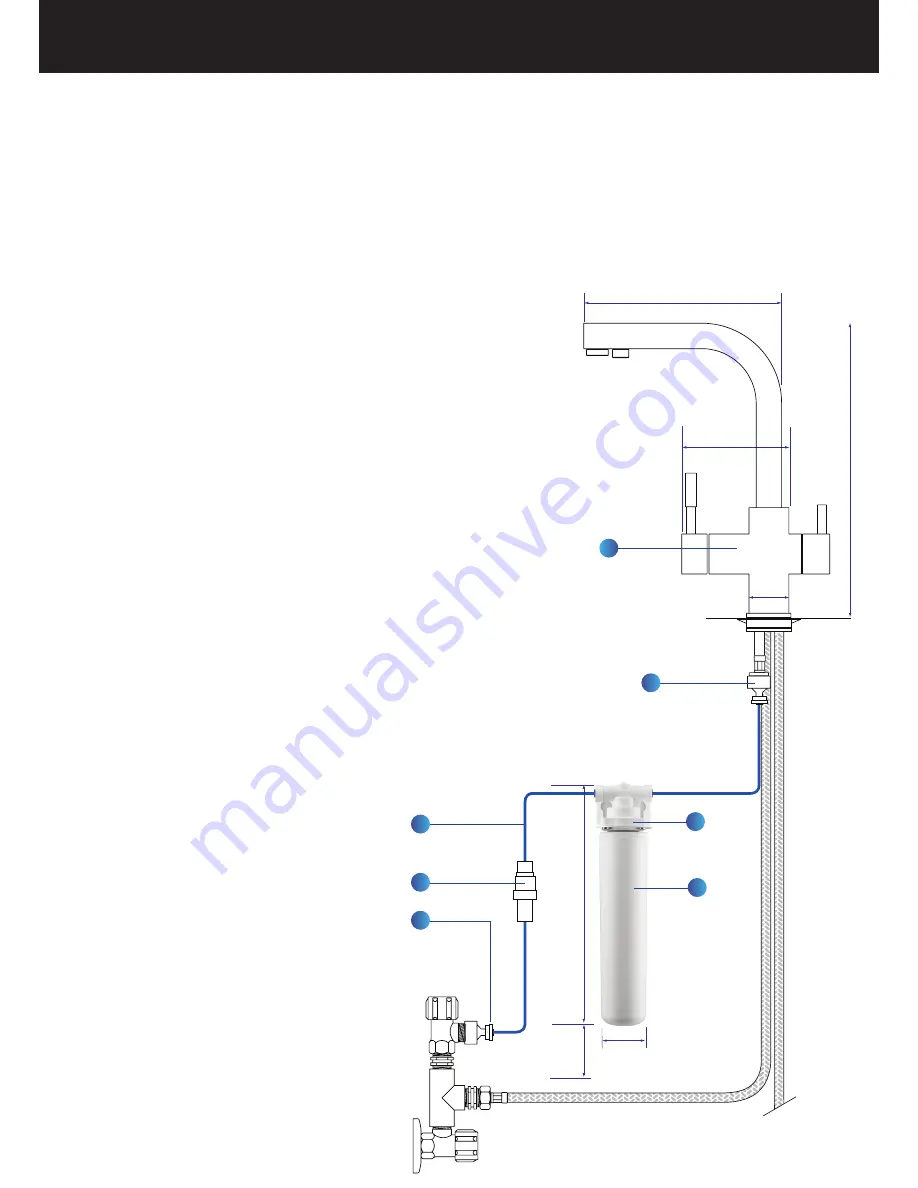
3. INSTALLING THE FILTER SYSTEM
• Following installation of the dual mixer tap as noted above there remains one hose to be connected to the
filter system.
• Remove plastic wrapper and lid from the filter cartridge and fit into the filter head – this is achieved by
pushing the filter cartridge into the head and twisting 90° in a clockwise direction.
• Determine the ideal location for the head and cartridge. You must allow a clearance of 300mm under
the filter head (or 65mm below bottom of cartridge) as this will enable the cartridge to be removed and
replaced.
• Once the position is located – screw the filter head to the cabinet wall.
• Connect the John Guest 1/2” female bsp to 1/4” tube connector to the 1/2” male bsp connection on the
mini cistern tap as shown - item 5.
• Cut from the John Guest tubing supplied a length of approx 100mm. Please ensure that the tubing is cut
with a sharp Stanley knife or tube cutter. Insert one end of this tube into the John Guest tube connector
that you have just installed - item 4.
• The other end of the tube can now be inserted into the inlet of the
Pressure Limiting / Dual Check Valve (PLDCV). As you will note
1/4” John Guest connections are supplied within the PLDCV.
• Please note John Guest fittings are “push fit”.
To ensure a clean and strong connection –
push tubing into fitting and when it will go
no further “pull back” against the fitting to seal tubing.
• Measure a length of tube from the outlet of the
PLDCV to the inlet of the black head assembly / elbow
connection. Cut tube to length. Insert one end of the
tube into the PLDCV outlet and insert the other
end of tube into the elbow inlet of the filter head.
• Measure the final length of tube from the outlet
of the filter head to the John Guest connection
located at the end of the braided filtered water hose.
Cut to size and insert tube into connections - item 7.
• Make sure all connections are tight and sealed.
• Turn water lines on and check for any leaks–
repair if necessary.
• Let water run through filter systen for 2-3 minutes to
purge air and activate system.
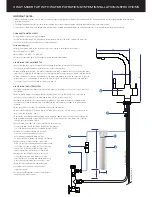
3 WAY MIXER TAP WITH WATER FILTRATION SYSTEM INSTALLATION INSTRUCTIONS
300
220
320
120
50
75
3
4
5
6
1
2
HOT
WAT
ER LINE
COLD
WAT
ER LINE
7
65
IMPORTANT NOTES:
1. When installing this system in a new home or kitchen please ensure that the cold water lines under the kitchen sink are flushed to remove all debris within the pipes before
installing the system
2. The Mixer Tap and Water Filter system must be installed in accordance with Australian Standard AS 3500 and local authority By-Laws.
3. The system includes a pressure limiting valve which must be installed with all installations as a legal requirement - if not installed the warranty is null and void.
1. CONNECT TO WATER SUPPLY
If a separate water connection is not provided:
• Locate the Isolation Stop Cock mounted on the wall underneath the sink for the existing cold water line.
• Turn off Isolation Stop Cock and disconnect attached fittings.
Using plumbing tape:
-
• Attach the following parts to the Isolation Stop Cock according to the diagram to the right:-
• Brass Female Tee 1/2” BSP
• Brass Nipples 1/2” BSP - 1/2” BSP (x2)
• Please note that these parts are not supplied (readily available via plumber)
2. INSTALLING THE 3 Way MIXER TAP
• Enclosed within the 3 Way mixer tap carton you will find installation instructions for the mixer tap.
Follow these carefully and when completed carry out the following tasks.
• Having installed the mixer tap - you will notice that there are three (3) braided hoses connected to the mixer
tap – one hot (marked with red stripes), one cold (marked with blue stripes) and one filtered cold (unmarked).
• Having created the Tee Section as noted above the mains cold braided hose can be connected to the cold
water connection – refer diagram. Obviously, the hot water hose can also be connected to the hot water
connection. Please ensure that all water remains turned off.


