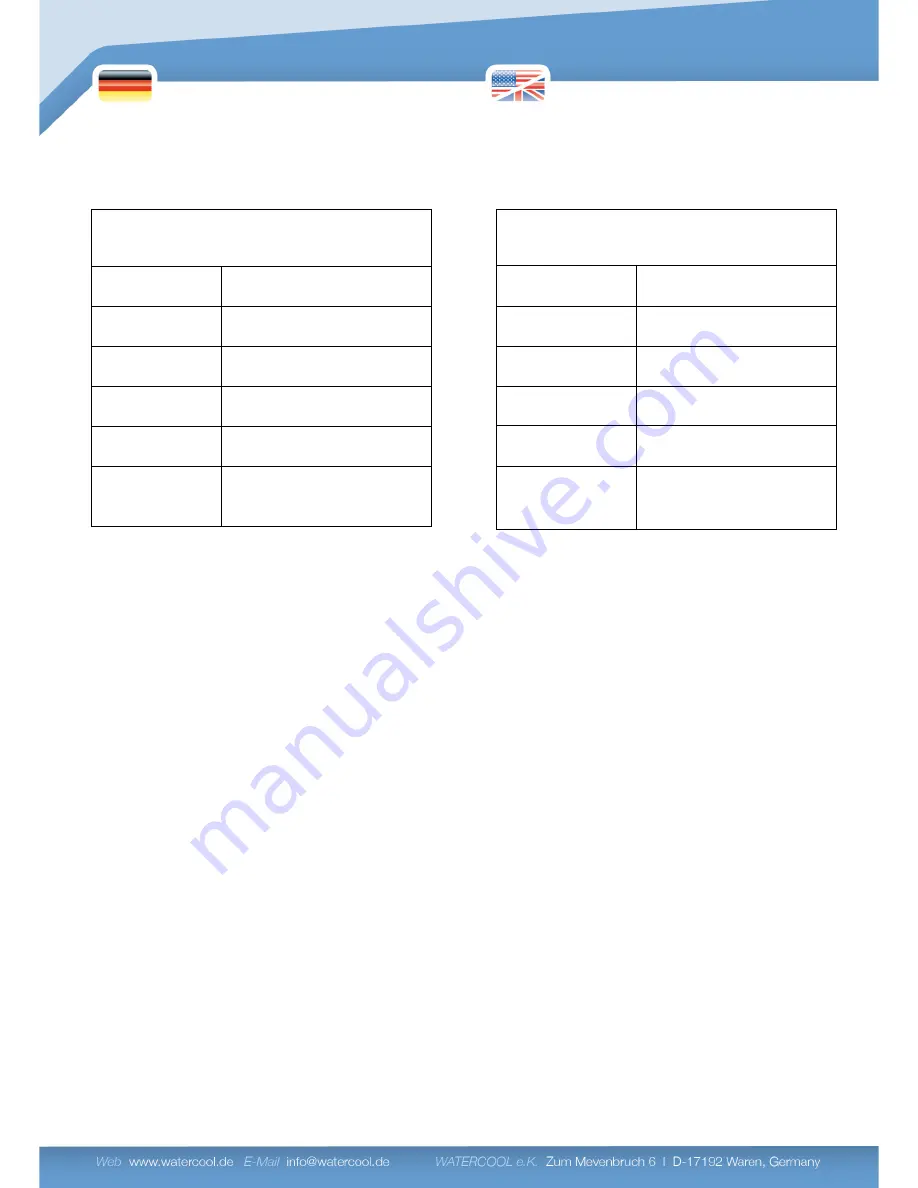
background image


2


Technical data:  
 

HEATKILLER®  MB-X  ASUS  RAMPAGE  IV  Black 

Edition 

Dimensions 

(L x W x H) 

107 

19 

23,5 

mm 

113 x 115 x 19 mm 

Weight 

430 g 

Material (bottom/top)  Copper / POM,  stainless steel 

Threads 

G ¼“ 

Max. Temperature 

80 °C 

Compatible to 

ASUS  RAMPAGE  IV  Black 

Edition 

 
2. Preparation of the mainboard 

First,  demount  the  original  heat  sinks  (see 

picture  1)  by  removing  the  screws  on  the 

mainboard’s  backside.  Take  care  not  to 

damage the heat sinks and heatpipe. You may 

want to keep them in case they are needed for 

any RMA-procedures. 

After  demounting  the  original  heat  sinks, 

please  remove  all  remnants  of  thermal 

pads/compounds.  Be  careful  not  to  damage 

your  hardware.  The  HEATKILLER®  MB-X  kit 

ships  with  precut  thermal  pads  for  easy 

installation. 


Technische Daten: 
 

HEATKILLER®  MB-X  ASUS  RAMPAGE  IV  Black 

Edition 

Abmaße (L x B x H) 

107 

19 

23,5 

mm 

113 x 115 x 19 mm 

Gewicht 

430g 

Material 

(Boden/Deckel) 

Kupfer / POM / Edelstahl 

Anschlüsse 

G ¼ Zoll 

Temperaturfest bis  80°C 

Kompatibel zu 

ASUS 

RAMPAGE 

IV 

Black 

Edition 

 
2. Vorbereitung der Installation 

Entfernen  Sie  zuerst  die  original  verbauten 

Kühlkörper  des  Mainboards.  Siehe  Abbildung 

1.  Lösen  sie  dazu  die  Schrauben  auf  der 

Rückseite  des  Mainboards.  Achten  sie  darauf 

die  Kühlkörper  und  die  Heatpipe  nicht  zu 

beschädigen.  Heben  sie  die  Teile  für  einen 

eventuellen  Garantiefall  des  Mainboards  auf. 


Sobald  die  Kühlkörper  demontiert  wurden, 

entfernen Sie bitte eventuell noch vorhandene 

Wärmeleitpaste 

auf 

den 

elektronischen 

Bauteilen.  Gehen  sie  dabei  bitte  besonders 

vorsichtig  vor  um  die  Hardware  nicht  zu 

beschädigen.  Für  die  leichte  Montage  des 

HEATKILLER®  MB-X  Sets  befinden  sich 

bereits fertig zugeschnittene Wärmeleitpads im 

Lieferumfang. 


Summary of Contents for HEATKILLER MB-X ASUS RAMPAGE IVBlack Edition

Page 1: ... Die Firma Watercool übernimmt keinerlei Haftung bei Beschädigungen an der Hardware 1 Description The HEATKILLER MB X ASUS RAMPAGE IV Black Edition is the optimal cooling solution for your ASUS mainboard All notable heat sources are cooled for a simultaneous increase in stability and overclocking potential You can download coloured mounting instructions in pdf format from the service area of our h...

Page 2: ...Technische Daten HEATKILLER MB X ASUS RAMPAGE IV Black Edition Abmaße L x B x H 107 x 19 x 23 5 mm 113 x 115 x 19 mm Gewicht 430g Material Boden Deckel Kupfer POM Edelstahl Anschlüsse G Zoll Temperaturfest bis 80 C Kompatibel zu ASUS RAMPAGE IV Black Edition 2 Vorbereitung der Installation Entfernen Sie zuerst die original verbauten Kühlkörper des Mainboards Siehe Abbildung 1 Lösen sie dazu die Sc...

Page 3: ...not to shift or damage the pads The length of the included screws allows reuse of the original VRM backplate 3 Montage des VRM Kühlers Überprüfen Sie zuerst die Kompatibilität des Kühlkörpers in dem Sie diesen an die dafür vorgesehene Stelle halten Passt der Kühlkörper liegt keine verdeckte Revisionsänderung des Mainboards vor und die Montage kann durchgeführt werden Dafür nehmen Sie die beiden lä...

Page 4: ... des Mainboards vor und die Montage kann durchgeführt werden Als erstes muss der Chipsatz mit einem Wärmeleitmittel versehen werden Dazu befindet sich ein quadratisches Wärmeleitpad The screws may only be pulled hand tight Overtightening can damage the voltage regulators 4 Mounting the chipset cooler First place the cooler at its intended position If the cooler does not fit there might have been u...

Page 5: ...hrauben zum Einsatz Zwischen Schraubenkopf und Mainboard Rückseite gehört je eine der mitgelieferten M3 Unterlegscheiben Die Schrauben dürfen nur handfest angezogen werden um den empfindlichen Chipsatz nicht zu beschädigen Now the cooler can be moved into its place and the mainboard flipped over Make sure to hold the cooler in place so the thermal pad cannot get shifted or damaged Five screws M3x1...

Page 6: ...d die Überprüfungen erfolgreich verlaufen kann der Computer in Betrieb genommen werden Die Temperaturwerte sollte anfänglich genau beobachtet werden 5 Installation and leak test After the installation a visual check and test run are recommended The leak test should preferably be performed outside of the computer If this is not possible the hardware may not be turned on during the test run After su...

Page 7: ...ser als Kühlmedium zu verwenden Zum Schutz vor Algen kann handelsübliche Zitronensäure verwendet werden ein Ausbreiten von Algen wird so wirkungsvoll verhindert 6 General Information The HEATKILLER MB X does not have a defined input and output The cooling medium can stream in or out on both sides Tubing should be routed in a way that does not transmit excessive strain onto the cooler We recommend ...

Reviews: