background image

LEPRECHAUN 90 O.S.A.

WOODBURNING STOVE

INSTALLATION & OPERATING

INSTRUCTIONS

GENERAL

When installing, operating and maintaining your
Leprechaun 90 O.S.A. Stove respect basic stan-
dards of fire safety.  Read these instructions careful-
ly before commencing the installation.  Failure to do
so may result in damage to persons and property.
Consult 

your 

local 

Municipal 

Office, 

Fire

Department, and your insurance representative to
determine what regulations are in force.  Save these
instructions for future reference.

PRE-INSTALLATION ASSEMBLY

Step 1:
After removing the stove from its packing, open the
firedoor door and remove the contents from the fire
box. 
Step 2:
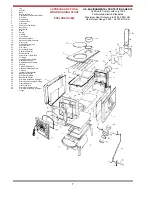
Lay the stove on its side and fit the 4 legs (item 1)
with the 

1/4

” (6.4mm) hex sets screws provided,

tighten screws.  Stand the stove upright, taking care
not to strain the leg bolts.
Step 3:
Install the Hot Plate (item 15) into the large opening
of the hob (item 13).  Do not remove the Hot Plate
when the stove is lighting.

THIS STOVE MAY BE CONNECTED TO EITHER A
TOP OR A REAR VENT.

REAR FLUE EXIT

Fit back sealing plate (Part no. 17) over the top flue
aperture in the hob (Part no. 13).  Fit the flue spigot
to part no 11 where part no. 17 was, making sure
that part no. 17 and part no. 14 are well secured on
a bed of fire cement.

TOP FLUE EXIT

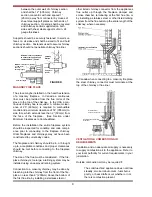
Fit part no. 14 over top
flue aperture in the hob
(Part No. 13) make sure
that part no. 14 is well
secured on a bed of fire
cement.

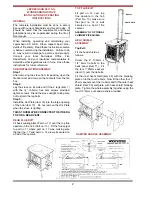
ASSEMBLY OF OPTIONAL
CHIMNEY PIPE SHIELD

HEAT SHIELD
ASSEMBLY

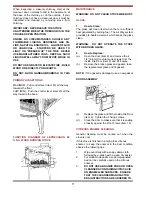
Top Exit:

Fit the head shield as
follows: 

Screw  the  4”  100mm  x
1/4” 6mm tie bolts to the
back panel (item 11).  Fit
the four 1” 25mm spacers
(item 31) over the tie bolts. 

Fit the inner heat shield (item 28) with the blanking
plate on to the four tie bolts.  Now fit the other four 1”
25mm spacers over the tie bolts and fit the outer heat
shield (item 30) complete with heat shield blanking
plate.  Tighten the whole assembly together using the
four 1/4” 6mm nuts and washers provided.

2

The complete installation must be done in accor-
dance with current Standards and Local Codes.  It
should be noted that the requirements and these
publications may be superseded during the life of
this manual.

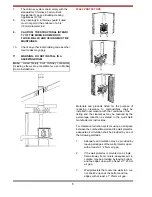
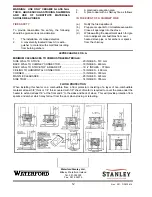
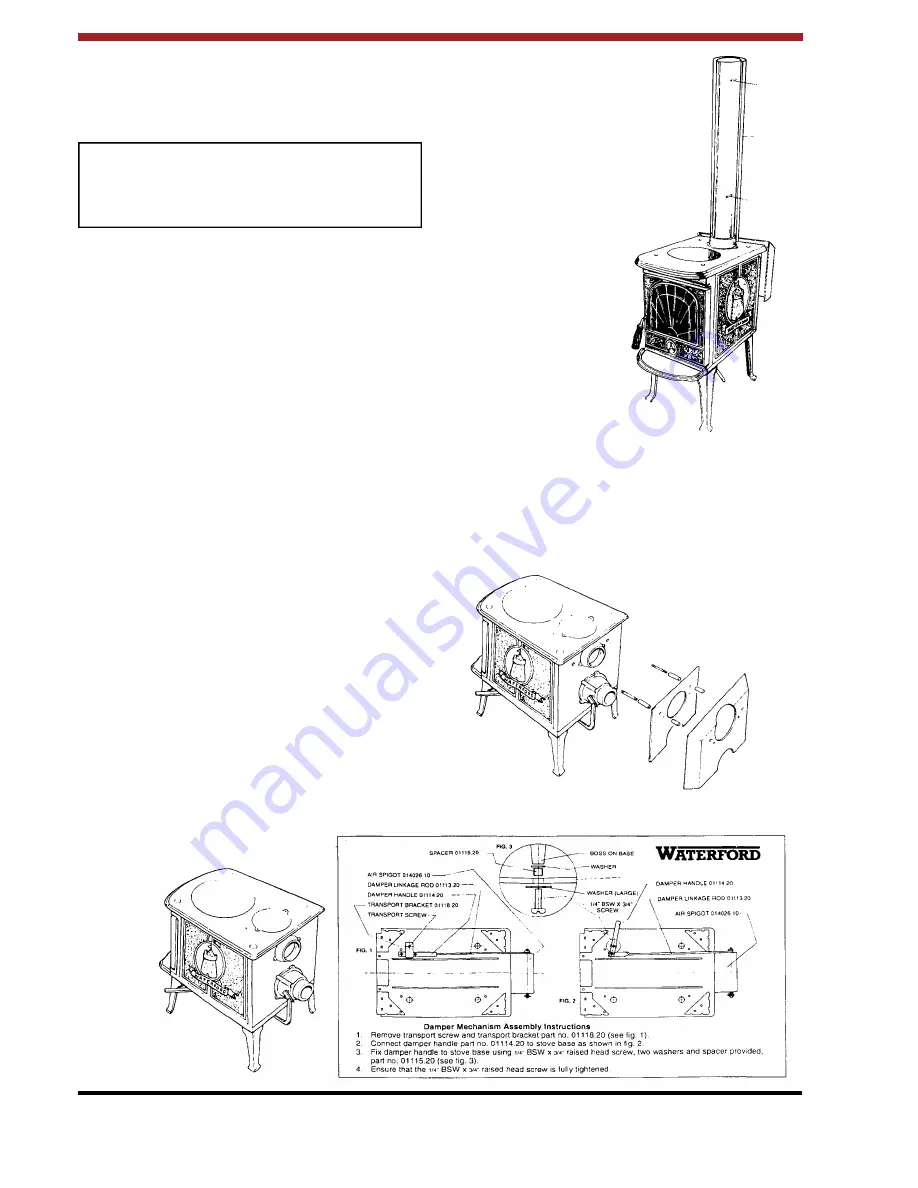
DAMPER HANDLE ASSEMBLY

Leprechaun 90 O.S.A.

Spacer

Heat Shield

Spacer

Fionn 90 OSA

Summary of Contents for LEPRECHAUN 90 O.S.A

Page 1: ...at all times and should not be allowed to touch the hot working surfaces while in use or until the appliance has thoroughly cooled If this stove is not properly installed a house fire may result For y...

Page 2: ...A REAR VENT REAR FLUE EXIT Fit back sealing plate Part no 17 over the top flue aperture in the hob Part no 13 Fit the flue spigot to part no 11 where part no 17 was making sure that part no 17 and par...

Page 3: ...1 4 6mm thick covered with 1 8 3mm sheet metal is required to cover the area under the heater and to extend to at least 18 450mm at the front and 8 200mm to the sides and rear This will provide pro t...

Page 4: ...ts between air vents and outside walls should be sealed to prevent ingress of mois ture l This stove is listed for Mobile home installa tion provided it is properly connected to an outside air supply...

Page 5: ...ances may be reduced by the percentage reduction as stated in the wall shield manufacturer s instructions For clearance reduction systems using an air space between the combustible wall and the wall p...

Page 6: ...ry The connector may pass through walls or partitions constructed of combustible material to a masonry chimney provided the connector system selected is installed in accordance with the proper clearan...

Page 7: ...nside Back Heat Shield 29 Door Sealing Rope 30 Outside Back Heat Shield 31 Spacers 32 Optional Pipe Shield 33 Heat Shield Blanking Plate 34 Tie Bolts 35 Top Baffle Plate Gasket 36 Back Panel Gasket 37...

Page 8: ...diameter as the chimney connector and having 1 25mm or more of insulation with a min 9 230mm air space between the outer wall of the chimney length and combustibles The inner end of the chimney lengt...

Page 9: ...less than 2 50mm from the face of the fireplace See Section under Minimum Clearances to Combustibles Before the installation the entire fireplace system should be inspected for condition and code com...

Page 10: ...your finger when the pipe is cool If you hear a dull echo the pipe may need cleaning Disassemble the chimney connector and clean the sections Replace corroded pipe sections The fit ting of a slip join...

Page 11: ...clean itself when there is sufficient heat generated by burning fuel The Air Way system provides pre heated warm air which keeps the glass clean WARNING DO NOT OPERATE THE STOVE WITH BROKEN GLASS 2 H...

Page 12: ...or hot embers or sparks from the chimney LEPRECHAUN 90 O S A MINIMUM CLEARANCES TO COMBUSTIBLE MATERIALS SIDE WALL TO STOVE 20 INCHES 510 mm BACK WALL TO CHIMNEY CONNECTOR 18 INCHES 460mm BACK WALL T...

Reviews: