background image

3

INSTRUCTION GUIDE: COLOR TOUCHSCREEN COMMUNICATING THERMOSTAT

IG1601EW   06/16

*IG1601EW* 


997-012330-14-R

Programming Your Thermostat

(NOTE: This option is not available if configured as a Zone 
Thermostat, but is available at the MasterStat.)

Preset Programming

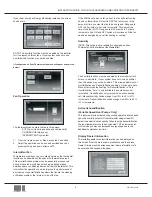
Preset options will step you through the programming. Simply 
select the temperatures and then view the completed program.

Programming a Day or a Series Of Days

After selecting the programming screen, you have the option 
of programming everyday, weekdays, weekends, or individual 
days. Once you’ve selected a certain day to program, a screen 
appears that allows you to set the time, heat setting, cool 
setting, and fan operation for each event.
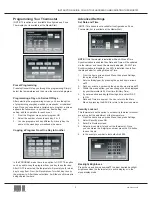
1.  From the Program menu, select program ON.
2.  Select the number of events each day, 2 or 4.
3.  You can program each day differently, or every day the 

same or the weekdays or weekends the same.

Copying a Program From One Day to Another

In the PROGRAM menu, there is an option to COPY. The option 
can be used to copy the program from one day to another day. 
After COPY is selected, the thermostat will prompt you for which 
day to copy from. Next, it will prompt you for which day to copy 
the program to. After these selections, it will then confirm what is 
being copied to where. 

Advanced Settings 

Set Date and Time

(NOTE: This option is not available if configured as a Zone 
Thermostat, but is available at the MasterStat.)

NOTE:

 If this thermostat is installed with an AWL and Time 

Synchronization is enabled then Date and Time will be updated 
via the internet and cannot be manually adjusted. If AWL Time 
Synchronization is disabled or no AWL is installed then follow 
the steps below for setting Date and Time.

1.  From the home screen, press Menu, then press Settings, 

then press Date/Time

2.  Set month/day/year, by pressing the up and down arrows 

▲▼

.

3.  Set hour: minute, by pressing the up and down arrows 

▲▼

.

4.  Within this menu option, you can change the time displayed 

by your thermostat to 24 Hour time (Military Time).

5.  If your area observes daylight savings time, select D.S.T. 

to ON.

6.  Date and Time are now set. You can return to the Main 

Menu by pressing the BACK to return to the previous menu.

Security Lockout

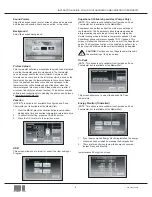
This thermostat has the option to set security features to lockout 
everything but the adjustment of the temperature. 
1.  From the home screen, press Menu, then press Settings.
2.  Select Security, press ON.
3.  Enter Pin Number screen.
4.  Select a pin number to lock out the thermostat. Once 

you’ve entered the 4-digit pin number, press the OK button 
to save the pin. 

5.  In the event pin number is lost default is 9999 

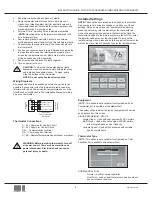
Backlight Brightness 

Press the up and down arrows 

▲▼

 to adjust desired backlight 

brightness when the thermostat is in active display or in the 
sleep display mode.

Summary of Contents for TPCC32U01

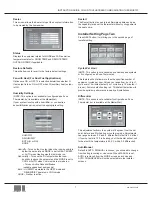
Page 1: ...els Displayed if configured as a Zone Thermostat Comp SPD and Room Humidity only displayed if configured as a stand alone thermostat Heating Set Point Time Date Outside Temperature If installed Room Humidity Mode Comp SPD Fan Operation Error Code If present Cooling Set Point Room Temperature Zone NOTE Outdoor temperature is only displayed if an outdoor sensor is installed 1 To select a MODE press ...

Page 2: ... energized Ranges are OFF to 20 minutes in 5 minute increments Then adjust the time of the fan is OFF Ranges are 5 40 minutes in 5 minute increments Fan ON and OFF cycles will continue until the fan has been energized by a call for heating or cooling Humidity NOTE This option is not available if configured as a Zone Thermostat but is available at the MasterStat The humidity function must be enable...

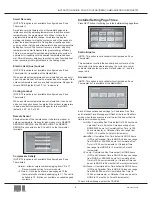
Page 3: ...ttings Set Date and Time NOTE This option is not available if configured as a Zone Thermostat but is available at the MasterStat NOTE If this thermostat is installed with an AWL and Time Synchronization is enabled then Date and Time will be updated via the internet and cannot be manually adjusted If AWL Time Synchronization is disabled or no AWL is installed then follow the steps below for setting...

Page 4: ... CANCEL button 3 Press the OK to return to the previous menu USB This screen allows you to import or export the User setting or Program Superboost Variable Speed Heat Pumps Only NOTE This option is not available if configured as a Zone Thermostat but is available at the MasterStat Superboost can be found under the main menu settings of the thermostat The Superboost option temporarily enables a lar...

Page 5: ...bled Installer Information Advanced Features Safety Considerations Improper wiring or installation may damage thermostat Wiring must conform to local and national electrical codes Introduction The thermostat is a wall mounted low voltage thermostat which maintains room temperature by controlling the operation of a heating and air conditioning system Batteries are not required temperature and mode ...

Page 6: ...4VAC Hot DX Communication ABC Controller Thermostat Connection DX Communication TPCC32U01 Color Touchscreen Thermostat Thermostat Connections C 24V Common for Control Circuit R 24V Supply for Control Circuit DX Communication Terminal DX Communication Terminal S1 S2 Remote Temperature Sensor indoor or outdoor WARNING Before installing thermostat turn off all power to unit There may be more than one...

Page 7: ... operates in the HEAT mode and DEHUMIDIFY operates in COOL mode NONE Neither is active Restart The Restart button is used to load firmware updates and give the capability to reboot the thermostat without cycling power to the heat pump Installer Setting Page Two Press NEXT button It will bring you to the second page of installer setting Cycles Per Hour NOTE This option is not available on variable ...

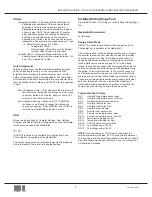
Page 8: ... terminals Compressor Satisfy NOTE This option is not available if configured as a Zone Thermostat Normal allows compressor downstaging from Y2 to Y1 Recommended setting for most products Y2 Finish Once the heat pump has engaged Y2 the thermostat will not allow downstaging to Y1 The call is satisfied in Y2 Option not available on variable speed systems Installer Setting Page Three Press NEXT butto...

Page 9: ...one Thermostat but is available at the MasterStat This screen changes the unit of measurement that is displayed on the thermostat Fahrenheit is the default setting Installer Setting Page Four Press NEXT button It will bring you to the Installer Setting page four Residential Commercial For future use Energy Demo Mode NOTE This option is not available if configured as a Zone Thermostat but is availa...

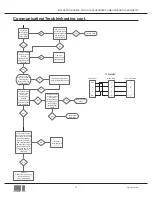
Page 10: ...igure Aurora System screen Yes Yes No Install communicating thermostat Do you have an AID tool No Get an AID tool Yes Which of these do you have TST ABC AXB IZ2 AOC MOC EEV Wire non communicating 8 wire thermostat to P1 terminal on the ABC board Is the thermostat communicating Yes No Issue resoled Variable Speed unit Single and Dual Capacity unit Y Active Communication N Device has been found but ...

Page 11: ...ride and the TST removed from the Configure Aurora System screen No Yes Yes Replace the ABC board Replace the thermostat DX R C DX 1 2 3 4 C R Can you send a picture of the ABC P7 connector and thermostat wiring connections Review and confirm the thermostat is wired correctly Check the continuity of the thermostat wires by removing wires from the green plug at ABC P7 and wire tying wires 1 and 2 t...

Page 12: ...01EW 06 16 IG1601EW 997 012330 14 R NOTES 2016 WaterFurnace International Inc 9000 Conservation Way Fort Wayne IN 46809 9794 WaterFurnace has a policy of continual product research and development and reserves the right to change design and specifications without notice ...

Reviews: