background image

15

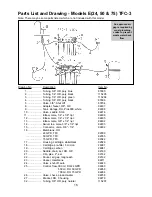
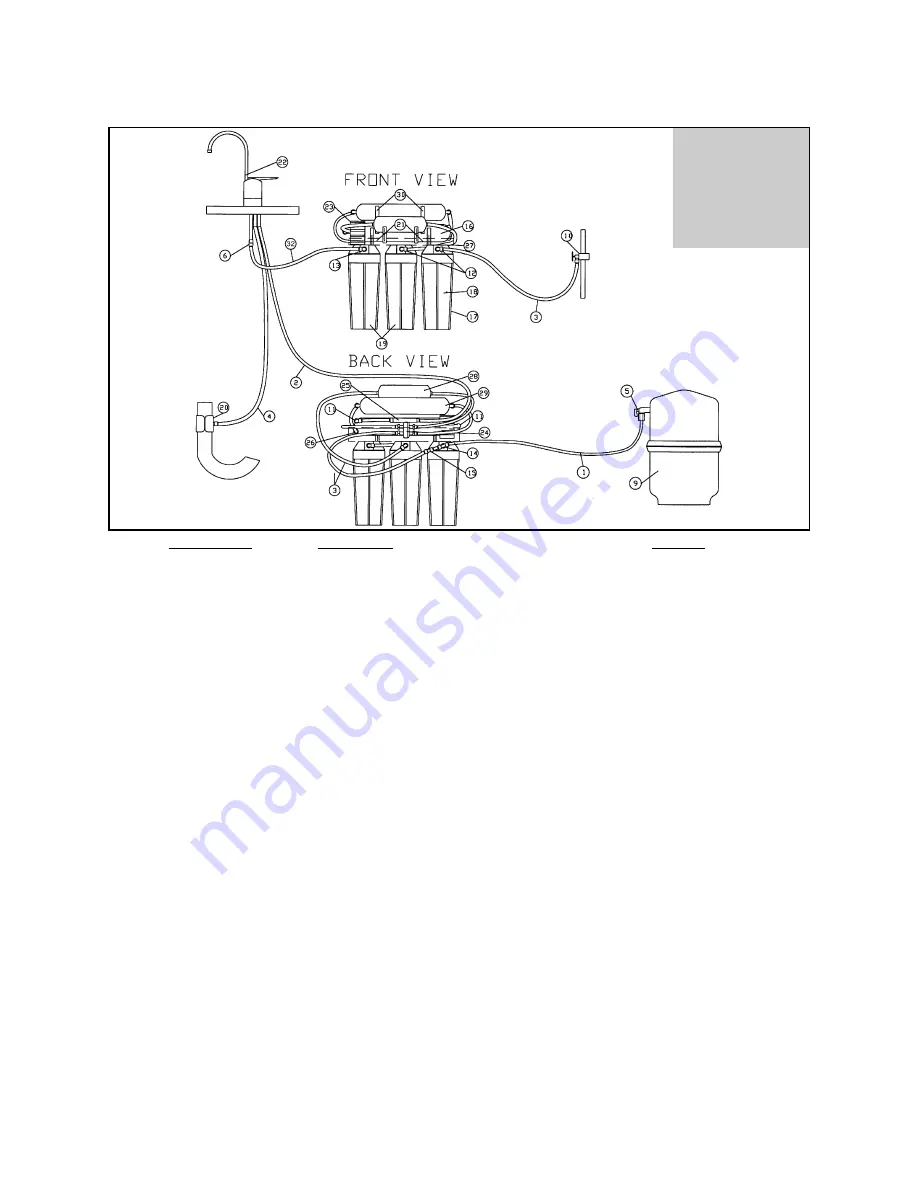
Parts List and Drawing - Model D75TFC-3

Note: There may be some parts listed, which are not included with this model.

Drawing No............... Description

Item No.

1...................... Tubing, 3/8" OD, poly, blue

87600

2...................... Tubing, 1/4" OD, poly, black

115205

3...................... Tubing, 1/4" OD, poly, green

115204

4...................... Tubing, 3/8” OD, poly, black

87606

5...................... Valve, 3/8", Shut Off

80704

6...................... Adapter, faucet, 3/8", QC

92407

9...................... Tank, storage, RO, Pro4000, white

92298

10 .................... Valve, saddle, SV-6

92276

11 .................... Elbow, male, 1/4" x 1/8" npt

92406

12 .................... Elbow, male, 1/4" x 1/4" npt

92405

13 .................... Elbow, male, 3/8" x 1/4" npt

92404

14 .................... Swivel tee, male, 3/8" x 1/4" npt

92403

15 .................... Connector, union, 3/8" - 1/4"

92402

16 .................... Membrane, RO, 75 GPD,TFC

92022

17 .................... Housing, cartridge, white/black

92026

18 .................... Cartridge, pre-filter, 5 micron

26091

19 .................... Cartridge, carbon

26081

20 .................... Saddle, drain, set, RO, 3/8”

92160

21 .................... Clip, pipe, 2", set

92162

22 .................... Faucet, air gap, long reach

92192

23 .................... Vessel, membrane

92211

24 .................... Valve, shut-off, auto

92223

25 .................... Control, flow, 700 ml, RO 75 GPD

92264

26 .................... Valve, check, product water

92258

27 .................... Bracket, RO, 3 housing

92279

28 .................... Cartridge, polyphosphate, QC

92015

29 .................... Cartridge, Extended Contact Post Carbon, QC

92020

30 .................... Clip, 2 x 1/2

92163

32 .................... Tubing, 3/8” OD, poly, natural

115207

An approved air

gap is required by

most plumbing

codes to prevent

waste water back

flow.

Summary of Contents for Aqua Flo

Page 1: ...Reverse Osmosis Drinking Water System Installation Operation and Service Manual ...

Page 2: ......

Page 3: ...sh out the preservative solution before using the system This volume of water represents approximately two days of production The water flushed should be disposed of to the drain Feed Water Quality This reverse osmosis drinking water system is not intended to be used for the treatment of water that is microbiologically unsafe or of unknown quality If the feed water quality is unsafe or unknown hav...

Page 4: ... Installation 4 Startup and Operation 9 Maintenance 10 Sanitization Procedures 11 Maintenance Schedule 14 Part List and Drawing for D75TFC 3 15 Parts List and Drawing for E75TFC 3 E50TFC 3 E24TFC 3 16 Parts List and Drawing for E50TFC 2SF 17 Reverse Osmosis Drinking Water System Flow Diagram all models 18 Troubleshooting Guide 19 Warranty Information Addresses 20 ...

Page 5: ...rom the tap Ice Cubes use RO water to fill ice cube trays Ice cubes made from RO water are typically clearer and better tasting than ice made from plain tap water Automatic Ice Makers a water line from the RO system can be plumbed to refrigerators with automatic icemakers Additional accessories required to complete this connection are not included Please consult the refrigerator s owner s manual o...

Page 6: ...membrane The membrane will allow only permeate pure water to pass through The brine waste water goes to the drain Permeate then flows through a hydraulic shut off valve to the storage tank When the tank fills and the tank pressure reaches 2 3 of the inlet feed water pressure the shut off valve closes which turns the system off When water is drawn from the faucet permeate flows from the storage tan...

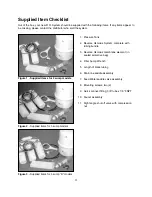
Page 7: ...ubing bundle 3 Reverse Osmosis membrane element in sealed protective bag 4 Filter Sump Wrench 5 Length of black tubing 6 Drain line saddle assembly 7 Feed Water saddle valve assembly 8 Mounting screws two 2 9 Quick connect fitting 3 8 tube x 1 8 FNPT 10 Faucet assembly 11 Right angle shut off valve with compression nut Figure 1 Supplied items for 2 sump models Figure 2 Supplied items for 3 sump mo...

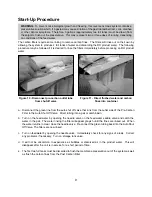
Page 8: ...at it can be easily removed from under the sink Avoid placing the storage tank in out of the way cabinets or dead spaces There are two reasons for this 1 the difficulty of installation increases significantly and 2 when the storage tank is located further away from the spigot the flow rate diminishes Module Assembly The module assembly should be hung on a sink cabinet side wall with the two wood s...

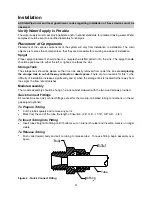
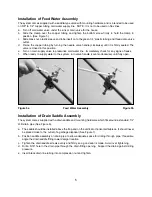
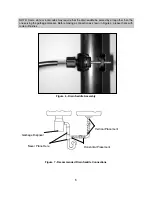
Page 9: ... check for any signs of leaks f When ready to supply water to the system turn valve handle counter clockwise until fully open Feed Water Assembly Installation of Drain Saddle Assembly The system comes supplied with a drain saddle and mounting hardware which fits around a standard 1 O D drain pipe See Figure 6 a The saddle should be installed above the trap and on the vertical or horizontal tailpie...

Page 10: ...rap other than the one serving the garbage disposal Before making a connection as shown in Figure 6 please check with code authorities Figure 6 Drain Saddle Assembly Figure 7 Recommended Drain Saddle Connections Vertical Placement Horizontal Placement Never Place Here Garbage Disposal ...

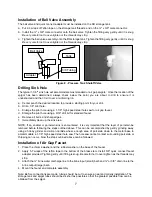
Page 11: ...d sharp edges f Immediately clean up the sink area NOTE If an enamel or porcelain sink is encountered it is very important that the layer of porcelain be removed before following the steps outlined above This can be accomplished by gently grinding away using a hobby grinder and silicon carbide wheel enough area of porcelain down to the metal base to accommodate a 1 1 8 high speed steel hole saw Th...

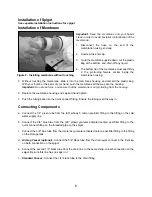
Page 12: ...using 6 Replace the membrane housing end cap and hand tighten 7 Push the tubing back into the quick connect fitting Ensure the tubing is all the way in Connecting Components a Connect the 1 4 green tube from the 90 elbow 5 micron pre filter fitting to the fitting on the cold water supply line b Connect the 3 8 blue tube from the 90 elbow granular activated carbon post filter fitting to the quick c...

Page 13: ...utlet side of the Pre Carbon Filter to the Auto Shut Off Valve Direct tubing into a pail or catch basin b Turn on the feed water by opening the needle valve on the feed water saddle valve and catch the water in the pail The water rinsing the filter will appear grayish until the fines are rinsed out When the water returns to clear close the needle valve Re connect the green tubing back into the Aut...

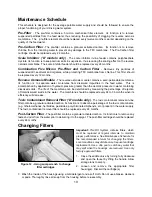
Page 14: ...ic pressure in water containing dissolved solids The life of the membrane can be determined by measuring the percentage of rejection of total dissolved solids in the water The membrane should be replaced every 24 to 36 months when its efficiency will decrease Toxic Contaminant Removal Filter D models only The toxic contaminant removal in line filter contains a granular activated carbon Its functio...

Page 15: ...omponents DO NOT USE SCOURING PADS OR ANY OTHER TYPE OF INSTRUMENT THAT COULD POTENTIALLY SCRATCH THE SURFACES OF THE UNIT Measuring spoon or device Household bleach typically containing 5 25 of chlorine One 1 Gallon of potable water to mix up a disinfectant solution DO NOT USE WATER THAT IS NOT CONSIDERED POTABLE OR IS OF A QUESTIONABLE NATURE TO MIX UP THE DISINFECTANT SOLUTION Drip pan or catch...

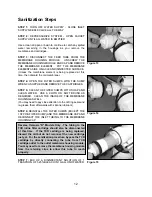
Page 16: ...E A CLOTH OR SOFT BRUSH AS REQUIRED CLEAN THE INSIDE OF THE MEMBRANE HOUSING AS WELL You may need to pay close attention to the O Ring seals and re grease them afterwards with silicone lubricant STEP 6 REINSTALL THE FILTER SUMPS EXCEPT THE 1ST PRE FILTER SUMP AND THE MEMBRANE CAP AND RECONNECT THE INLET TUBING TO THE MEMBRANE HOUSING CAP Reverse Osmosis D Models Only The tubing to the TCR inline f...

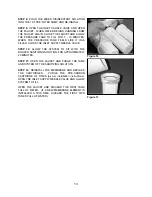
Page 17: ...ALVE STEP 10 ALLOW THE SYSTEM TO SIT WITH THE DILUTED SANITIZING SOLUTION FOR APPROXIMATELY 20 MINUTES STEP 11 OPEN THE FAUCET AND PURGE THE TANK AND SYSTEM OF THE SANITIZING SOLUTION STEP 12 REINSTALL THE MEMBRANE AND REPLACE THE CARTRIDGES PURGE THE PRE CARBON CARTRIDGE OF FINES as per installation instructions OPEN THE INLET SUPPLY NEEDLE VALVE AND ALLOW SYSTEM TO FILL OPEN THE FAUCET AND DISCA...

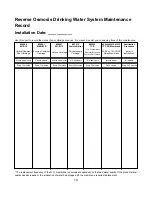
Page 18: ...ent Carbon Cartridge Polyphosphate Removal Extended 24 50 or 75 USGPD refer to Dual Cartridge Cartridge Cartridge Contact Post Carbon Rated Membrane instructions 2 sump models only 3 sump models 3 sump models x2 D models only D models only refer to model all models Every 12 months Every 12 months Every 24 months Every 24 months Every 24 months 24 36 months Every 6 12 months The replacement frequen...

Page 19: ... 92404 14 Swivel tee male 3 8 x 1 4 npt 92403 15 Connector union 3 8 1 4 92402 16 Membrane RO 75 GPD TFC 92022 17 Housing cartridge white black 92026 18 Cartridge pre filter 5 micron 26091 19 Cartridge carbon 26081 20 Saddle drain set RO 3 8 92160 21 Clip pipe 2 set 92162 22 Faucet air gap long reach 92192 23 Vessel membrane 92211 24 Valve shut off auto 92223 25 Control flow 700 ml RO 75 GPD 92264...

Page 20: ... male 3 8 x 1 4 npt 92404 14 Swivel tee male 3 8 x 1 4 npt 92403 15 Connector union 3 8 1 4 92402 16 Membrane RO 24 GPD TFC 92009 50 GPD TFC 92035 75 GPD TFC 92022 17 Housing cartridge white black 92026 18 Cartridge pre filter 5 micron 26091 19 Cartridge carbon 26081 20 Saddle drain set RO 3 8 92160 21 Clip pipe 2 set 92162 22 Faucet air gap long reach 92192 23 Vessel membrane 92211 24 Valve shut ...

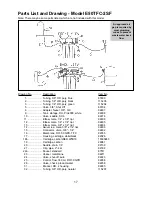
Page 21: ... 4 x 1 4 npt 92405 13 Elbow male 3 8 x 1 4 npt 92404 14 Swivel tee male 3 8 x 1 4 npt 92403 15 Connector union 3 8 1 4 92402 16 Membrane RO 50 GPD TFC 92035 17 Housing cartridge white black 92026 18b Cartridge carbon SED WTB10 15500243 19 Cartridge carbon 26081 20 Saddle drain 1 4 92159 21 Clip pipe 2 set 92162 22a Faucet standard 87511 23 Vessel membrane 92211 24 Valve shut off auto 92223 25 Cont...

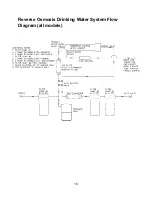
Page 22: ...18 Reverse Osmosis Drinking Water System Flow Diagram all models ...

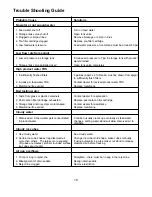
Page 23: ...membrane Bad tasting water 1 Taste from glass or plastic containers Contact dealer for explanation 2 Post carbon filter cartridge exhausted Replace post carbon filter cartridge 3 Storage tank and or system contaminated Contact dealer for assistance 4 Membrane life expired Replace membrane Cloudy water 1 Dissolved air in feed water gets concentrated Condition usually clears up eventually as feed wa...

Page 24: ... operation contrary to our printed instructions or damage caused by hot water freezing flood fire or Act of God is not covered by this warranty In all such cases regular parts and service charges will apply This warranty is void if unit is altered or repaired by anyone other than an authorized service representative All shipping charges on units or parts submitted to our facility for repair or rep...

Reviews: