


Installation and connection of outdoor unit
05.06.2015
35 / 80
Copyright
2013 by: WATERKOTTE GmbH. Subject to changes.
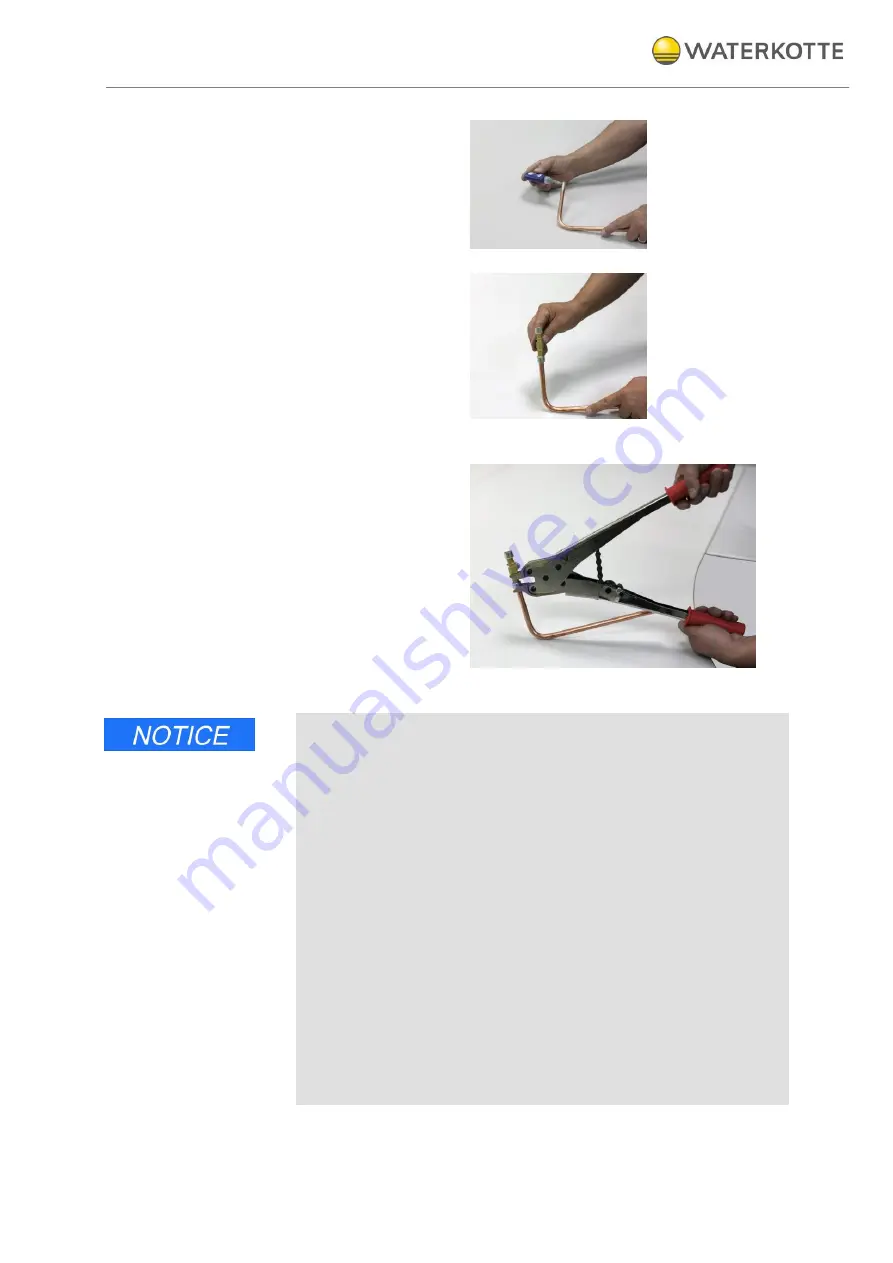
3.
Application of LOKPREP
On the outer surface of the cleaned tube ends, apply
a thin film of LOKPREP to the tube end that will be
inserted into the LOKRING coupling.
4.
Assembly
Insert tube ends up to the stop into the LOKRING
coupling. To ensure better distribution of LOKPREP,
rotate coupling by 360°.
5.
Completing assembly
Next, position manual assembly tool on coupling in
such a way that LOKRINGs are accurately seated
within the assembly jaws. Operate ratchet handle on
assembly tool until LOKRINGs are compressed and
meet at the stop.
During assembly it is important that tube always rests
against inner stop of coupling. The connection is
completed and the tube system can be pressurised or
evacuated after a curing time of about 4 minutes.
For copper and copper alloy seamless tubes use C1220 copper-
phosphorus to connect the refrigerant tubes. Ensure that the inside of the
tubes is clean and free of harmful contaminants, such as sulphuric com-
pounds, oxidants, debris, or dust. Use tubes in specified thickness. (see
8.2.3) Note the following when reusing existing tubes that carried R22
refrigerant. Replace the existing flare nuts, and flare the designated sections
again.
Do not use thin tubes. Store tubes required for installation indoors and keep
tube ends sealed until just before brazing. (Leave elbow joints, etc. in their
packaging.) Any dust, debris or moisture entering the refrigerant lines pose
a risk of oil deterioration or compressor failure.
Apply a small amount of ester oil / ether oil or alkyl benzene as refrigeration
oil to the flared sections. Mixing mineral oil with refrigeration oil poses a risk
of oil deterioration.
Do not use any refrigerant other than R410A. If another refrigerant is used,
the chlorine will cause the oil to deteriorate.
Use the following tools specifically designed for use with R410A refrigerant.
For other questions contact your nearest dealer.


