Requirement:
Wear clean, chemical-resistant, powder-free gloves when performing
this procedure.
Required tools and materials
• Chemical-resistant, powder-free gloves
• 1/4-inch open-end wrench
• 5/16-inch open-end wrench
• 1/2-inch open-end wrench
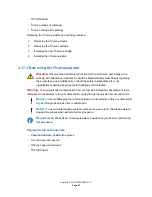
• Accumulator check-valve assembly
To replace the accumulator check valve:
1.
Flush the solvent manager with nonhazardous solvent.
2.
Power-off the solvent manager.
3.
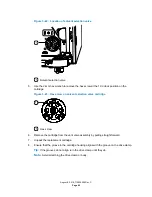
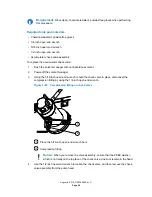
Using the 5/16-inch open-end wrench to hold the check valve in place, disconnect the
compression fitting by using the 1/4-inch open-end wrench.
Figure 3–25: Compression fitting on check valve
1
2
Place the 5/16-inch open-end wrench here
Compression fitting
Notice:
When you remove the valve assembly, ensure that the PEEK washer,
which is normally on the top face of the check valve, does not remain in the head.
4.
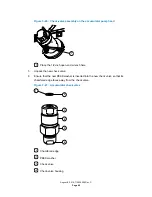
Use the 1/2-inch open-end wrench to loosen the check valve, and then remove the check-
valve assembly from the pump head.
August 8, 2016, 715005050 Rev. C
Page 64


