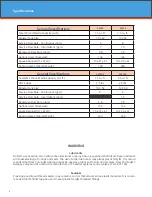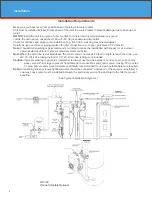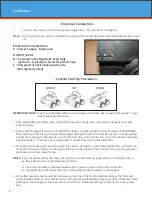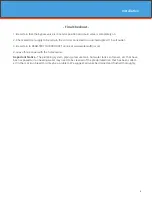
13
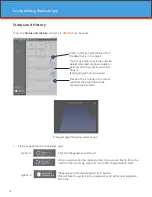
Main Menu
12
:
00
1. To enter Main Menu, press the
Menu/Enter
button.
(Time of Day will flash)
2. To set the
Time of Day
, press the
Set/Change
button.
(First digit will flash)
Example
[
12
:
00
]
-
To change digit value, press the
Set/Change
button.
-
To accept the digit value, press the
Menu/Enter
button.
-
Next digit will flash to begin setting.
-
Once the last digit display is accepted, all digits will flash.
3. To set
A.M.
or
P.M
., press the
Menu/Enter
button.
-
To change digit value, press the
Set/Change
button.
Example [
A
]
-
To accept the digit value, press the
Menu/Enter
button.
-
Once A.M. or P.M. is accepted, the next menu item will flash.
4. Days Between Backwash
-
Press Menu / Enter Button. This display is used to set the maximum amount of time
(in days) the unit can be in service without a backwash. This option setting is identified
by the letter ‘A’ in the left digit. Backwash will begin at the set Backwash Time. A
“00” setting will cancel this feature. The Max Value for this item is 29.
Example:
Every 6 days
(
A - 06
)
(Default Setting)
To Adjust this Value Press the Set / Change Button.
To Accept the Digit Value Press the Menu / Enter Button.
5. To set the
Number of Days between Air Draw Cycles
(d), press the
Set/Change
Button
- Repeat instructions from step (2)
Exampl
e (
d - 01
)
Notes: 1) Maximum value is 9.
2) If value set to 0, air draw is turned off, but an air cycle will still be completed when
backwash cycle occurs. If the Number of Days between Air Draw Cycles is set to
a higher number of days than the Number of Days between Backwash Cycles, it
will have no effect. In order to turn off all cycles, both the Days between Backwash
and Days between Air Draw Cycles must be set to 0.
3) Default setting is 1 day.
6. To Exit Main Menu, press the
Menu/Enter
button.
Note:
If no buttons are pressed for 60 seconds, the Main Menu will be exited automatically.
Setting Up and Controlling the System Using the Buttons on the Valve
Set Up Using Buttons and Display on Valve
Summary of Contents for SIDEWINDR SW10
Page 1: ...Installation Operation Manual...
Page 30: ...30...


