Page 24
START-UP AND REFILL PROCEDURES
Your Hot Spring
®
spa has been thoroughly tested during the manufacturing process to ensure reliability and long-term customer satisfaction. A
small amount of water may have remained in the plumbing after testing and, as a result, may have spotted the spa shell or the spa siding prior to
delivery. Before filling the spa, wipe the spa shell clean with a soft rag.
The following instructions must be read and followed exactly to ensure a successful start-up or refill.
CAUTIONS
• Do not fill the spa with hot water, as tripping of the high-limit thermostat may result.
• DO NOT CONNECT POWER TO AN EMPTY SPA. Power to the spa automatically activates critical components within the spa,
such as controls, heater, circulation pump, and other systems. If power is supplied to these components prior to the spa being
filled, the components will be damaged, and this may result in a non-warranty component failure.
• Do not use your spa after filling until all of the steps listed below are completed.
• Do not add chlorine if treating your spa with polyhexamethylene biguanide (Biguanide, PHMB, eg. BaquaSpa
™
) sanitizer.
1. Close all drains and fill the spa with water through the filter compartment. The water level of your Hot Spring spa should be maintained at a
level equal to the middle of the tile. The water level for the Sovereign
®
Limited Edition is 4 1/2” below the bar top, or just below the pillow.
RECOMMENDED:
Use the FreshStart
®
10,000
pre-filter to remove unwanted contaminants from the tap water.
IMPORTANT:
Watkins Manufacturing Corporation does not recommend that the spa be filled with “softened” water, as this may damage the
spa’s equipment.
2.
AFTER
the spa has been filled with water and the equipment compartment door is secured, power must be applied to the spa.
•
115 volt models:
Connect the GFCI to the waterproof receptacle and push the RESET button on the GFCI.
•
230 volt models:
Open the door of the electrical subpanel and reset the 20 amp GFCI breaker, verify that the system is primed (see step 3),
then reset the 30 amp breaker. Close and secure the subpanel door.
3. The jet pump, heating system, and all internal plumbing will achieve a partial prime as the spa is filled. To check the operation of the jet
system and to purge any remaining air from the heating system, push the JETS button (for the Landmark
®
and Grandee
®
, push both JETS 1
and JETS 2 buttons) to make the jet pump run on high speed for one minute. Once the jet system is fully operational (as indicated by strong,
non-surging jets), priming of the spa is complete. Weak or surging jets are an indication of a low water level condition or clogged filter
cartridges.
IMPORTANT:
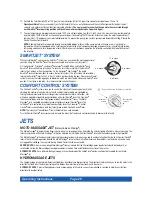
Be sure the air control valves (see illustration in Comfort Control
®
system section) are open by turning each one clockwise and
checking to see that the SmartJet
®
lever is pointing to the 3 o’clock position (see illustration in SmartJet
®
system section).
4. Adjust Total Alkalinity (TA) to 125 ppm, Calcium Hardness (CH) to 150 ppm, then spa water pH to between 7.4 and 7.6. These procedures are
listed in the “Water Quality and Maintenance” section.
IMPORTANT:
Add spa water chemicals directly into the filter compartment with the jet pump on high speed for at least ten minutes.
OPERATION NOTE:
Adjusting the Total Alkalinity as the first step is important, as out-of-balance TA will affect your ability to adjust the pH
correctly and will prevent the sanitizer from operating effectively.
5. Superchlorinate the spa water by adding 1-1/2 teaspoons of chlorine (sodium dichlor) per 250 gallons of spa water. Use the jet button marked
“CLEAN” to circulate the spa water for a ten-minute period.
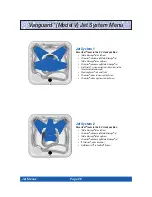
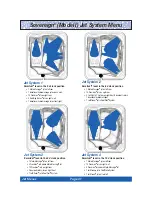
6. During the super-chlorination period, rotate the SmartJet
®
lever(s) through each of their operating positions, letting the spa water circulate
(with jets on) for equal periods of time. For example, if your spa has four operating positions, leave the SmartJet
®
lever in each position for
approximately two to three minutes.
OPERATION NOTE:
The Landmark
®
, Grandee
®
, Vanguard
™
, Sovereign
®
Limited Edition , and Jetsetter
®
SmartJet
®
levers are designed to
operate in the 3 o’clock and 9 o’clock positions. The Sovereign
®
and Prodigy
®
SmartJet
®
levers are designed to operate in the 3 o’clock, 6
o’clock, 9 o’clock, and 12 o’clock positions.
7. Set the temperature control to the desired temperature (between 100°F and 104°F), then place the vinyl cover on the spa and allow the water
temperature to stabilize (approximately 24 hours). Make sure you secure the cover in place using the cover locks. Periodically check the spa
water temperature. When the water temperature climbs above 90°F, proceed to the next step.
8. Rotate the SmartJet
®
lever(s) to the primary position (3 o’clock) and turn on the CLEAN cyle for ten minutes to circulate the spa water. After the
clean cycle is complete, test the spa water for Free Available Chlorine (FAC) residual. If the residual is between 3 and 5 ppm on the test strips
(found in the test kit) go on to the next step. If the residual is less than 3 ppm, superchlorinate the spa water by adding 1-1/2 teaspoons of
chlorine (sodium dichlor) per 250 gallons of spa water. Use the jet button marked “CLEAN” to circulate the spa water for a ten-minute period.
9. Rotate the SmartJet
®
lever(s) to next position and let the spa water circulate (using the jet) for ten minutes. Test the spa water for Free
Available Chlorine (FAC) residual. If the residual is between 3 and 5 ppm on the test strips (found in the test kit) go on to the next step. If the
residual is less than 3 ppm, superchlorinate the spa water by adding 1-1/2 teaspoons of chlorine (sodium dichlor) per 250 gallons of spa
water. Then use the jet button marked “CLEAN” to circulate the spa water for a ten-minute period. Repeat this procedure until all SmartJet
®
lever operating positions have been tested.
Operating Instructions


