44
Watkiss BookMaster Service Manual - Issue 1 - 14/12/00
Service Procedures
•
TrimMaster Standard
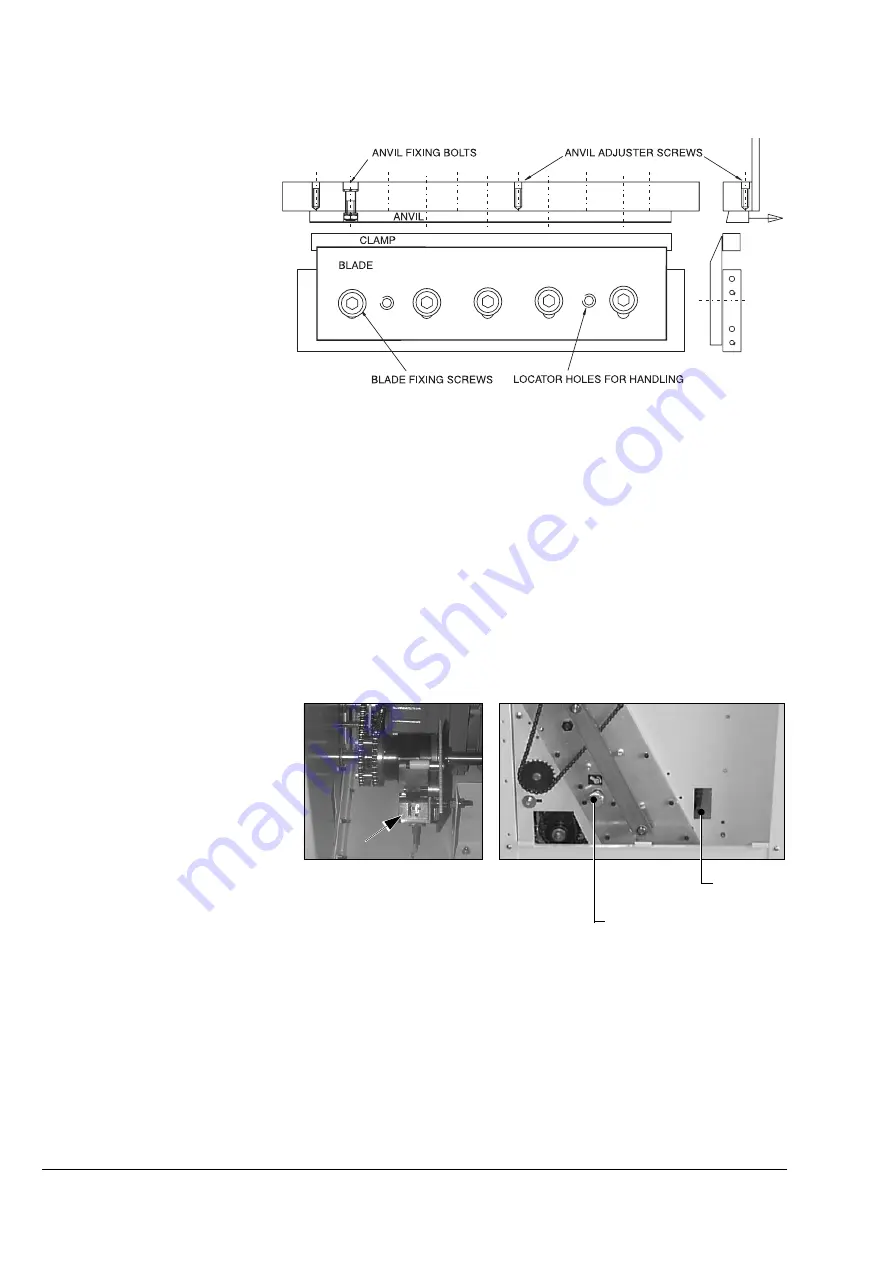
Check the anvil:
Carefully check the anvil for any damage. If it requires re-
grinding, remove the five fixing screws and lift away.
Regrinding instructions for the anvil and blade are included in section 3.4.10.
Refitting the TrimMaster blade and anvil:
Slacken the anvil adjuster
screws by two revolutions. Position the anvil fully back towards the conveyor
and lightly tighten the anvil fixing screws. Affix the blade using the five blade
fixing screws but do not tighten. Using the mark made when the blade was
removed, adjust the angle of the blade. Ensure that it does not protrude above
the clamp at point 'A' or below it at point 'B' (see Figure 3:25). Lightly tighten
the centre screw, sufficient to hold the blade in this position.
Remove the L/H TrimMaster side cover (two x M5 button screws and wash-
ers). Release the clutch by depressing the lever (see arrow) through the access
hole in the side plate (see Figure 3:24). Use a 19mm spanner to manually crank
the unit until the blade is at top dead centre. At point 'C' (see Figure 3:25) the
blade must pass the anvil by 1mm (1/25"). Make fine adjustments to the posi-
tion if necessary. Tighten all the blade fixing screws starting from the centre
and working out. Push the anvil firmly forwards against the blade (pushing
from behind with your fingers at each end). Maintain a light pressure on the
Figure 3:23 TrimMaster blade and anvil fixings
Figure 3:24 TrimMaster manual cranking
Manual Crank Drive
Access Hole
Summary of Contents for BookMaster
Page 6: ...c iv Watkiss BookMaster Service Manual Issue 1 14 12 00...
Page 18: ...12 Watkiss BookMaster Service Manual Issue 1 14 12 00 System Description Fuses...
Page 54: ...48 Watkiss BookMaster Service Manual Issue 1 14 12 00 Service Procedures TrimMaster Pro...
Page 56: ...50 Watkiss BookMaster Service Manual Issue 1 14 12 00 Electronics Software Connection Diagrams...
Page 57: ...Electronics Software Connection Diagrams Watkiss BookMaster Service Manual Issue 1 14 12 00 51...
Page 58: ...52 Watkiss BookMaster Service Manual Issue 1 14 12 00 Electronics Software Connection Diagrams...
Page 59: ...Electronics Software Connection Diagrams Watkiss BookMaster Service Manual Issue 1 14 12 00 53...
Page 60: ...54 Watkiss BookMaster Service Manual Issue 1 14 12 00 Electronics Software Connection Diagrams...
Page 61: ...Electronics Software Connection Diagrams Watkiss BookMaster Service Manual Issue 1 14 12 00 55...
Page 62: ...56 Watkiss BookMaster Service Manual Issue 1 14 12 00 Electronics Software Connection Diagrams...
Page 63: ...Electronics Software Connection Diagrams Watkiss BookMaster Service Manual Issue 1 14 12 00 57...
Page 64: ...58 Watkiss BookMaster Service Manual Issue 1 14 12 00 Electronics Software Connection Diagrams...
Page 65: ...Electronics Software Connection Diagrams Watkiss BookMaster Service Manual Issue 1 14 12 00 59...
Page 66: ...60 Watkiss BookMaster Service Manual Issue 1 14 12 00 Electronics Software Connection Diagrams...
Page 67: ...Electronics Software Connection Diagrams Watkiss BookMaster Service Manual Issue 1 14 12 00 61...
Page 127: ......


