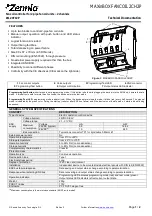
Watlow EZ-ZONE
®
ST
•
9
•
Chapter 2 Install and Wire
–
+
–
+
–
+
S1
S2
S3
S1
S3
–
+
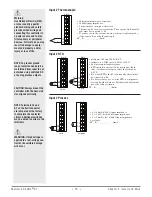
Thermocouple
(Input 2)
Process
0 to 20 mA
(Input 2)
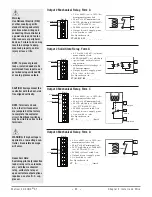
N.O. (Output 3)
N.C. (Output 3)
common (Output 3)
N.O. (Output 4)
contactor (Coil 1)
Contactor
Coil 1
Contactor
Coil 2
ST_
B - _ _ _ _ - _ _ _ _ (no limit)
ST_
L - _ _ _ _ - _ _ _ _ (with limit)
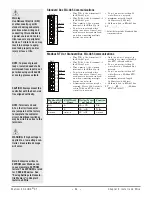
common (R
UI)
T-/R- (R
UI)
T+/R+ (R
UI)
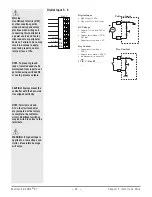
- common (Digital I/O)
+ Digital Input 6 or Output 6
+ Digital Input 5 or Output 5
ST_ _ - _ _
A _ - _ _ _ _
Remote User Interface (RUI)
common (Modb
us R
TU)
T-/R- (Modb
us R
TU)
T+/R+ (Modb
us R
TU)
- common (Digital I/O)
+ Digital Input 6 or Output 6
+ Digital Input 5 or Output 5
ST_ _ - _ _
M _ - _ _ _ _
Modbus RTU on EIA-485
Limit
Address
Selection
fuse
load
S1
S2
S3
+
–
S1
S3
2-wire
RTD
(Input 1)
3-wire
RTD
(Input 1)
Thermocouple
(Input 1)
Process
0 to 20 mA
(Input 1)
Process
0 to 10V
Î
(dc)
0 to 50mV
Î
(dc)
(Input 1)
N.O.
(Output 2)
common
(Output 2)
Controller
–
+
2-wire
RTD
(Input 2)
3-wire
RTD
(Input 2)
98
99
CF
CD
CE
B5
D6
D5
L2
K2
T1
S1
R1
L2
K2
T1
S1
R1
98
99
CC
C
A
CB
B5
D6
D5
1 2 3 4
ON
L3
K3
J3
A1
L4
T2
S2
R2
L2
K2
T1
S1
R1
L2
K2
T1
S1
R1
L2
K2
T1
S1
R1
L2
K2
T1
S1
R1
L3
K3
J3
A1
L4
T2
S2
R2
L3
K3
J3
A1
L4
T2
S2
R2
L3
K3
J3
A1
L4
T2
S2
R2
L3
K3
J3
A1
L4
T2
S2
R2
neutral
hot
fuse
fuse
earth
ground
1
6
3
4
A1
A2
2
5
EZ-ZONE™ ST
Patent Pending
Integrated
Control Loop
1 2
3
4
ON
L
IM
IT
O
U
T
3
S
S
R
S
TA
T
U
S
O
U
T
2
L
IM
IT
O
U
T
3
S
S
R
S
TA
T
U
S
O
U
T
2
hot
hot
Process
0 to 10V
Î
(dc)
0 to 50mV
Î
(dc)
(Input 2)
Power Supply
Power Supply
fuse
fuse
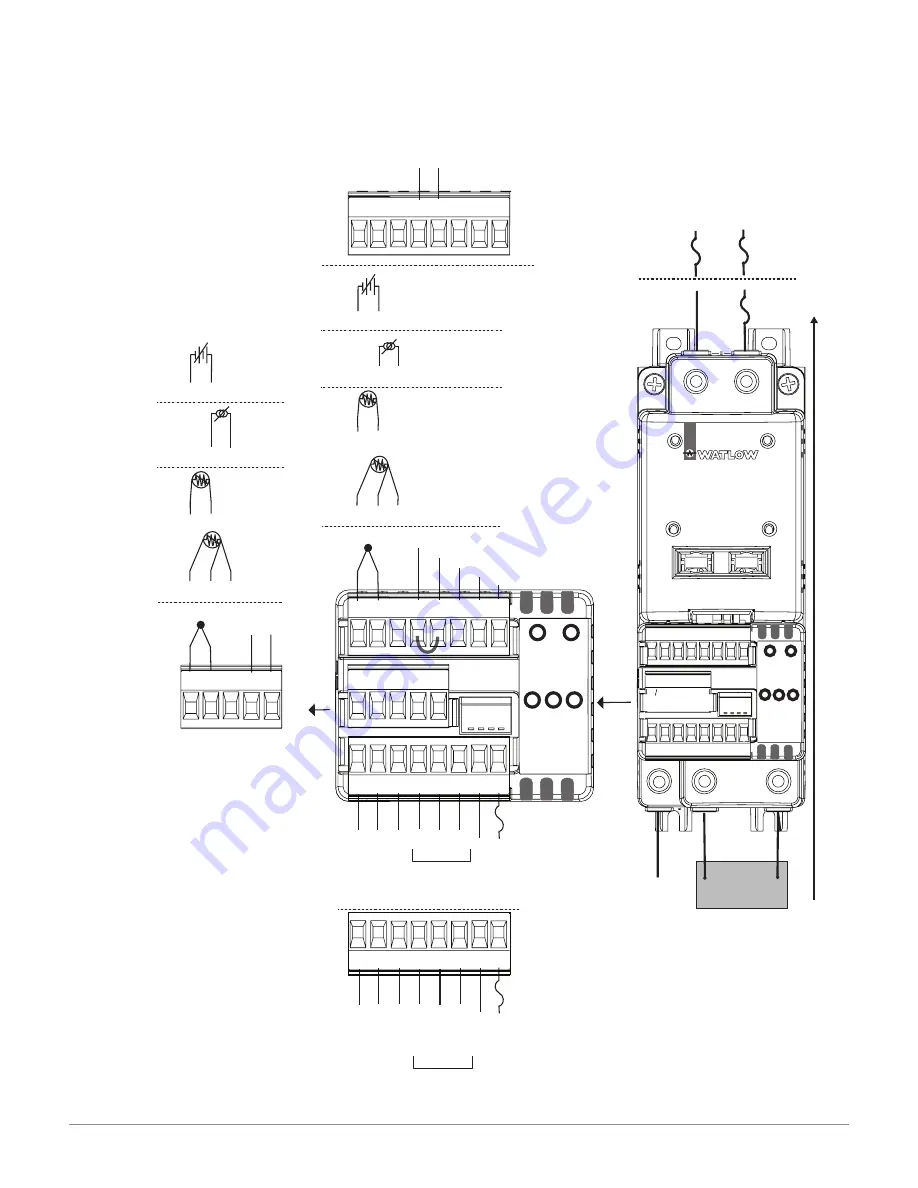
Output 1 (SSR)
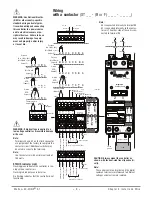
Wiring
with a contactor
(ST _ _ - (B or F) _ _ _ - _ _ _ _)
Ó
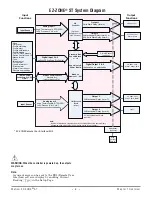
WARNING: Use National Electric
(NEC) or other country-specific
standard wiring and safety prac-
tices when wiring and connecting
this controller to a power source
and to electrical sensors or pe-
ripheral devices . Failure to do so
may result in damage to equip-
ment and property, and/or injury
or loss of life .
ç
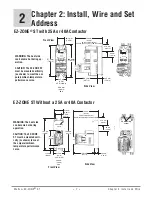
WARNING: If high voltage is applied to a
low-voltage controller, irreversible damage
will occur .
Note:
Terminals L4 and A1 on the limit connector
are jumpered at the factory to complete the
contactor circuit . Additional switches may
be wired in series to the terminals .
Note:
Use the contactor with a minimum load of
100 watts .
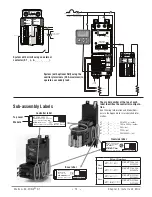
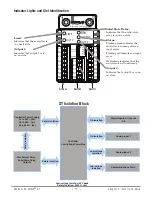
STATUS Indicator Light
Flashing green indicates the controller is run-
ning with no input errors .
Flashing red indicates an input error .
No flashing indicates that the controller is not
functioning .
CAUTION: Always mount the controller as
shown, with the heat-sink fins aligned verti-
cally .
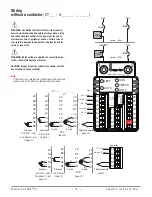
Note:
The control common terminal and the digital
common terminal are referenced to different
voltages and must remain isolated .
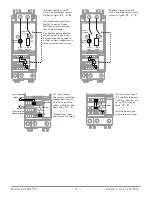
Note:
A2 is connected internally to terminal 98 .
A1 is connected internally to the contac-
tor coil . The other side of the coil is con-
nected to terminal 99 .


