
SETTING POSTS
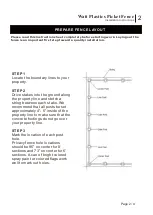
STEP 1
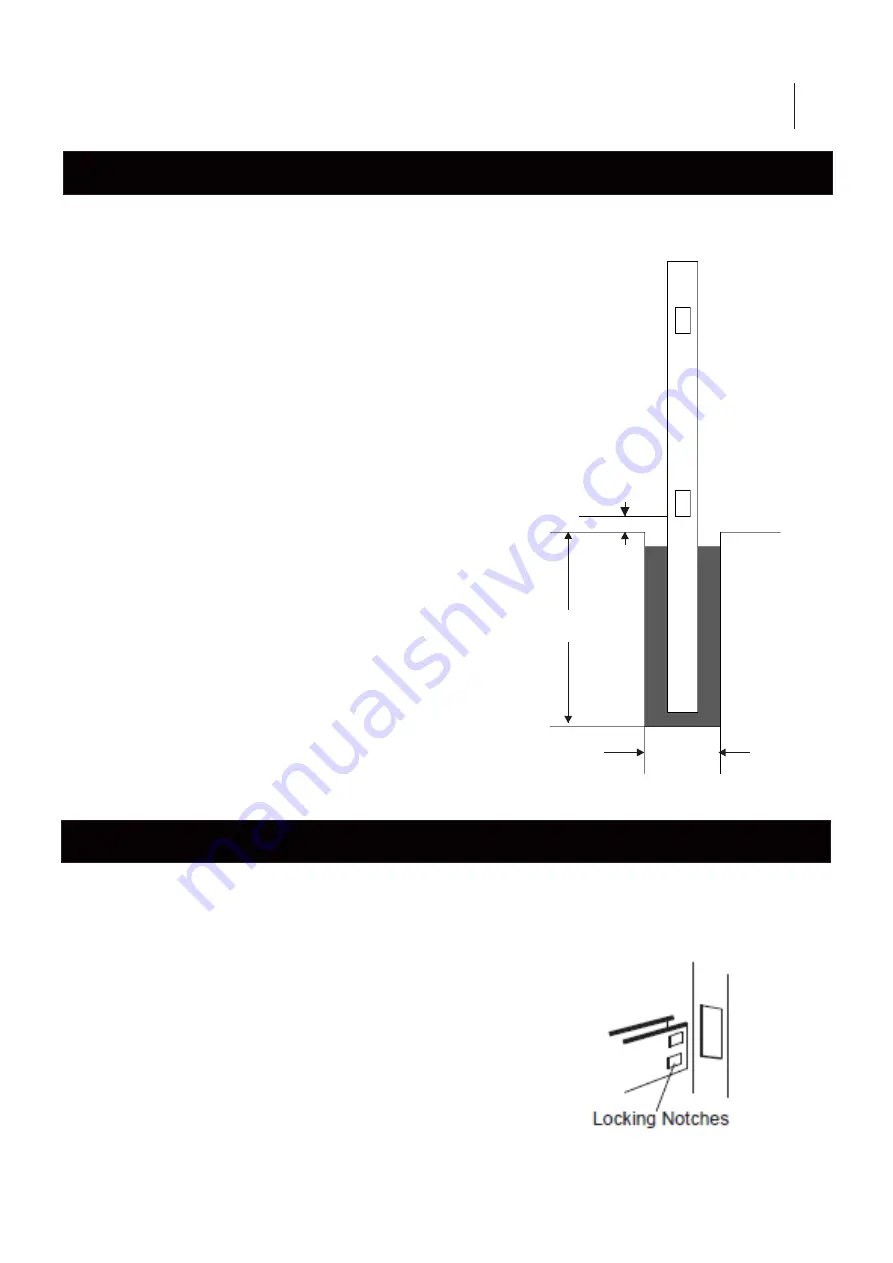
Dig holes 8”-10” in diameter and anywhere from 24”,
30” or 36” deep depending on your local weather and
soil condi ons.
STEP 2
Posi on the post in the hole. The post should be
centered in the hole and must be square with the fence
line so that when the rails are inserted into place they
will parallel the string line. Check the post on two
adjacent sides with a carpenter’s level and adjust as
necessary to make sure it is plumb. The fence height
above grade is also determined at this me. We
recommend 2” be le from the bo om of the bo om
rail to the ground.
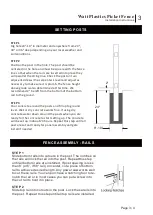
STEP 3
Pour concrete around the posts and fill up to ground
level. Wet or dry concrete works fine. If using dry
concrete water down around the posts when you are
ready for the concrete to start se ng up. The concrete
will be set up in about 24 hours. Repeat this step un l all
post are set and ready for panel assembly and gate
install if needed.
FENCE ASSEMBLY - RAILS
STEP 1
Slide bottom rails into cutouts in the post. The notches on
the rails will lock the rail into the post. Repeat this step
until all bottom rails are installed. If post spacing is less
than 8’ (or 6', if 68" rail) on center, cut a piece of bottom
rail to achieve desired length. Any power saw works well
to cut these rails. You can purchase a notching tool to re-
notch the rail or in most cases you can put a screw into
the cut rail to hold it in place.
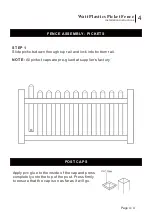
STEP 2
Slide top rail into cutouts in the post. Lock these rails into
the post . Repeat this step until all top rails are installed.
Page
:
3
/
4
Installation Instructions
3
Watt Plastics Picket Fence
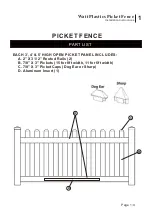
2"
24"
8"-10"


