16
❑
1)
Place the two short motor clamps onto the tops
of the two hardwood mounting rails. The center of the
forward clamp should be 5/16" behind the front of the
rails and the center of the rear clamp should be 1" behind
the front of the rails. See photo # 19 below.
Photo # 19
❑
2)
While holding each clamp in place (push down
on them firmly so they fit flush against the tops of the
rails), use a pen and mark the locations of the four mount-
ing holes onto the tops of the hardwood rails.
❑
3)
Remove the two motor clamps. Using a drill with
a 1/8" drill bit, drill four holes through the hardwood rails
at the four marks you drew.
❑
4)
Set the two short motor clamps back into place,
aligning the mounting holes in the clamps with the holes
you drilled in the hardwood rails.
❑
5)
Feed your ESC through the precut hole in the
firewall and set the motor into the motor clamps. So the
cowl will line up properly when it is installed later, the
tip of the motor shaft should be 3-3/8" in front of the
firewall.
☛
The measurement given above is if you are using a
propeller that is a friction fit onto the motor shaft (like the
Gunther brand propellers). If you are using a propeller
that requires a propeller adapter you will have to move
the motor farther back so that the cowl will line up.
❑
6)
Secure the motor into place using the two tall
motor clamps, four 3mm x 14mm machine screws, eight
3mm flat washers and four 3mm nylon insert nuts. Tighten
the screws and nuts firmly. See figure # 20 below.
Photo # 20
COWLING INSTALLATION
TOOLS AND SUPPLIES REQUIRED
❑
Kwik Bond Thin C/A
❑
# 1 Phillips Head Screwdriver
❑
Excel Modeling Knife
❑
Electric or Hand Drill
❑
1/16" Drill Bit
❑
Scissors
❑
Straight Edge Ruler
❑
Pen or Pencil
❑
220 Grit Sandpaper w/Sanding Block
❑
Masking Tape
1
5
6
10
ITEMS REQUIRED
❑
{1} Molded Plastic Cowling
❑
{3} 2mm x 6mm Wood Screws
24
11
27
15
CUTTING OUT THE COWLING
16
17
18
19
❑
1)
Using a pair of scissors, carefully cut out the back
of the cowling along the molded scribe line. Using 220
grit sandpaper with a sanding block, carefully sand the
back edge of the cowling smooth and straight.
❑
2)
Using a modeling knife, cut out the molded circle
and the two molded squares in the front of the cowling.
Carefully cut out a 3/4" diameter air-intake hole in the
lower, front portion of the cowl. See photo # 21 below.
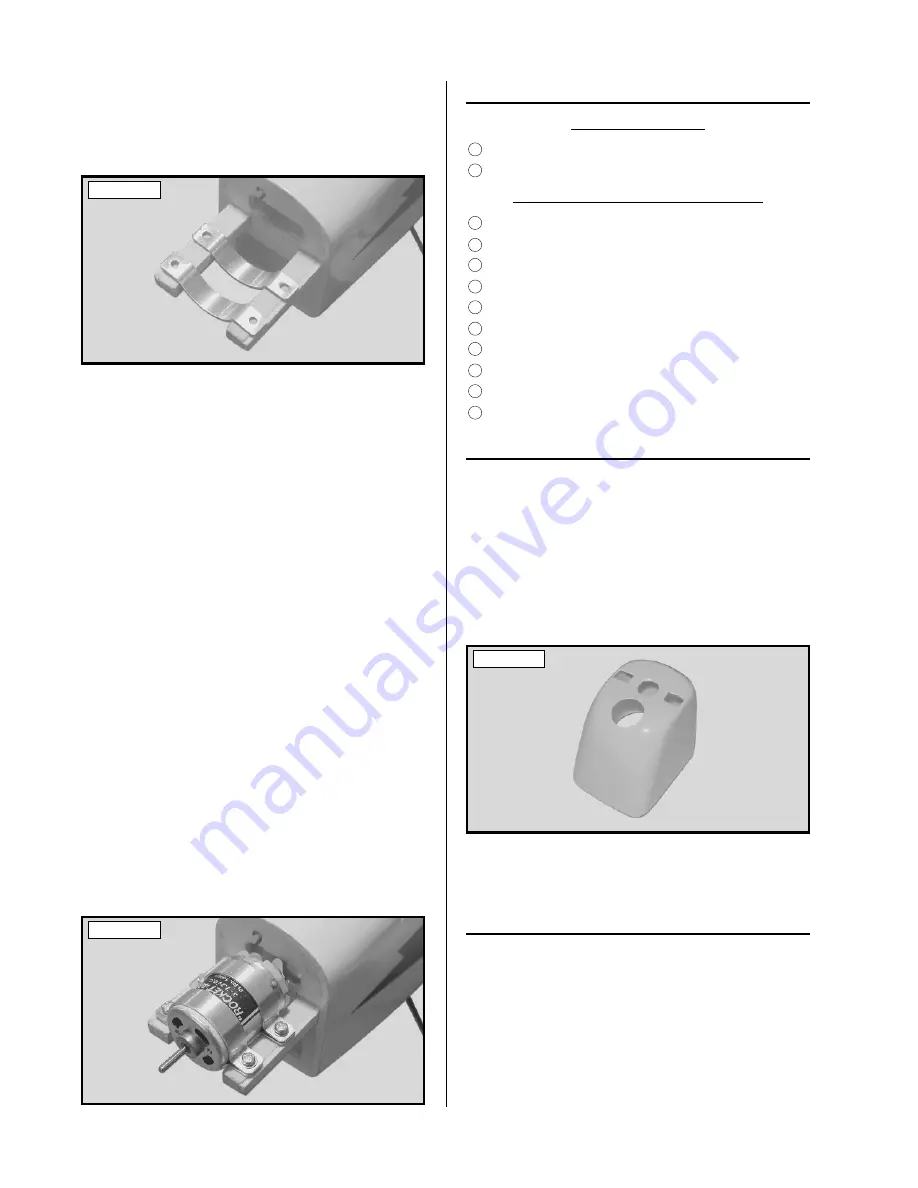
Photo # 21
☛
It’s important that you cut an air-intake hole in the
front of the cowling. This will allow air to pass through
the fuselage, cooling the battery and ESC.
ALIGNING THE COWLING
❑
3)
Slide the cowling into place. To properly align
the cowling, the back edge of the cowling should be about
1/8" past the front of the firewall and the front of the cowl-
ing should be centered around the motor shaft.
❑
4)
When satisfied with the alignment, use a couple
of pieces of masking tape to hold the cowling firmly in
place.


