15
❑
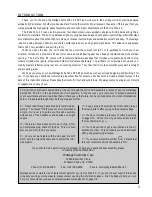
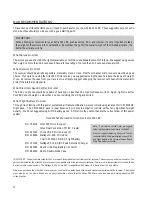
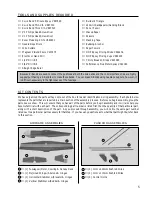
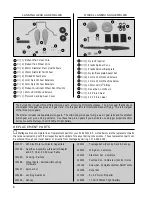
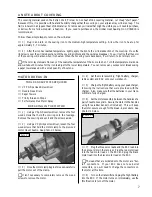
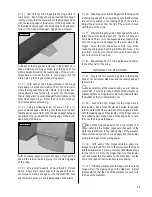
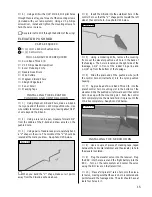
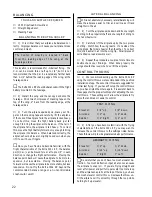
6) Using a drill with a 1/16" drill bit, drill pilot holes
through the servo tray, one for each of the mounting screws
(included with your radio system). Using a # 0 phillips
screwdriver, install and tighten the mounting screws to
hold the servo in place.
☛
Be careful not to drill through the bottom of the wing!
PARTS REQUIRED
TOOLS AND SUPPLIES REQUIRED
ELEVATOR PUSHROD
❑
Kwik Bond Thick C/A
❑
# 0 Phillips Head Screwdriver
❑
Excel Modeling Knife
❑
Needle Nose Pliers
❑
Wire Cutters
❑
Magnum Z-Bend Pliers
❑
Straight Edge Ruler
❑
Pen or Pencil
❑
Masking Tape
❑
{1} 1mm x 420mm Pushrod Wire
❑
{1} Control Horn
5
7
INSTALLING THE ELEVATOR
PUSHROD AND CONTROL HORN
❑
1) Using Magnum Z-Bend Pliers, make a Z-bend
in only one end of the 1mm x 420mm pushrod wire. Use
wire cutters to remove any excess wire, leaving about 3/16"
of wire beyond the Z-bend.
❑
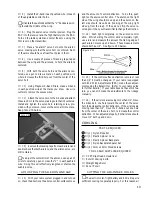
2) Using a ruler and a pen, measure forward 3/4"
from the middle of the Z-bend and draw a mark on the
pushrod wire.
❑
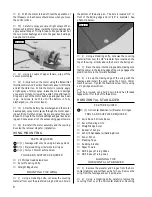
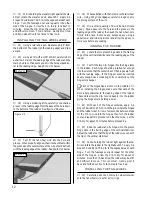
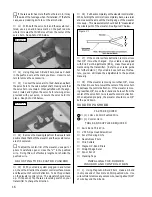
3) Using a pair of needle nose pliers, carefully bend
a "V" shape in the wire. The
middle
of the "V" should be
located at the mark you drew.
See photo # 20 below.
Photo # 20
☛
When you bend the "V" shape, make sure it points
away from the Z-Bend as shown above.
❑
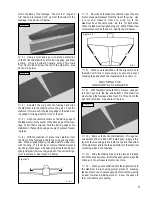
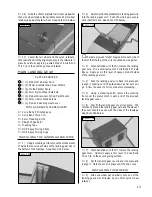
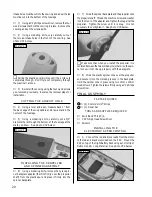
4) Insert the Z-Bend into the outermost hole in the
control horn so that the "V" shape points toward the left
side of the control horn.
See photo # 21 below.
Photo # 21
❑
5) Using a modeling knife, remove the covering
from over the elevator pushrod exit hole in the back of
the fuselage. The hole is located on the right side of the
fuselage, 1-3/4" in front of the rudder hinge line and
1-1/16" up from the bottom of the fuselage.
❑
6) Slide the plain end of the pushrod wire (with
the control horn still attached) into the nylon pushrod
housing.
❑
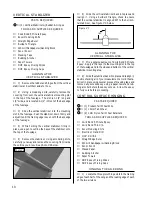
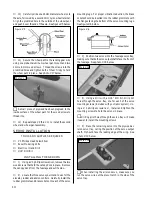
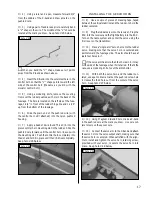
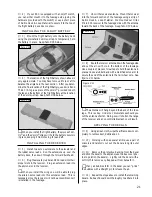
7) Apply a bead of Kwik Bond Thick C/A into the
precut control horn mounting slot in the bottom of the
elevator. Slide the pushrod wire forward until the control
horn lines up with the mounting slot. Push the control
horn completely into the slot and hold it in place until the
C/A dries completely.
See photo # 22 below.
Photo # 22
INSTALLING THE SERVO HORN
❑
8) Use a couple of pieces of masking tape, taped
between the horizontal stabilizer and the elevator, to hold
the elevator centered.
❑
9) Plug the elevator servo into the receiver. Plug
the ESC into the receiver and the flight battery into the
ESC . Turn on the radio system and center the servo
using the trim lever on the transmitter.
❑
10) Place a "single arm" servo horn onto the eleva-
tor servo, making sure that the servo horn is centered and
points toward the fuselage side. The arm should have at
least four holes in it.


