22
TOOLS AND SUPPLIES REQUIRED
BALANCING
❑
#1 Phillips Head Screwdriver
❑
Straight Edge Ruler
❑
Masking Tape
BALANCING THE EXTRA 330L EP
❑
1) It is critical that your airplane be balanced cor-
rectly. Improper balance will cause your airplane to lose
control and crash.
This location is recommended for initial test flying. The
C.G. can be moved fore or aft up to 1/4", but it is not
recommended that the C.G. be located any farther back
than 2-1/4" behind the leading edge of the wing, at the
fuselage sides.
☛
The Extra 330L EP should be balanced with the flight
battery mounted in the fuselage.
❑
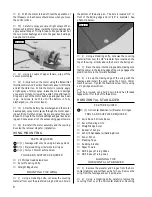
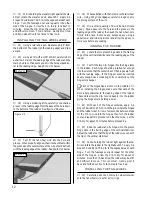
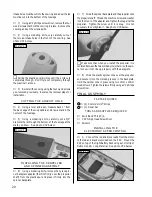
2) Install the wing and the canopy deck onto the
fuselage. Stick two short pieces of masking tape on the
top of the wing, 2" back from the leading edge, at the
fuselage sides.
❑
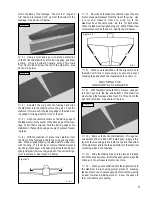
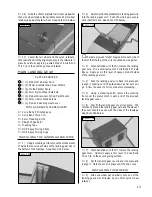
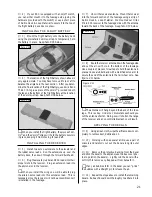
3) Turn the airplane upside down, place your fin-
gers on the masking tape and carefully lift the airplane.
If the nose of the airplane falls, the airplane is nose heavy.
To correct this, move the flight battery back just far
enough to bring the airplane into balance. If the tail of
the airplane falls, the airplane is tail heavy. To correct
this, move the flight battery forward only enough to bring
the airplane into balance. When balanced correctly, the
airplane should sit level or slightly nose down when you
lift it up with your fingers.
☛
Once you have flown and become familiar with the
flight characteristics of the Extra 330L EP, the balance
point (C.G.) can be moved fore or aft up to 1/4" in each
direction to change the flight performance. Moving the
balance point back will cause the airplane to be more re-
sponsive, but less stable. Moving the balance point
forward will cause the airplane to be more stable, but less
responsive.
Do not fly the Extra 330L EP beyond the
recommended balance range or an uncontrollable
crash could result!
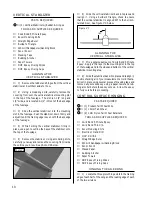
The Center of Gravity is located 2" back
from the leading edge of the wing, at the
fuselage sides.
LATERAL BALANCING
☛
While not absolutely necessary, lateral balancing will
make the airplane easier to trim and will make it track
straighter in the air.
❑
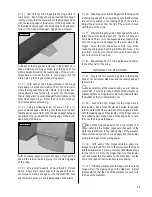
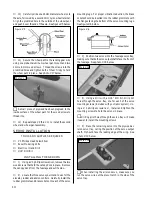
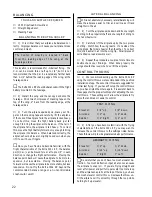
4) Turn the airplane upside down and tie one length
of string to the propeller shaft and one length of string to
the tail wheel wire.
❑
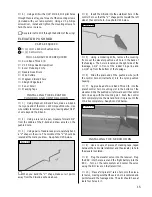
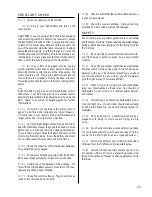
5) Carefully lift the airplane up by the two pieces
of string. Watch how the wing reacts. If one side of the
wing drops, that side is heavier than the other. To correct
this, stick a small nail into the wing tip. Small pieces of
self adhesive lead also work well.
❑
6) Repeat the procedure a couple of more times to
double check your findings. When done properly the
wings should stay level when you lift the airplane.
❑
1) We recommend setting up the Extra 330L EP
using the control throws we recommended in the pushrod
installation steps. Those control throws are suggested for
initial test flying. If you haven't set up the control throws
yet, we have listed them here again. Please refer back to
those pages for the proper technique for adjusting the con-
trol throws. These settings will allow the airplane to fly
smoother and make it easier to control.
CONTROL THROWS
TEST FLYING
Elevator:
3/8” up
3/8” down
Ailerons:
1/4” up
1/4” down
Rudder:
1/2" Right
1/2" Left
❑
2) After you have become familiar with the flying
characteristics of the Extra 330L EP, you may want to
increase the control throws to the settings listed below.
These throws will provide greater aerobatic performance.
AEROBATIC FLYING
Elevator:
1/2” up
1/2” down
Ailerons:
5/16” up
5/16” down
Rudder:
1" Right
1" Left
☛
Be careful that you don't have too much elevator de-
flection. Too much deflection input all at once can cause
the airplane to snap roll. If you are flying straight and
level at full power and pull full up elevator to enter a loop
and the airplane snap rolls at the top of the loop, you have
too much elevator control throw. Decrease the throw un-
til the airplane will fly smoothly through the loop while
holding full up elevator.

