ASSEMBLY INSTRUCTIONS
1
2
EXTERIOR UNIT
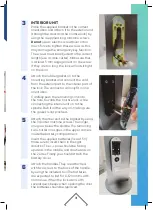
Attach the included rubber gasket on the
back of the exterior unit. Make sure that you
use the correct one as there is also one for
the interior part. The correct one has one lip
that should surround the outdoor unit, while
the indoor one has two lips to cover both
the indoor unit on one side, and its mounting
bracket on the other. Pass the cord through
the upper hole in the door and the square
handle spindle through the lower one.
NOTE! The arrows on the handle spindle
MUST point upwards and the red mark
must be on the top. Otherwise the lock will
not work!
MOUNTING
Remove the spare keys and put them in your
pocket before installing the lock. This is a
safety measure in case you forget to insert
the battery when you have finished the
assembly and then close the door. When you
have dismantled your existing mortise lock
etc. insert the new one.
Remember to ensure that the latch bolt and
the trigger on the mortise lock are set to
the correct orientation. This depends on the
hinge direction of the door. Read point 1 on
page 29 if you need to change this. Fasten
the mortise lock with the same screws that
you removed from your old one. Then mount
the enclosed strike plate in the doorframe.
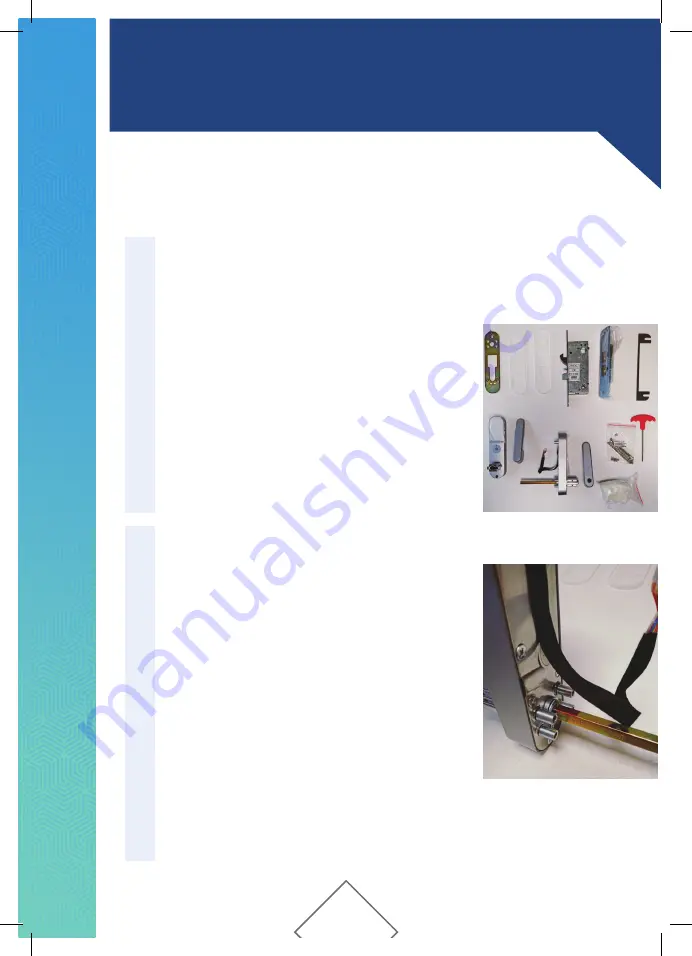
NOTE! When mounting the lock on your front door make
sure to use the attached insulation. Spread the insulation
in the top and bottom hole around the spindle to prevent a
thermal bridge.
We highly recommend that you read the entire
assembley instruction before you start.
(page 30, 31, 32)
Note: Please do not test the lock by closing the door during the assembly
process. You might find yourself locked out.
30


