background image

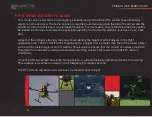
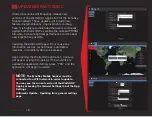
PRISM’s compasses are calibrated from the factory and should not require an additional calibration 
before flight. It is important to note however that periodically, a user may wish to calibrate the 
compasses for the best performance possible. In order to calibrate the onboard compasses, simply 
enter the Settings -> Sensors -> Compass menu. Then click OK to begin compass calibration. 

While the calibration is underway, hold the drone in the air and spin it around on all axes slowly in a 
circular motion. The aircraft can be rotated at random. It is important that the aircraft be rotated so that 
all axes are rotated during the calibration process. This may take up to a few minutes to complete, so 
please be patient. During the compass calibration, a status bar will be displayed. Once the calibration is 
complete, a readout will be shown to show the health of all three compasses. 

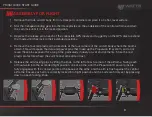
PRISM’s accelerometers are calibrated from the factory and should not require an additional calibration 
before flight. It is important to note however that operations in extreme temperatures may require an 
additional accelerometer calibration. In order to calibrate the accelerometer, simply enter into Sensors -> 
Accelerometer, then follow the instructions. After placing the vehicle in each position, hold the aircraft still 
and press “Next”, until complete. Once this is finished, a vehicle reboot must be completed in order to fly. 

ACCELEROMETER CALIBRATION

COMPASS CALIBRATION

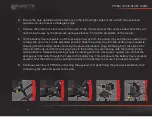
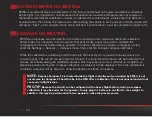
NOTE: 

Because Compass #3 is located inside the flight controller and surrounded by EMF, it is not 

uncommon for Compass #3 health to be in the RED after a calibration. This is not unusual and will not 

cause any in-flight issues.

PRO-TIP: 

Because the aircraft can be configured with a heavy flight battery, during a compass 

calibration it may be easier for the operator to only plug in 1 battery in an effort to save weight. In 

addition, this may be performed with two people to make the process easier.

13

Summary of Contents for Prism COAXIAL X8

Page 1: ...PRISM QUICK START GUIDE...

Page 2: ...lenges that professional Drone Operators face on a daily basis so we created this aircraft with the pilots in mind We hope that it serves you and your organization well in all of your future endeavors...

Page 3: ...7 6 lbs 3 44 kg 34 1 lbs 15 47 kg 20 8 lbs 9 43 kg 39 3 lbs 17 83 kg 15 6 lbs 7 07 kg 41 8 lbs 18 96 kg 13 1 lbs 5 94 kg MTOW 37 lbs 16 78 kg 54 9 lbs 24 9 kg Tattu PLUS 6s 16 000mAh x 4 19 lbs Tattu...

Page 4: ...mode uses GPS inputs to maintain position during flight Pilot inputs via the pitch roll sticks command changes in ground speed Pitch and roll stick deflection will command fore aft and left right gro...

Page 5: ...planning the pilot should identify the height of all tall objects in the flight operations area The RTL ALTITUDE should be set to a height that is greater than that of the tallest object with a comfo...

Page 6: ...booms attach This will expose the data and power pins that make up the Propulsion ID system so do not leave these pins exposed for a long time particularly in dusty or wet environments Store the red p...

Page 7: ...n Slide the battery tray into the battery tray receptacle ensuring that the battery leads are facing the power distribution plugs emerging from the side of the main aircraft body and that the locking...

Page 8: ...ficantly and are still within operational limits 4 Observe VMC for the intended area of operation 5 Verify the launch area and pad is level totally clear and secure 6 Position RPA nose into wind PIC s...

Page 9: ...ng area 4 Bring the RPA to a hover roughly 15 ft 3 m above landing area 5 Slowly lower RPA to touch down ensuring minimal horizontal movement after landing gear has made contact to avoid dynamic rollo...

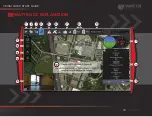
Page 10: ...PRISM QUICK START GUIDE 10 WATTS QGC EXPLANATION 1 2 3 4 5 6 7 9 8 18 10 11 12 13 14 15 16 17...

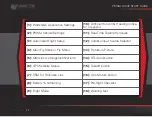
Page 11: ...Time Telemetry Values 3 Automated Flight Setup 12 Camera Input Source Selector 4 Main Fly Screen Fly Menu 13 Picture in Picture 5 MAVLink warnings notifications 14 RTL Land button 6 GPS Satellite Sta...

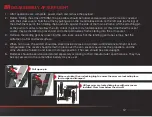
Page 12: ...3 Remove the landing gear by loosening the cam locks on each of the landing gear tube clamps Set the airframe on a flat and level surface 4 When not in use the aircraft should be stored inside its cas...

Page 13: ...s PRISM s accelerometers are calibrated from the factory and should not require an additional calibration before flight It is important to note however that operations in extreme temperatures may requ...

Page 14: ...start the EchoSky Mobile During the rebooting process the companion computer will download the update and cache it for transfer to PRISM Restart the WattsQGC application and allow it to fully connect...

Page 15: ...ience possible Updating the WattsQGC app will not cause any information such as cached maps automated missions or telemetry data to be erased Upon opening the WattsQGC application a pop up will appear...

Page 16: ...PRISM QUICK START GUIDE 16 NOTES...

Page 17: ...2021 Watts Innovations Watts All Rights Reserved...

Reviews: