AM Series Pool Heater User Manual
SECTION 6: INSTALLATION - NATURAL GAS
OMM-0111_B:
•
GF-146-P
•
10/29/2019
Technical Support
•
(800) 526-0288
•
Mon-Fri, 8 am - 5 pm EST Page 33 of 47
6.3 Connection of Gas Supply Piping
Connect the gas supply to the unit as follows:
Connecting the Gas Supply to the Unit
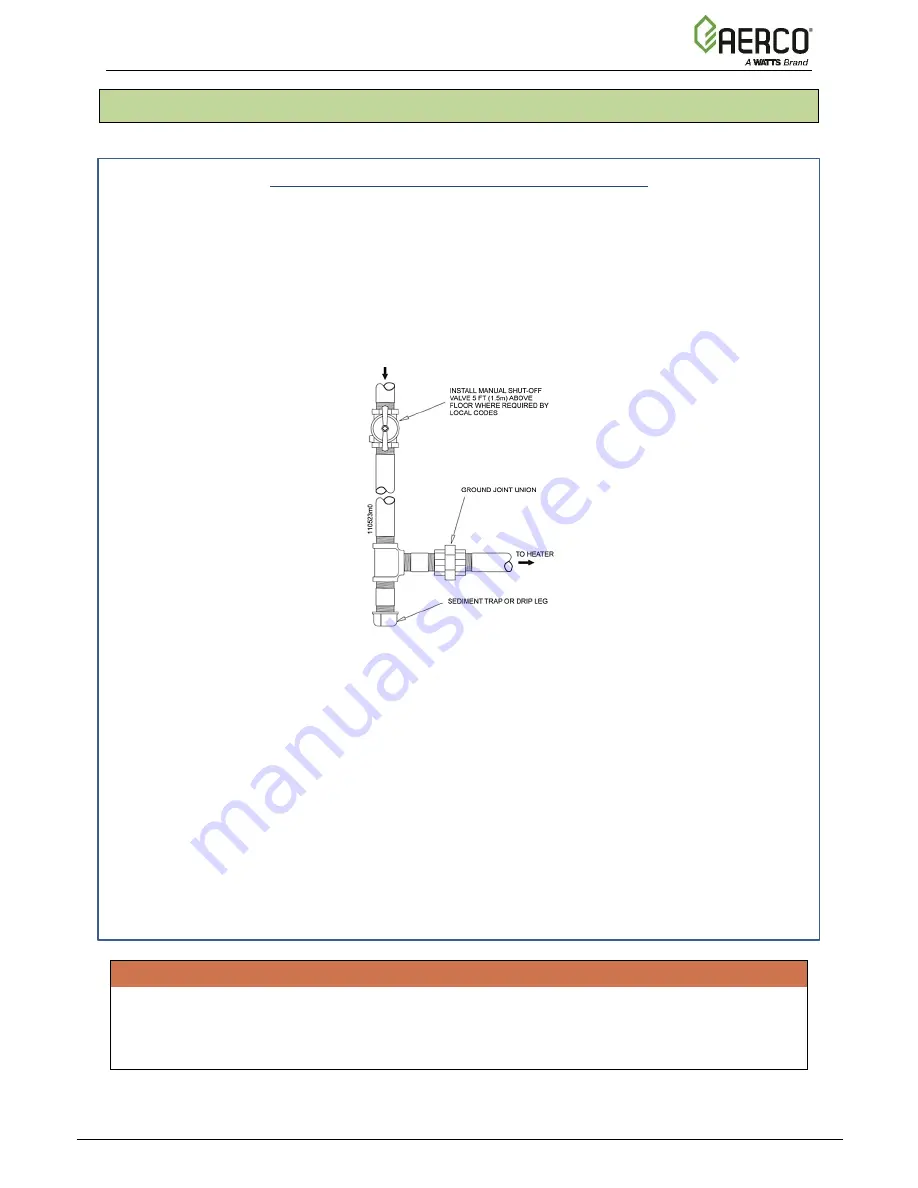
1. Refer to Figure 6-1 for connections necessary to pipe gas to the unit.
a) Install ground joint union for servicing, when required.
b) Install a manual shutoff valve in the gas supply piping.
c) Manual main shutoff valves must be identified as such by the installer.
2. Install a sediment trap / drip leg. (Figure 6-1).
3. Support piping with hangers, and not from the unit or its accessories.
Figure 6-2: Gas Supply Piping Connections
4. Purge all air from the gas supply piping.
5. Before placing the appliance in operation, check the appliance and its gas connection for
leaks.
a) The appliance must be disconnected from the gas supply piping system during any
pressure testing of that system at a test pressure in excess of 1/2 PSIG (3.5 kPa).
b) The appliance must be isolated from the gas supply piping system by closing a manual
shutoff valve during any pressure testing of the gas supply piping system at test pressures
equal to or less than 1/2 PSIG (3.5 kPa).
c) The appliance and its gas connection must be leak tested before placing it in operation.
6. Use pipe sealing compound compatible with propane gas. Apply sparingly only to male
threads of the pipe joints so that pipe dope does not block gas flow.
WARNING!
Do not attempt to support the weight of the piping with the water heater or its accessories.
Never use an open flame to test for gas leaks. Always use an approved leak detection method.
Failure to apply pipe sealing compound can result in severe personal injury, death, or
substantial property damage.


