Benchmark 5000-6000 Operation & Maintenance Manual
SECTION 4
– MAINTENANCE
OMM-0118_B
•
GF-203
•
5/9/2019
Technical Support
•
(800) 526-0288
•
Mon-Fri, 8 am - 5 pm EST Page 40 of 148
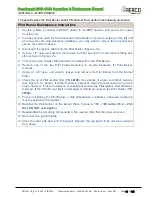
To inspect/replace the Pilot Burner and/or Pilot Burner Rod, perform the following procedure:
Pilot Burner Maintenance Instructions
1. Set the
C-More Control
ler’s ON/OFF switch to the
OFF
position. Disconnect AC power
from the unit.
2. For easy access, open the front panel and right side door. If you are working on the left unit
of a two-unit, zero side clearance installation, you may want to remove the top panel and
service the unit from above.
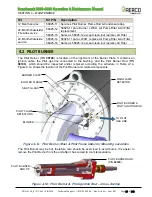
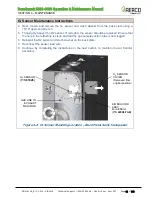
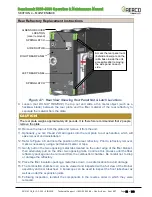
3. Disconnect the ignition cable from the Pilot Burner (Figure 4-1a).
4.
Using a 1/2” open-end wrench, disconnect the Pilot gas line from the reducer fitting and
elbow shown in Figure 4-1a.
5. First, remove the reducer fitting and then the elbow from the Pilot Burner.
6. Remove one of the two Pilot Flame Detectors to provide clearance for Pilot Burner
removal.
7. Using a 1-
1/2” open end wrench, loosen and remove the Pilot Burner from the Burner
Plate.
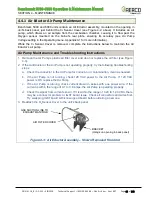
8. Check the tip of Pilot Ignition Rod (P/N
66100
) for evidence of erosion or carbon build-up
(see Figure 4-1b, above). If carbon build-up is present, clean the component using a wire
brush, however, if there is evidence of substantial erosion, the Pilot Ignition Rod should be
replaced. If the Pilot Burner itself is damaged or deformed, replace the Pilot Burner (P/N
29700
).
9. Prior to reinstalling the Pilot Burner, a high temperature, conductive, anti-seize compound
must be applied to the threads.
10. Reinstall the Pilot Burner on the Burner Plate. Torque to
170 - 180 in-lbs. (19.2
– 20.3
Nm). DO NOT over tighten
.
11. Reassemble the remaining components in the reverse order that they were removed.
12. Reconnect the ignition cable.
13. Close the right side door and front panel. Replace the top panel if the unit was serviced
from above.

