1726 North Ballard Road, Suite 1 - Appleton, WI 54911 - 920.991.9082
Technical Support 855.804.5774 - Parts@waupacaelevator.com
PTM30187-E
20 MAR 2018
W
E
CRUSH
HAZARD
CUTTING
HAZARD
CRUSH
HAZARD
CRUSH
HAZARD
CRUSH
HAZARD
CRUSH
HAZARD
FALLING
HAZARD
CRUSH
HAZARD
PINCH
HAZARD
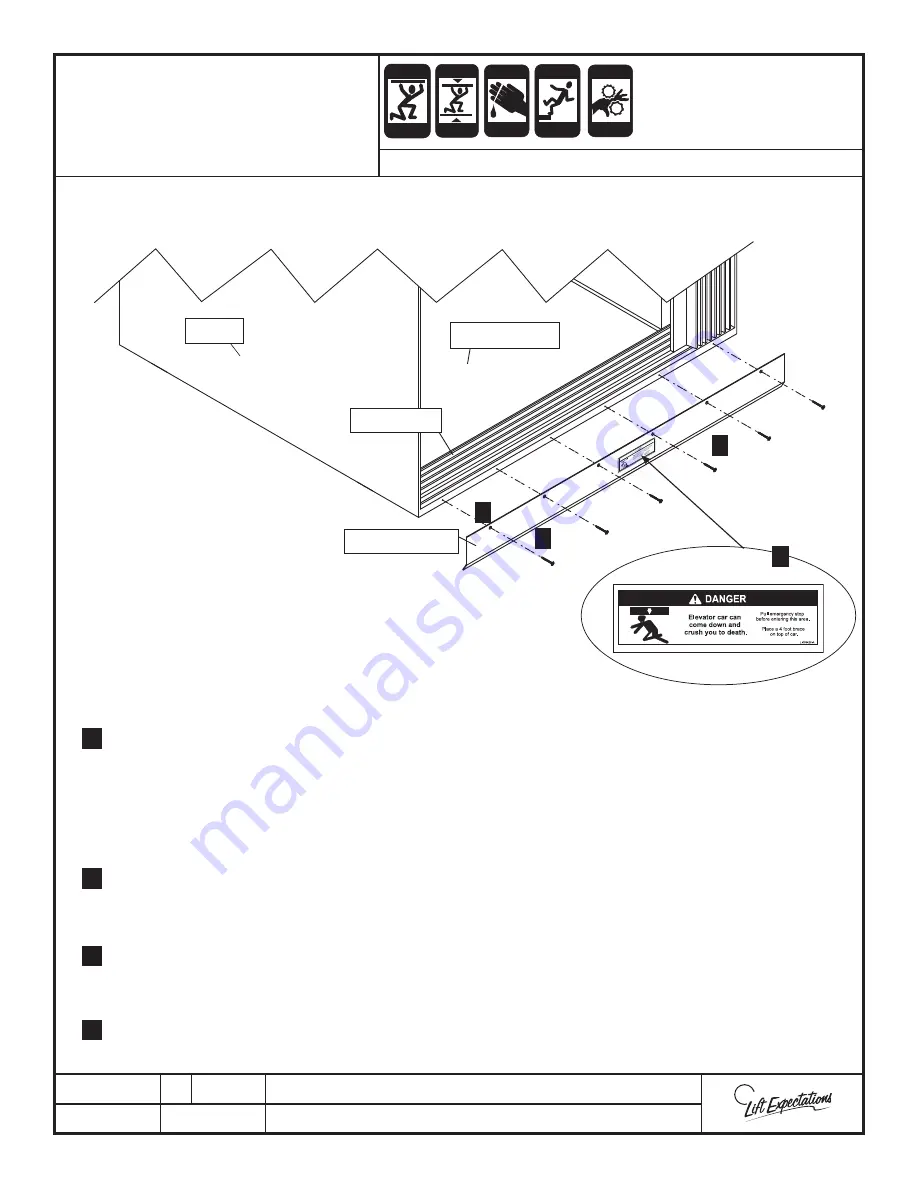
Align toe guard with the bottom of the car sill and one edge of either outside wall with the bend
facing into the hoistway.
Mark all hole locations.
Drill all hole locations previously marked in step 2 with a 3/32” drill bit x 1-1/4” deep pilot hole.
Place toe guard into position established in step 1. Verify both toe guard edges line up with the
outside wall edges, the top of the toe guard lines up with the bottom of the car sill, and the hole
patterns align with the pilot holes drilled.
Fasten toe guard onto car fl oor with a #6 x 1-1/4” coarse screw per each hole.
Note:
Quantity of holes depend on toe guard length.
Place the danger label(s) in the center of opening(s) on provided toe guard(s).
CAR FLOOR
TOE GUARD
CAR SILL
WALL
SERIES :
All Elevators
TOE GUARD
INSTALLATION
1.
4.
5.
6.
2.
3.
1
4
5
6
Page 53


