background image


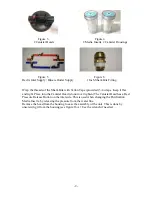
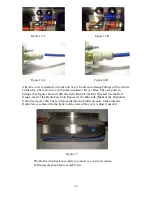
           Figure 10 A                                                               Figure 10 B 
 
Turn the assembly over, and then locate the tape mark at the elbow. (See figure 10A) 
This is the location for the HydroCare strap connection. (See figure 10B) At this time, 
install the HydroCare module as follows: 


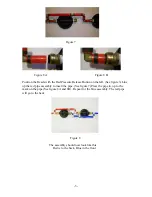
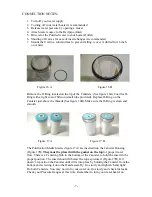
                                                           Figure 11 
 
 Attach the HydroCare Unit to the strap, with the light facing out. (Away from the pipe 
assembly). 


- 4 -


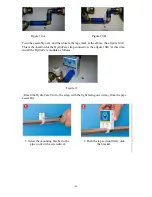
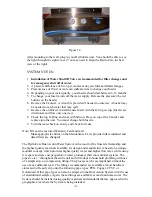
 1. Screw the mounting bracket to the                    2. Push the top section firmly onto 
        pipe work with a screwdriver.                                          the bracket. 

Summary of Contents for HYDROCARE DUAL ACTION

Page 1: ...HYDROCARE DUAL ACTION WATER SYSTEM INSTALLATION MANUAL COMPLETE UNIT PARTS LIST Figure 1 Figure 2 Shark Bite Removal Tool Silicon Wrench 8 Lag Bolts Teflon Tape Inch Red Blue Tubes...

Page 2: ...ed 3 4 wraps Keep it flat and tight Place into the Canister Head do not over tighten The Canister Head has a Red Pressure Release Button on the inlet side This is used when changing the Purification M...

Page 3: ...left See figure 3 Line up the red pipe assembly to insert the pipe See figure 7 Press the pipe in up to the mark on the pipe See figure 8A and 8B Repeat for the blue assembly The red pipe will go to t...

Page 4: ...on for the HydroCare strap connection See figure 10B At this time install the HydroCare module as follows Figure 11 Attach the HydroCare Unit to the strap with the light facing out Away from the pipe...

Page 5: ...d light should glow brightly Figure 12 A Figure 12 B Figure 12 C Turn assembly over to attach the Mounting Cover At this time record the serial number located under the cover beside the Gauges Positio...

Page 6: ...ee figure 14A and 14B Insert the Red into the Red Pipe and into the Red Gauge Left of the HydroCare Unit Repeat for the Blue side Right of the HydroCare Unit See figure 13B These will provide inlet an...

Page 7: ...the Canister just above the threads See figure 16B Make sure the O Ring is clean and smooth Figure 17 A Figure 17 B The Purification Media Inserts figure 17A are inserted into the Canister Housing Fi...

Page 8: ...ts 9 Turn the water back on slowly and check for leaks Note Fill out the enclosed Warranty Card and mail Make appropriate entries on the Maintenance Card provided date installed and dates filters are...

Reviews: