background image

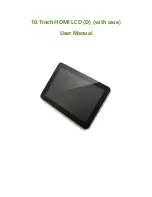
10.1inch HDMI LCD (D) 


INTRODUCTION 


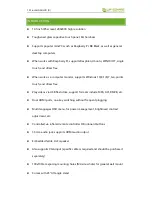
10.1inch IPS screen,1280x800 high resolution 


Toughened glass capacitive touch panel, 6H hardness 


Supports popular mini PCs such as Raspberry Pi, BB Black, as well as general 

desktop computers 


When works with Raspberry Pi, supports Raspbian, Ubuntu, WIN10 IOT, single 

touch, and driver free 


When work as a computer monitor, supports Windows 10/8.1/8/7, ten-points 

touch, and driver free 


Play videos via USB flash drive, support formats include MP4, AVI, RMVB, etc. 


Dual HDMI ports, one-key switching without frequent plugging 


Multi languages OSD menu, for power management, brightness/contrast 

adjustment, etc. 


Controlled via infrared remote controller OR onboard buttons 


3.5mm audio jack, supports HDMI audio output 


Embedded ferrite Hi-Fi speaker 


Also supports VGA input (specific cable is required and should be purchased 

separately) 


100x100mm spacing mounting holes (M4 screw hole) for general wall mount 


Comes with 45° tilt angle stand


Summary of Contents for 10.1inch HDMI LCD (D)

Page 1: ...10 1inch HDMI LCD D with case User Manual...

Page 2: ...10 1inch HDMI LCD D CONTENT Introduction 3 How to use 4 Working with PC 4 Tablet PC Settings 5 Working with Raspberry Pi 8 Rotation 9 Keys Description 12 Play Videos from USB Drive 13...

Page 3: ...7 ten points touch and driver free Play videos via USB flash drive support formats include MP4 AVI RMVB etc Dual HDMI ports one key switching without frequent plugging Multi languages OSD menu for po...

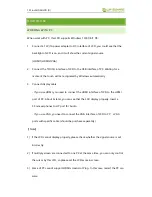
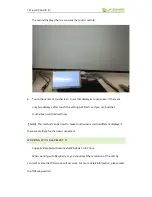
Page 4: ...se HDMI you need to connect the HDMI interface of LCD to the HDMI port of PC About 5s later you can see that the LCD display properly Insert a 3 5mm earphones to HP port for Audio If you use VGA you n...

Page 5: ...l the cursor on main display So it is proposed to set the touch LCD as the main display In Windows 10 there is Tablet PC Settings allow you to set touchscreen to control other displays instead of main...

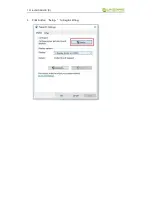
Page 6: ...10 1inch HDMI LCD D 3 Click button Setup to begin setting...

Page 7: ...ou can find there is prompt on your first screen with white background color 5 Press Enter on keyboard this operation work as tell the PC this screen is not the touchscreen I want to control Then you...

Page 8: ...find that touchscreen controls itself now Note This method can be used to make touchscreens control different displays if there are multiple touchscreen connected WORKING WITH RASPBERRY PI Supports Ra...

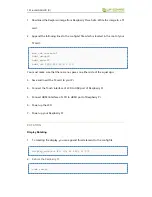
Page 9: ...0 0 0 You must make sure that there are no spaces on either side of the equal sign 3 Save and insert the TF card to your Pi 4 Connect the Touch interface of LCD to USB port of Raspberry Pi 5 Connect H...

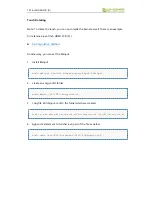
Page 10: ...can set the libinput 1 Install libinput sudo apt get install xserver xorg input libinput 2 create an xorg conf d folder sudo mkdir etc X11 xorg conf d 3 copy file 40 libinput conf to the folder which...

Page 11: ...boot After completing these steps The LCD could rotate 90 degree both display and touch Note 90 degree Option CalibrationMatrix 0 1 0 1 0 1 0 0 1 180 degree Option CalibrationMatrix 1 0 1 0 1 1 0 0 1...

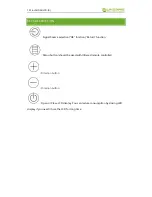
Page 12: ...e selection OK function Return function Menu button should be used with Infrared remote controller Direction button Direction button Open or Close LCD display You can reduce consumption by closing LCD...

Page 13: ...Connect USB drive to TOUCH interface of LCD by micro USB to USB Make sure there are videos in drive Change the signal source to USB Choose Movie by infrared remote controller Then press OK button Cho...

Reviews: