9 of 9
© 2022 Wavetronix LLC. All rights reserved. Protected in the US by patents viewable at www.wavetronix.com/en/legal. Protected by Canadian Patent Nos. 2461411; 2434756; 2512689; and European Patent Nos. 1435036; 1438702;
1611458. Other US and international patents pending. Wavetronix, SmartSensor, Click, Command and all associated logos are trademarks of Wavetronix LLC. All other product or brand names as they appear are trademarks or
registered trademarks of their respective holders. Product specifications are subject to change without notice. This material is provided for informational purposes only; Wavetronix assumes no liability related to its use.
WX-501-0536 • 01.22
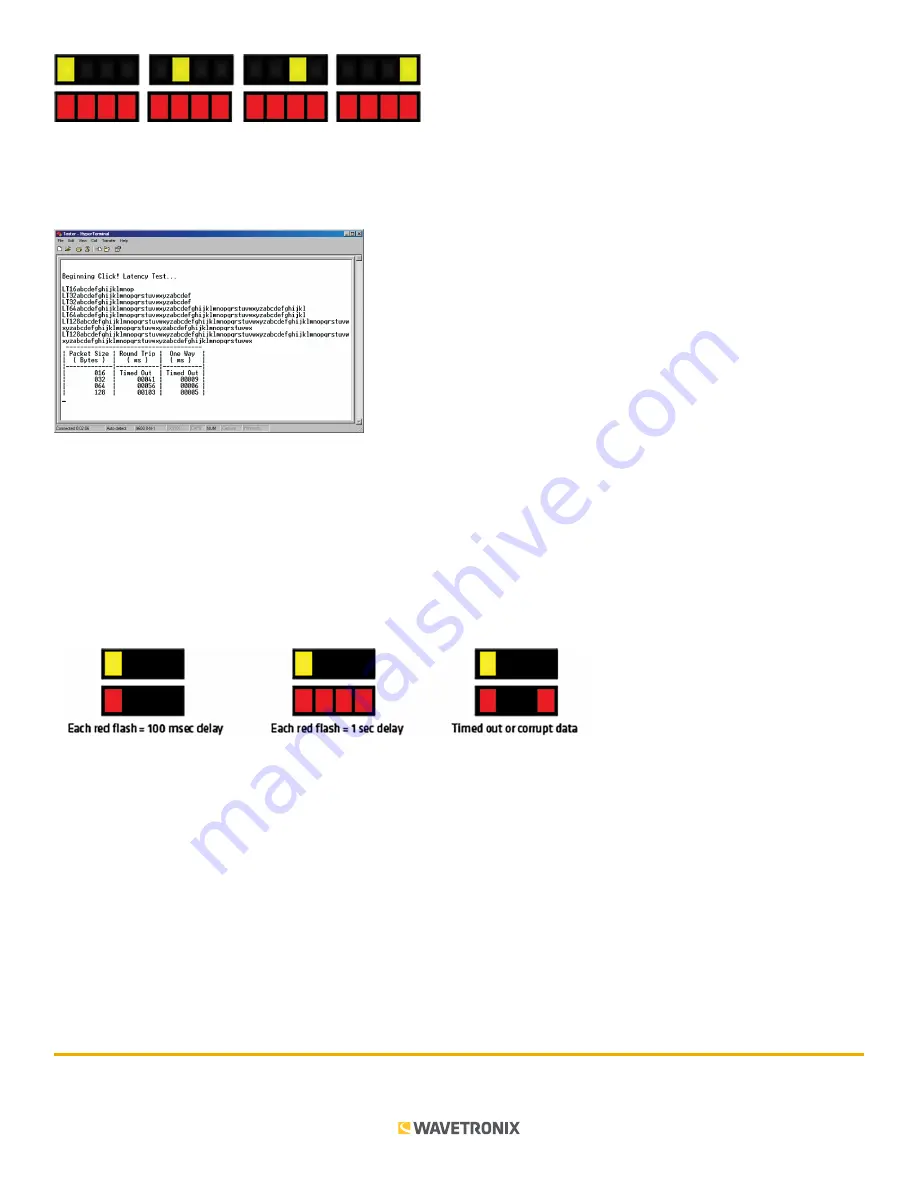
When latency testing is finished, the results can be viewed in two ways:
■
For exact delay times, have either of the two devices connected to a computer via a serial cable before begin-
ning the test. After the test, refer to the tables that come up in HyperTerminal as shown in the figure below.
If you are not connected to the computer and want a general idea of the delay time, you can refer to the submenu
LEDs on the device. The device will show results for each packet size starting with the 16 byte size shown by the
first yellow LED. When each yellow LED illuminates, the corresponding delay time information will be signaled by
the red LEDs.
The figure below shows what each set of red LED combinations signifies. Each time one red LED flashes there is
100 milliseconds of delay for that data packet. Each time all red LEDs flash there is 1 second of delay. Finally, if the
two outside LEDs flash this indicates an error (the device timed out after 5 seconds). The device will display all
byte sizes individually along with the corresponding delay time information.
Reset
The reset task is the sixth option presented in the menu selection process. The reset function will return the Click 510
to factory defaults. If a device is not responding and not communicating, resetting the device may fix the problem.


