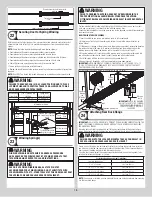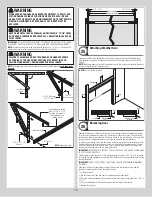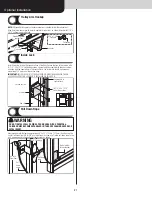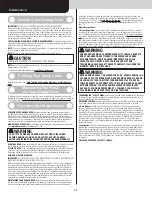
CONE), WHICH GOES ON THE RIGHT HAND SIDE.
IMPORTANT:
ON SINGLE SPRING APPLICATIONS, ONLY A LEFT WOUND (BLACK WINDING
CONE), IS REQUIRED.
NOTE:
The set screws used on all winding cones and cable drums are colored red. DO NOT
identify right and left hand by the set screw color.
IF YOU DON’T HAVE A COUPLER ASSEMBLY:
Facing the inside of the door, lay the torsion
shaft / torsion keyed shaft on the floor. Lay the torsion spring with the black winding cone
and the black cable drum at the right end of the torsion shaft / torsion keyed shaft. Lay the
torsion spring with the red winding cone and the red cable drum at the left end of the torsion
shaft / torsion keyed shaft. Slide the spring anchor bearing onto the torsion shaft / torsion
keyed shaft followed by the torsion springs and cable drums.
IMPORTANT:
THE SPRING ANCHOR BEARING, TORSION SPRINGS, AND CABLE DRUMS
MUST BE POSITIONED, AS SHOWN.
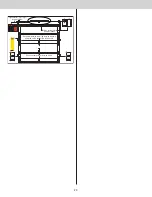
Torsion shaft /
Torsion keyed shaft
Right wound, red
winding cone
(left hand side)
Left wound, black
winding cone
(right hand side)
Right hand
cable drum,
black
Left hand cable
drum, red
IMPORTANT:
ON SINGLE
SPRING APPLICATIONS,
ONLY A LEFT WOUND
(BLACK WINDING CONE),
IS REQUIRED.
NOTE:
Layout
counterbalance parts in
proper orientation, then
install onto torsion
shaft, as shown.
Spring anchor bushing
With assistance, pick up the torsion spring assembly and slide one end of the torsion shaft
/ torsion keyed shaft through one head plate. Lay the middle of the torsion shaft / torsion
keyed shaft into the spring anchor bracket. Slide the other end of the torsion shaft / torsion
keyed shaft into the other head plate.
Left hand
head plate
Right hand
head plate
Spring anchor
bracket
Torsion shaft /
Torsion keyed shaft
NOTE:
Position the torsion shaft so that equal amounts of the shaft extend from each head
plates.
Spring anchor bushing
IF YOU HAVE A COUPLER ASSEMBLY:
Disassemble the coupler assembly by removing
the (3) 3/8” - 16 x 1-1/2” hex head screws, (6) 3/8” washers, (3) 3/8” lock washers and the
(3) 3/8” - 16 hex nuts from the coupler halves. Loosen the set screws. Set the components
aside.
Coupler assembly
(3) 3/8” - 16 x 1-1/2”
hex head screws
(3) 3/8” - 16
Hex nuts
(3) 3/8”
Washers
(3) 3/8”
Washers
(3) 3/8” Lock
washers
Coupler halves
Set screws
Set screws
Facing the inside of the door, lay the (2) torsion keyed shafts on the floor. One torsion keyed
shaft on the left hand side and the other torsion keyed shaft on the right hand side. Starting
on the left hand side, lay one of the coupler halves, the spring anchor bearing, torsion spring
with the red winding cone and the red cable drum at the left end of the torsion keyed shaft.
Next on the right hand side, lay the other coupler half, spring anchor bearing, the torsion
spring with the black winding cone, and the black cable drum at the right end of the torsion
keyed shaft. Slide the coupler halves, spring anchor bearings onto the torsion keyed shafts
followed by the torsion springs and the cable drums, as shown.
IMPORTANT:
THE COUPLER HALVES, SPRING ANCHOR BEARINGS, TORSION SPRINGS,
CABLE DRUMS MUST BE POSITIONED, AS SHOWN.
Slide the flat edge of the couple half flush with the side edge of the torsion keyed shaft. Insert
(1) key into the slot of both the coupler half and the slot in the torsion keyed shaft. Tighten
the (2) set screws and the locking nut to secure the coupler half to the torsion keyed shaft,
as shown.
NOTE:
Tighten the set screws to 14-15 ft. lbs. of torque (once set screws contact the shaft,
tighten set screws one full turn). Repeat the same process for the other coupler half.
NOTE:
Layout
counterbalance parts in
proper orientation, then
install onto torsion
shaft, as shown.
Torsion
keyed
shaft
Coupler
halves
Coupler halves
assembled
Set screws
and Lock nut
Key
Key
Torsion keyed shaft
Right wound, red
winding cone
(left hand side)
Left wound, black
winding cone
(right hand side)
Left hand cable
drum, red
Right hand cable
drum, black
Spring anchor bushing
Spring anchor bushing
Torsion keyed shaft
Red cable drum
(left hand side)
Black cable drum
(right hand side)
Coupler
halves
Coupler halves
assembled
Set screws
and Lock nut
Key
Key
Torsion keyed shaft
Right wound, red
winding cone
(left hand side)
Left wound, black
winding cone
(right hand side)
NOTE:
Layout
counterbalance parts in
proper orientation, then
install onto torsion
shaft, as shown.
Spring anchor bushing
Spring anchor bushing
With assistance and starting on the left hand side of door, pick up the left hand torsion spring
assembly and slide one end of the torsion keyed shaft through the head plate. Lay the other
side of the torsion keyed shaft into the spring anchor bearing. Repeat the same process for
the right hand torsion spring assembly.
Torsion
keyed
shaft
Coupler
half
Spring anchor
brackets
Left hand head
plate
Right hand
head plate
Torsion
keyed
shaft
Right wound, red
winding cone (left
hand side)
Spring anchor bushing
Spring
anchor
brackets
Torsion keyed shafts
Right
hand
head plate
Left hand
head
plate
NOTE:
Position both torsion keyed shafts so that equal amounts of the shafts extend from
each end head plates.
Spring anchor bushing
16
Summary of Contents for 8300
Page 25: ......


