4
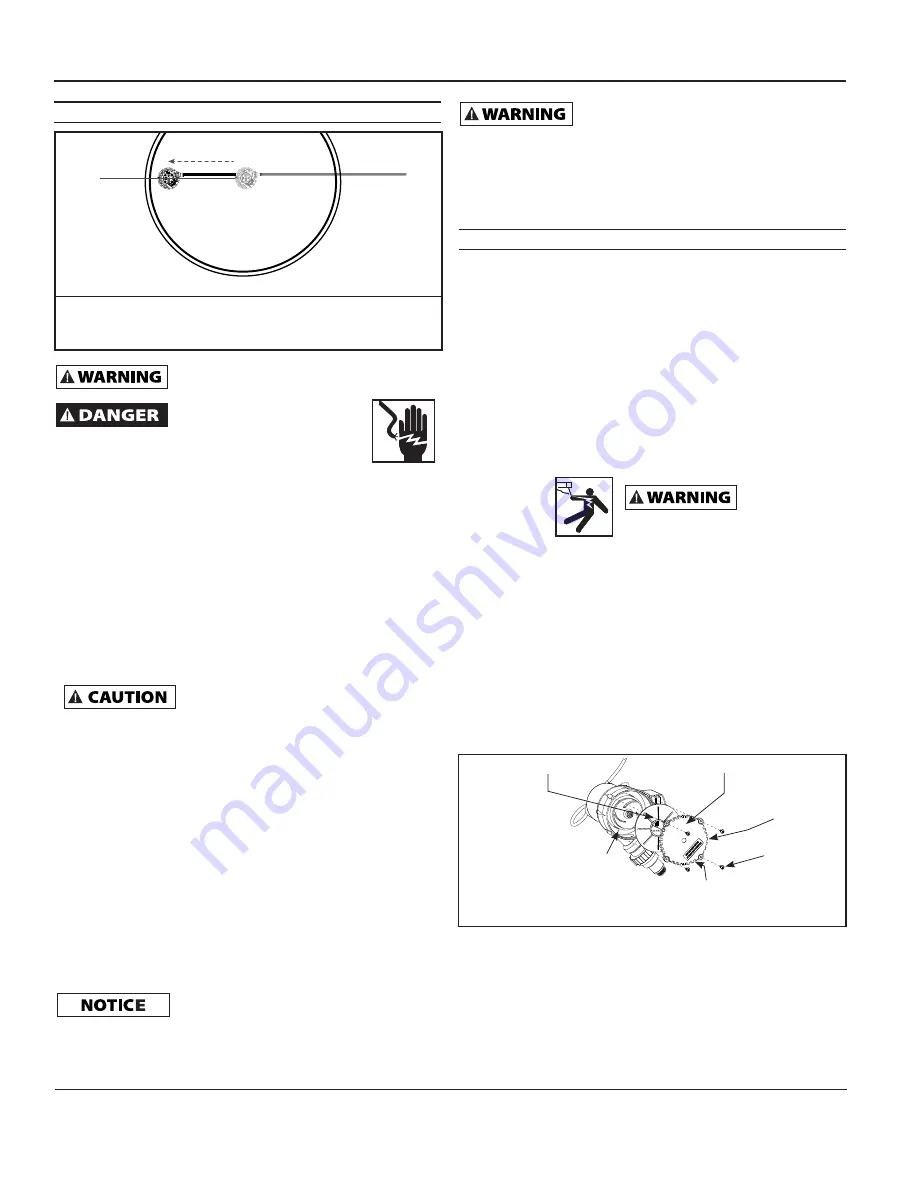
PULL ACROSS - PUMP REMOVAL
Figure E - Pull Across pump removal (top view)
E1
E1. Disconnect power to pump. Using the included 25 ft.
rope, safely pull pump to edge of pool, disconnect discharge
hose and remove.
Never use power cord to position, carry or
retrieve the pump.
will be pumped.
Do
NOT handle pump with wet
hands or when standing in water
or on a damp surface when the unit is operating or fails to
operate. ALWAYS disconnect pump power cord from
power source before handling. Do NOT bury cord.
Visually locate cord to prevent damage caused by lawn mowers,
hedge trimmers and other equipment. Failure to do so WILL result
in fatal electrical shock.
Do NOT alter the pump to override the automatic
water detector. The shaft seal depends on water
for lubrication. Overriding this pump feature CAN cause the pump to
run dry and MAY damage the shaft seal and cause pump failure.
5. The water level must be at least 2-1/8 inches for the pump
to cycle, prime, and operate. Water levels less than 2-1/8
inches will not allow the impeller to contact water therefore
no water will be pumped.
6. Plug the pump into a properly grounded 120 volt GFCI
protected outlet. The pump will start automatically when the
water reaches a depth of 2-1/8 inches. A priming delay of 2
seconds is programmed into the control to allow time for air
to escape from the pumping chamber.
Use caution when positioning the pump not to
damage the power cord by dragging across the
edge of the pool. Also take into consideration the placement of the
discharge hose and power cord after installation. Make sure no sharp
edge can damage the power cord or discharge hose causing unsafe
conditions.
7. The pump will stop automatically once water has been
removed to a depth of approximately 3/4 of an inch. The
pump will NOT restart until the water depth rises to 2-1/8
inches or greater.
8. The pump will NOT allow itself to run dry. Once the pump
detects that water is no longer being removed, it will shut down
automatically. The pump must remain upright at all times in
order for the water detection to function. Do NOT allow the
pump to operate on its side or inverted The shaft seal depends
on water for lubrication, allowing the pump to remain in any
other orientation than upright could cause shaft seal failure or
pump failure.
Pump starts automatically.
Always disconnect electric supply
before attempting to install, service, relocate, or perform any
maintenance.
Minimal service is required for this pump. The motor housing of
the pump is completely sealed and requires no service. If pump
should fail to operate, perform the following troubleshooting
guidelines:
PRIMING HOLE
BASE SCREWS (4)
INLET SCREEN/ BASE
IMPELLER PLATE
Figure 1 - Priming Hole Location
WHEN REATTACHING THE BASE (INLET SCREEN), BE SURE THAT THE
SIX (6) "PLUGGED" SCREENS ARE ORIENTED BELOW THE SWITCH.
5. Periodic cleaning is required to maintain performance of the
pump. Follow the cleaning steps listed below:
a. Disconnect pump from power source.
b. Remove the strainer.
c. Remove the four (4) base screws (Figure 1).
d. Remove the base and impeller plate.
e. Remove the debris and make sure the impeller turns
freely.
f. Reinstall impeller plate, base, screws, and strainer.
1. Verify pumping height does NOT exceed 15 feet (See Figure
A). If pumping height is greater than 15 feet, this pumps
automatic feature will not operate correctly.
2. Verify water depth is 2-1/8 inches or greater.
3. To verify pump is operating correctly.
a. Disconnect pump from power source.
b. Connect hose adapter/check valve and discharge hose
to pump.
c. Immerse pump in a bucket or tub of water at least 2-1/8
inches in depth.
d. Place the other end of the discharge hose outside the
bucket, so the water will pump out.
e. Plug power cord into a grounded 120 volt GFCI power
outlet. The pump should start after 2 seconds of
detecting water. Once the pump removes the water to a
depth of 3/4 inch, the pump will stop automatically.
f. If pump does NOT operate, unplug power cord and
proceed to maintenance – step 5.
4. To verify discharge hose is free from a blockage.
a. Connect hose to another water source such as a faucet.
If water flows through hose, return to step 3a. If water is
restricted, verify discharge hose is unwound and remove
all kinks, bends, or obstructions in hose.
b. If pump is still NOT operating, proceed to step 6.
MAINTENANCE
Electrocution Hazard!
PLUGGED SCREENS
Operating Instructions and Parts Manual
www.waynepumps.com


