background image

Operation Guide 


Issue V1.0 (2019-05-08) 


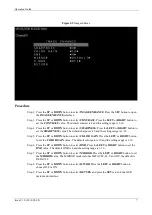
Figure 2-4


DAY/NIGHT interface 


Step 2


Press the 

LEFT

 or 

RIGHT

 button to set the Mode. 

Step 3


Press the 

UP 

or 

DOWN 

button to select 

RETURN

 and press the 

SET 

return to the OSD 

main menu interface. 

----End 

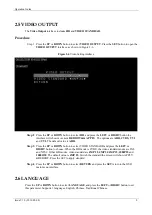
2.4 IMAGE ENHANCE 

The 

Image Enhance

 interface includes 

CONTRAST

SHARPNESS

COLOR GAIN,


DNR, 

MIRROR

 and 

D-WDR, 

as shown in Figure 2-5.

Summary of Contents for 0E-HD4MP28DM

Page 1: ...4MP HD Analog Camera OSD Operation Manual Operation Guide If you have any questions please call W Box Tech Support 1 833 574 9124 for assistance 0E HD4MP28DM 0E HDD4MP28 0E HD4MPMODM 0E HD4MPMOEY ...

Page 2: ... potentially hazardous situation which if not avoided could result in death or serious injury Indicates a potentially hazardous situation which if not avoided may result in minor or moderate injury Indicates a potentially hazardous situation which if not avoided could result in equipment damage data loss performance deterioration or unanticipated results NOTICE is used to address practices not rel...

Page 3: ... This Document ii 1 OSD Main Menu 1 1 1 Procedure 1 1 1 1 Camera Control Using Five Buttons 1 1 2 OSD Main Menu Interface 1 2 OSD Setting 3 2 1 AE 3 2 2 AWB 4 2 3 DAY NIGHT 5 2 4 IMAGE ENHANCE 6 2 5 VIDEO OUTPUT 8 2 6 LANGUAGE 8 2 7 RESET 9 2 8 SAVE EXIT 9 2 9 EXIT 9 ...

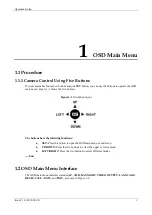
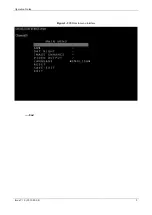
Page 4: ...shows the five buttons Figure 1 1 Five button layout The buttons have the following functions SET Press this button to open the OSD main menu or end setup UP DOWN Press the two buttons to select the upper or lower menu LEFT RIGHT Press the two buttons to select different modes End 1 2 OSD Main Menu Interface The OSD main menu interface includes AE AWB DAY NIGHT VIDEO OUTPUT LANGUAGE RESET SAVE EXI...

Page 5: ...Operation Guide Issue V1 0 2019 05 08 2 Figure 1 2 OSD main menu interface End ...

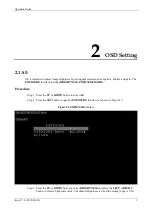
Page 6: ... includes BRIGHTNESS EXPOSURE MODE Procedure Step 1 Press the UP or DOWN button to select AE Step 2 Press the SET button to open the EXPOSURE interface as shown in Figure 2 1 Figure 2 1 EXPOSURE interface Step 3 Press the UP or DOWN button to select BRIGHTNESS and press the LEFT or RIGHT button to select a brightness value The default brightness is 6 and the setting range is 1 20 ...

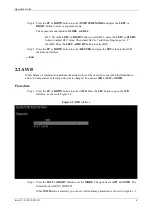
Page 7: ...N button to select RETURN and press the SET return to the OSD main menu interface End 2 2 AWB White balance is intended to reproduce the actual colors of the observed scene when the illuminance and color temperature of the target object are changed You can set WB to ATW or MWB Procedure Step 1 Press the UP or DOWN button to select AWB Press the SET button to open the WB interface as shown in Figur...

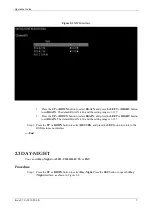
Page 8: ...n to select BGAIN and press the LEFT or RIGHT button to set BGAIN The default BGAIN is 30 and the setting range is 1 127 Step 3 Press the UP or DOWN button to select RETURN and press the SET button to return to the OSD main menu interface End 2 3 DAY NIGHT You can set Day Night to AUTO COLOR B W or EXT Procedure Step 1 Press the UP or DOWN button to select Day Night Press the SET button to open th...

Page 9: ...s the LEFT or RIGHT button to set the Mode Step 3 Press the UP or DOWN button to select RETURN and press the SET return to the OSD main menu interface End 2 4 IMAGE ENHANCE The Image Enhance interface includes CONTRAST SHARPNESS COLOR GAIN DNR MIRROR and D WDR as shown in Figure 2 5 ...

Page 10: ...e is 1 16 Step 5 Press the UP or DOWN button to select COLOR GAIN Press the LEFT or RIGHT button to set the COLOR GAIN value The default color gain is 10 and the setting range is 1 16 Step 6 Press the UP or DOWN button to select DNR Press the LEFT or RIGHT button to set the DNR value The default DNR is 4 and the setting range is 1 16 Step 7 Press the UP or DOWN button to select MIRROR Press the LE...

Page 11: ...he default value is AHD Step 3 Press the UP or DOWN button to select VIDEO STANDARD and press the LEFT or RIGHT button to choose When the HD mode is CVBS the video standard modes are PAL and NTSC Other HD modes video standard are 4MP 25 4MP 30 4MP 15 1080P25 and 1080O30 The default value is 4MP 25 Switch the standard the screen will show APPLY REBOOT Press the SET to apply standard Step 4 Press th...

Page 12: ...a OSD parameter 2 8 SAVE EXIT Press the UP or DOWN button to select SAVE EXIT and press the SET button to save the OSD settings and return to the camera s real time video interface 2 9 EXIT Press the UP or DOWN button to select EXIT and press the SET button to discard the OSD settings and return to the camera s real time video interface ...

Reviews: