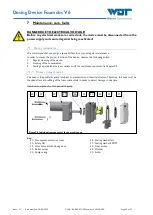
Dosing Device Foamdos V6
Index: 01
Date modified: 30/08/2019
OI No.: BA DW 025-00 Foamdos V6 EN.DOCX
Page 27 of 37
Change hose kit and roller carrier
see description in
Chapter 5.2 Commissioning works, “Insert roller carrier at the fragrance pump”
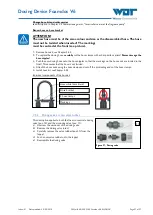
Renew hose on hose bracket
ATTENTION!
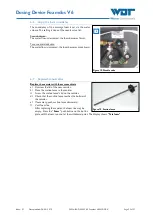
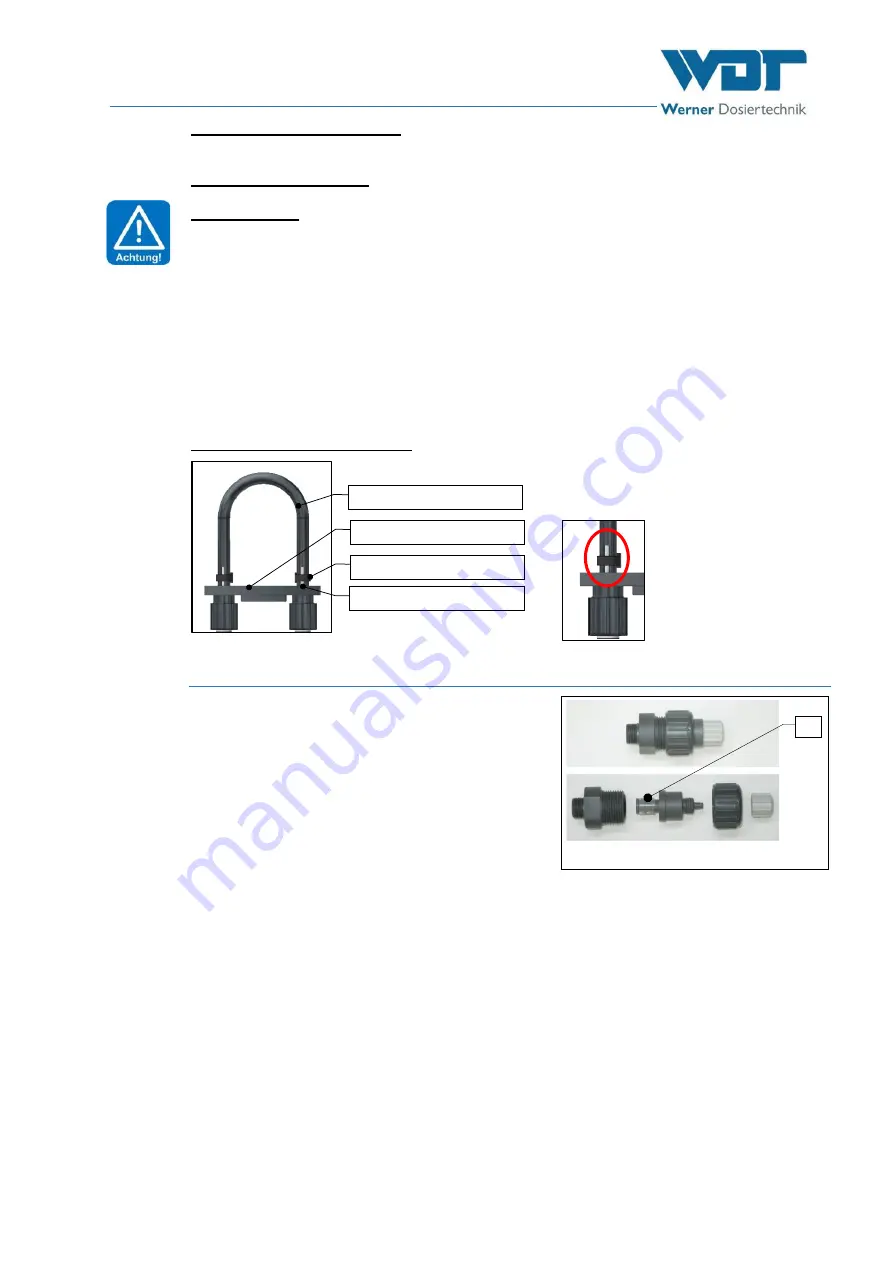
The new hose must be of the same colour and size as the disassembled hose. The hose
must not be twisted when inserted! The markings
must be centred at the front (see picture).
1.
Remove hose kit,
see Chapter 5.2.2
2.
To replace the dosing hose,
carefully
cut the hose clamps with a sharp knife or pliers!
Never damage the
hose nipples!
3.
Push the new dosing hose onto the hose nipples so that the markings on the hose ends are located in the
front! This ensures that the hose is not twisted.
4.
Attach the hose ends using the hose clamps and cut off the protruding ends of the hose clamps.
5.
Install hose kit,
see Chapter 5.2.2
Individual components of the hose kit
7.1.2
Dosing valves, renew valve rubber
This description applies to both the foam concentrate dosing
) and the air dosing valve (pos.
a)
Unscrew the union nut of the dosing valve
b)
Remove the dosing valve insert
c)
Carefully remove the valve rubber (pos 51) from the
tappet
d)
Push a new valve rubber onto the tappet
e)
Reassemble the dosing valve
Hose white (here black)
Hose bracket
Markings
2 hose clamps
Figure 21, Dosing valve
51


