!
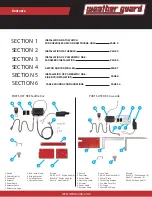
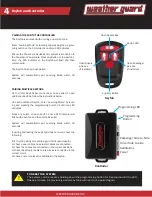
TO SPLIT POWER FOR ADDITIONAL POWER-
SYNC ITEMS IN THE SAME BOX
Attach the 4-way connector to the end of the
PowerSync Power cable to split the power
connection.
5
WEATHERGUARD.COM
1.1
1.2
B
A
This extension bracket
is not needed on
low-profile boxes
1.3
Installation of PowerSync RKE
BEFORE INSTALLING TO TRUCKBOX
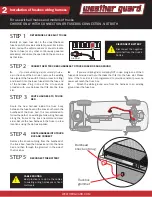
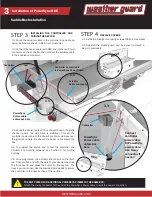
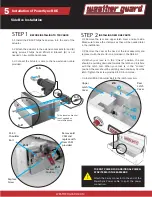
2.1 Remove the rear and upper latch cover and set aside.
Make sure to save the 3 screws as they will be needed later
in the installation.
2.2 Remove the cam at the back of the lock assembly and
replace it with the shorter one provided in the RKE kit.
2.3 When your lock is in the “Unlock” position, the cam
should be pointing down and towards the latch and interfere
with the latch cam. When your lock is in the “Locked”
position, the cam should be pointing down and away from the
latch. Tighten the screw provided to 80 in-lb torque.
2.4 Install #4-40 Shoulder Bolt to the latch lever arm
Side Box Installation
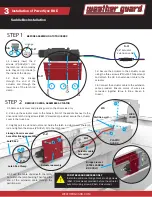
INSTALLING NEW RKE PARTS
1.1 Install the #8-16 Philips head screw into the end of the
actuator.
1.2 Attach the actuator to the extension brackets (A) and (B)
using screws Philips head #10x3/4. Bracket (B) is not
needed on low-profile truckboxes.
1.3 Connect the Actuator cable to the new extension cable
provided.
STEP 1
STEP 2
Upper
Latch
Cover
Rear
Latch
Cover
1
2
3
2.1
#4-40
Shoulder
Bolt
Remove old
CAM and
replace with
New CAM
provided
Replace
Screw
Locked
Position
2.2
2.4
2.3

