Coolant Circuit
www.webasto.us
47
Webasto Product N.A., Inc.
™
11.2 Heat Exchanger Replacement
Removal
1. Follow directions in Sec. 10.2 "Air-handler Cover
Removal" on page 44.
2. Drain sufficient coolant from system to prevent
spillage inside sleeper compartment.
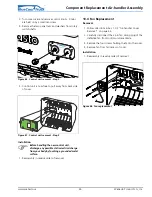
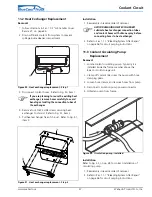
Figure 50. Heat exchanger replacement - Step 1
3. Disconnect coolant hoses. Refer to Fig. 50, item 1.
If you are planning to reuse the existing heat
exchanger, remove hoses carefully to avoid
bending or twisting the connection tubes of
the exchanger.
4. Remove four 10x32 UNF screws securing heat
exchanger to shroud. Refer to Fig. 51, item 2.
5. Pull heat exchanger free of shroud. Refer to Fig. 51,
item 3.
Figure 51. Heat exchanger replacement - Step 2
Installation
1. Reassembly in reverse order of removal.
AVOID DAMAGING HEAT EXCHANGER!
Lubricate heat exchanger connection tubes
and coolant hoses with silicone spray before
connecting hoses to heat exchanger.
2. Refer to Sec. 11.1 "Bleeding System After Repair"
on page 46 for circuit purging instructions.
11.3 Coolant Circulating Pump
Replacement
Removal
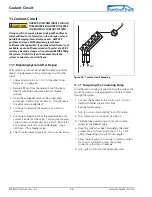
1. Locate coolant circulating pump. Typically, it is
installed inside the frame member above the
BlueCool cold storage unit.
2. Clamp off coolant lines near the pump with hose
clamping pliers.
3. Loosen hose clamps and remove hoses from pump.
4. Disconnect circulation pump power connector.
5. Unfasten pump from frame.
Figure 52. Circulation pump - installed
Installation
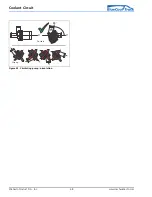
Refer to Fig. 53, on pg. 48 for correct installation of
circulating pump.
1. Reassembly in reverse order of removal.
2. Refer to Sec. 11.1 "Bleeding System After Repair"
on page 46 for circuit purging instructions.
1
2
3

