17
4.14 Installation Checklist (Review Prior To Installation)
4.14.1 Seawater cooling system:
◆
Speed scoop located as far below the water line and as close to the keel as possible.
◆
Shut off valve (sea cock) and speed scoop properly sealed and tightened.
◆
Seawater pump is at least 1’ (305mm) below water line and securely mounted.
◆
Strainer mounted below pump with access to filter.
◆
Double/reversed stainless steel hose clamps on all hose connections.
◆
Teflon tape on all threaded connections.
◆
Hose runs uphill from speed scoop and sea cock to strainer, pump and A/C unit, and then downhill (if
possible) from A/C unit to overboard discharge.
◆
Water flowing freely from overboard discharge while pump is running.
◆
Pump relay panel, if used, must have its own circuit breaker sized for the pump. (20 amp max)
◆
All metal fittings should be bonded.
4.14.2 Mounting
◆
Not in engine room or bilge area, must be sealed away from exhaust or fumes.
◆
Proper spacing allowed around unit.
◆
Attached to solid level platform with hold down brackets provided.
◆
Condensate drain routed aft and downhill to a sealed sump (not bilge).
◆
All penetrations to bilge area sealed.
◆
Blower rotated toward supply air grille.
4.14.3 Electrical
◆
All butt connections on pumps are tightly crimped and covered with heat shrink.
◆
AC power source installed and grounded/bonded in accordance with ABYC standards.
◆
Control wires connected to terminal strip with fork or ring terminals.
◆
Circuit breakers sized according to specifications on the data plate label.
◆
Pump Relay Panel (if used) has a dedicated circuit breaker sized for the pump but not to exceed 20 amps
maximum.
4.14.4 Grilles and Ducting
◆
Supply air grille mounted as high as possible.
◆
Return air grille mounted as low and as close to the A/C unit as possible.
◆
Return air grille mounted away from bilge vapors or exhaust fumes.
◆
Ducting is pulled taut, straight, smooth and properly connected with no excess.
4.14.5 Quick Start Operations Checklist
◆
Ensure seawater intake ball valve (sea cock) is open.
◆
Turn on the A/C circuit breaker. If the seawater pump has its own circuit breaker, make sure to turn it on.
◆
Turn the system on. Set the desired cabin temperature (set point).
◆
Check for a steady solid stream of water from the overboard discharge.
◆
Verify that there is steady airflow out of the supply air grille
◆
If the unit does not appear to be operating properly, refer to troubleshooting guidelines.
DO NOT turn the unit off and immediately turn it back on. Allow at least 30 seconds for refrigerant
pressure equalization.
Summary of Contents for FCF 10
Page 2: ......
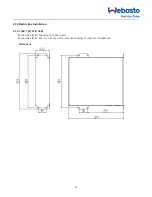
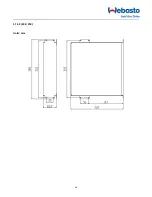
Page 16: ...16 4 13 2 20K 25K Units mm ...
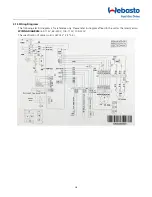
Page 19: ...19 WIRING DIAGRAM 12K 115V 12K 230V The specification of power cord is AWG12 3 3 2 5 ...
Page 20: ...20 WIRING DIAGRAM 16K 115V 16K 230V The specification of power cord is AWG12 3 3 2 5 ...
Page 30: ...30 NOTES ...
Page 31: ...31 NOTES ...

