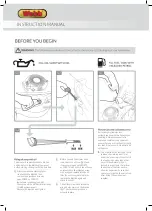
Before starting your mower
inspect it carefully to ensure that
there are no loose parts and that it
is in good working order.
Be sure of your footing.
Always walk, never run, when
operating the lawnmower.
Keep hands, feet and
clothing away from the
mower’s moving parts and
always wear appropriate footwear
(avoid sandals or open shoes).
Never put your hands or feet
underneath the chassis of the
lawnmower while the engine is
running.
Clear the area to be mowed of any
stones, sticks, wire and debris
before beginning. Always ensure
that you mow a safe distance away
(over 14 metres) from adults,
children and animals.
Always use fresh premium unleaded
petrol that is not more than 4-6 weeks
old. Fill the tank using a funnel, but
never completely. Clean up
any overflow or splashes
before starting.
Do not smoke when filling
the fuel tank, using the
machine,or when petrol is in the
immediate area. Never use or store
the mower near a naked flame.
Turn off the engine and disconnect
the spark plug cap before cleaning,
transporting, or making adjustments.
Never leave the mower unattended.
Never open the fuel filler cap, or fill
the tank, if the engine is still hot
after use. Please ensure that you
securely tighten the petrol cap
after filling.
Mow across the face of slopes,
not up & down, and avoid mowing on
very steep slopes. We recommend
you avoid mowing when it is
raining, after nightfall or in
poor light conditions.
Do not transport the
mower in a vehicle if there
is any petrol in the tank.
Be aware that the machine’s
exhaust area and other parts
of the lawnmower get very
hot during and right after use.
Turn off the engine before
emptying the grass-catcher and
before clearing any grass caught
in the rear flap where the catcher fits.
Store fuel and oil in a cool
well-ventilated place, away
from direct sunlight and gas
cylinders or hot water heater systems
It is recommended that you wear
ear protectors, safety goggles and
safety boots when using the
lawnmower.
All servicing and repair work under
warranty must be carried out by an
Authorised Dealer, otherise the
1+1-Year warrany may be void.
To inspect the underside of your
mower, only tilt the lawnmower
to your right, or back, when standing
behind it (this is the side where the
exhaust is near the ground) otherwise
oil may leak into inappropriate areas
of the engine. Never tilt the lawnmower
when the engine is running.
Do not operate the machine by
pulling it towards you as you risk
pulling it onto your feet. Instead,
always push and walk behind your
lawnmower.
Do not fill the tank, or start
the lawnmower indoors, or in a
poorly ventilated area, as exhaust
gases contain poisonous substances
and petrol fumes are flammable
and dangerous.
Do not alter engine governing
settings or over-rev the engine, as
excessive speed is dangerous and
can reduce engine life.
USING YOUR MOWER
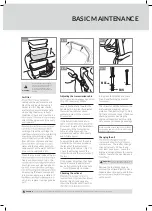
Attach the Grass Collection Bag
The grass collection bag attaches
easily by lifting the mower’s Rear Flap
with one hand (Fig. 9) and slide the
grass collection bag into position (Fig.
10).
Cutting Height Adjustment
For best results adjust the cutting
height of your mower to suit the
mowing conditions. Do not try to
remove too much grass in one pass.
Adjustment of the cutting height is
made centrally. Turn off the mower
and take the weight of the mower
by lifting. Take hold of the cut height
adjustment lever, positioned on the
mower’s right hand rear wheel.
Move the lever inwards to release
it from its locating notch. Move
the lever down machine to increase
the cutting height.
To reduce the cutting height move the
lever upwards. Return the lever to
the locating notch to set the desired
cutting height.
securely into its serrated holder (Fig.
11).
Mowing your Lawn
Start your mower (see: Starting
the engine). Keep hold of the Brake
(OPC) Lever (releasing the Brake
(OPC) Lever will stop the engine to
avoid accidents) (Fig. 12). To power
the mower (WERR17SP Only)
forward move the Drive Lever up and
forward (Fig. 13). The mower can be
pushed with the drive disengaged for
more precise handling. After mowing
and emptying the Grass Collection
Bag ensure the engine is not running
and turned off.
Cleaning your Mower
Cut grass is damp. Regular cleaning
after each use will ensure better
functioning of the mower and reduce
the risk of corrosion or seizure.
the engine to cool then remove
accumulated grass clippings from and
around the engine with a brush. Clean
the grass collection bag annually with
a brush or gentle spray of water and
allow to dry.
Clean underneath regularly -
disconnect the spark plug cap and tilt
the mower backwards. Remove cut
grass with a scraper and a brush.
Do not use a pressure washer or hot
water to clean the mower. Dry off the
machine before storing by leaving it
clean surface to prevent corrosion or
seizure.
Storing your Mower
Store your mower in a dry, well-
sparks or heat sources. Disconnect the
spark plug cap. Avoid storing beneath a
tarpaulin or similar cover as it may
cause condensation resulting in
corrosion.
Winter Storage:
Thoroughly clean the mower. Run
the engine outdoors until fuel tank
is empty or empty fuel using a fuel
suction pump. Dispose of discarded
fuel safely and responsibly. Run
the engine until remaining fuel is
consumed.
Remove the spark plug from the
engine. pour a tablespoon of engine
oil into the cylinder. Gently pull the
starter rope several times to distribute
the oil to protect the cylinder over
winter. Replace and tighten the spark
plug.
Transporting your Mower
Ensure the fuel tank is empty. Run
the engine until any remaining fuel is
consumed. Allow the engine to cool.
How to cut for best results
For best results cut your lawn in
alternative directions switching
direction each time you cut. Cut your
lawn at an equal and regular height.
Slightly overlap your cutting lines.
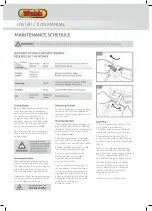
WARNING!
WARNING!
!
!
Turn mower off before
adjusting cutting height lever
Turn mower off before cleaning
Fig 9
Fig10
Fig12
Fig13
Fig11
INSTRUCTION MANUAL
Before starting your mower
inspect it carefully to ensure that
there are no loose parts and that it
is in good working order.
Be sure of your footing.
Always walk, never run, when
operating the lawnmower.
Keep hands, feet and
clothing away from the
mower’s moving parts and
always wear appropriate footwear
(avoid sandals or open shoes).
Never put your hands or feet
underneath the chassis of the
lawnmower while the engine is
running.
Clear the area to be mowed of any
stones, sticks, wire and debris
before beginning. Always ensure
that you mow a safe distance away
(over 14 metres) from adults,
children and animals.
Always use fresh premium unleaded
petrol that is not more than 4-6 weeks
old. Fill the tank using a funnel, but
never completely. Clean up
any overflow or splashes
before starting.
Do not smoke when filling
the fuel tank, using the
machine,or when petrol is in the
immediate area. Never use or store
the mower near a naked flame.
Turn off the engine and disconnect
the spark plug cap before cleaning,
transporting, or making adjustments.
Never leave the mower unattended.
Never open the fuel filler cap, or fill
the tank, if the engine is still hot
after use. Please ensure that you
securely tighten the petrol cap
after filling.
Mow across the face of slopes,
not up & down, and avoid mowing on
very steep slopes. We recommend
you avoid mowing when it is
raining, after nightfall or in
poor light conditions.
Do not transport the
mower in a vehicle if there
is any petrol in the tank.
Be aware that the machine’s
exhaust area and other parts
of the lawnmower get very
hot during and right after use.
Turn off the engine before
emptying the grass-catcher and
before clearing any grass caught
in the rear flap where the catcher fits.
Store fuel and oil in a cool
well-ventilated place, away
from direct sunlight and gas
cylinders or hot water heater systems
It is recommended that you wear
ear protectors, safety goggles and
safety boots when using the
lawnmower.
All servicing and repair work under
warranty must be carried out by an
Authorised Dealer, otherise the
1+1-Year warrany may be void.
To inspect the underside of your
mower, only tilt the lawnmower
to your right, or back, when standing
behind it (this is the side where the
exhaust is near the ground) otherwise
oil may leak into inappropriate areas
of the engine. Never tilt the lawnmower
when the engine is running.
Do not operate the machine by
pulling it towards you as you risk
pulling it onto your feet. Instead,
always push and walk behind your
lawnmower.
Do not fill the tank, or start
the lawnmower indoors, or in a
poorly ventilated area, as exhaust
gases contain poisonous substances
and petrol fumes are flammable
and dangerous.
Do not alter engine governing
settings or over-rev the engine, as
excessive speed is dangerous and
can reduce engine life.
USING YOUR MOWER
Attach the G
r
ass Collection Bag
The grass collection bag attaches
easily by lifting the mower’s Rear Flap
with one hand (Fig. 9) and slide the
grass collection bag into position (Fig.
10).
Cutting Height Adjustment
For best results adjust the cutting
height of your mower to suit the
mowing conditions. Do not try to
remove too much grass in one pass.
Adjustment of the cutting height is
made centrally. Turn off the mower
and take the weight of the mower
by lifting. Take hold of the cut height
adjustment lever, positioned on the
mower’s right hand rear wheel.
Move the lever inwards to release
it from its locating notch. Move
the lever down machine to increase
the cutting height.
To reduce the cutting height move the
lever upwards. Return the lever to
the locating notch to set the desired
cutting height.
securely into its serrated holder (Fig.
11).
Mowing
your Lawn
Start your mower (see: Starting
the engine). Keep hold of the Brake
(OPC) Lever (releasing the Brake
(OPC) Lever will stop the engine to
avoid accidents) (Fig. 12). To power
the mower (WERR17SP Only)
forward move the Drive Lever up and
forward (Fig. 13). The mower can be
pushed with the drive disengaged for
more precise handling. After mowing
and emptying the Grass Collection
Bag ensure the engine is not running
and turned off.
Cleaning
your Mower
Cut grass is damp. Regular cleaning
after each use will ensure better
functioning of the mower and reduce
the risk of corrosion or seizure.
the engine to cool then remove
accumulated grass clippings from and
around the engine with a brush. Clean
the grass collection bag annually with
a brush or gentle spray of water and
allow to dry.
Clean underneath regularly -
disconnect the spark plug cap and tilt
the mower backwards. Remove cut
grass with a scraper and a brush.
Do not use a pressure washer or hot
water to clean the mower. Dry off the
machine before storing by leaving it
clean surface to prevent corrosion or
seizure.
Storing
your Mower
Store your mower in a dry, well-
sparks or heat sources. Disconnect the
spark plug cap. Avoid storing beneath a
tarpaulin or similar cover as it may
cause condensation resulting in
corrosion.
Winter Sto
r
age:
Thoroughly clean the mower. Run
the engine outdoors until fuel tank
is empty or empty fuel using a fuel
suction pump. Dispose of discarded
fuel safely and responsibly. Run
the engine until remaining fuel is
consumed.
Remove the spark plug from the
engine. pour a tablespoon of engine
oil into the cylinder. Gently pull the
starter rope several times to distribute
the oil to protect the cylinder over
winter. Replace and tighten the spark
plug.
Tr
ansporting
your Mower
Ensure the fuel tank is empty. Run
the engine until any remaining fuel is
consumed. Allow the engine to cool.
How to cut for best results
For best results cut your lawn in
alternative directions switching
direction each time you cut. Cut your
lawn at an equal and regular height.
Slightly overlap your cutting lines.
WARNING!
WARNING!
!
!
Turn mower off before
adjusting cutting height lever
Turn mower off before cleaning
Fig 9
Fig10
Fig12
Fig13
Fig11
INSTRUCTION MANUAL


