background image


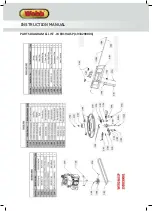
REPLACEMENT PARTS


Please find on the following pages, parts lists and drawings for your machine. Should you require a replacement 

part, please call the Handy Distribution Spares Team on 01793 333212, option 1 for assistance.  


Webb recommends the use of Handy Parts oils, fuel additives, nylon lines pre-packed parts for all our machines. 


TRANSPORT  


Empty the petrol tank  


Always let the engine run until it has used up the remainder of petrol in the tank. 


Empty the engine oil from the warm engine. 


Remove the spark plug boot from the spark plug.  


Clean the cooling fins of the cylinder and the housing. 


Use the original packaging to ship whenever possible. 


TROUBLE SHOOTING 

Refer to the Briggs & Stratton operators manual, supplied with your machine for engine related information. 

PROBLEM 

POSSIBLE CAUSES 

REMEDIAL ACTION 

Engine does not start 

Fuel tank is empty. 

Fill tank with fuel 

Spark plug loose. 

Tighten spark plug. 

Spark plug wire loose or 

disconnected from plug. 

Install spark plug wire on spark plug. 

Spark plug gap is incorrect 

Set correct gap between electrodes. 

Spark plug is defective. 

Install new, correctly gapped plug. 

Carburettor is flooded with 

fuel. 

Remove air filter and pull starter rope 

continuously until carburetor clears itself. Install 

air filter. If problem persists consult local 

Approved Service Dealer. 

Old Fuel 

Fuel becomes stale after 30 days and causes 

residues to build and ‘gunk up’ the carburettor. 

Change with fresh fuel. If problem persists 

consult local Approved Service Dealer. 

Engine runs erratic 

Unit running in start position 

Move throttle lever back to Hare/Fast position 

Spark plug cap loose 

Connect and tighten the spark plug cap 

Blocked fuel line or stale fuel 

Fuel becomes stale after 30 days and causes 

residues to build and ‘gunk up’ the carburettor. 

Change with fresh fuel. If problem persists 

consult local Approved Service Dealer. 

Vent in fuel cap is blocked 

Clean vent 

Water or dirt in fuel system 

Drain fuel tank. Refill with fresh fuel. If problem 

persists consult local Approved Service Dealer. 

Dirty air filter 

Clean air filter 

Carburettor out of adjustment  Visit approved Briggs & Stratton Service Dealer. 

Engine overheats 

Engine oil level low 

Fill engine with 4-stroke SAE30 lawnmower oil. 

Refer to Briggs & Stratton operators manual. 

Air flow restricted 

Visit approved Briggs & Stratton Service Dealer. 

Carburettor out of adjustment  Visit approved Briggs & Stratton Service Dealer. 

Lawnmower will not 

collect grass 

Mulch plug in exit chute 

Remove mulch plug. 

Lawnmower will not 

mulch grass 

Engine speed too low 

Set throttle between ¾ and full throttle. 

Wet grass 

Do not mow when the grass is wet.  

Excessively high grass  

Mow once at a high cutting height, then mow 

again at the desired height or make a narrower 

cutting swath (1/2 width). 

Dull blade 

Sharpen or replace blade. 

Uneven cut 

Wheels not positioned 

correctly 

Place all four wheels in same height position. 

Dull blade 

Sharpen or replace blade. 

INSTRUCTION MANUAL

Summary of Contents for 1938290001

Page 1: ...anger Whilst every effort has been made to ensure the accuracy of information contained in this manual our policy of continuous improvement determines the right to make modifications without prior warning Images are used for illustration purposes only en Original Instructions ASSEMBLY REQUIRED Minimum Two Persons 48cm 19 Self Propelled Petrol Lawnmower WER19ALSP 1938290001 53cm 21 Self Propelled Pet...

Page 2: ...nal use only Commercial copying redistribution hiring or lending is prohibited No part of this publication may be stored in a retrieval system or transmitted in any other form or means without written permission from Handy Distribution In all cases this copyright notice must remain intact 5 January 21 INSTRUCTION MANUAL ...

Page 3: ...he mower is in use Before mowing remove all foreign objects from the lawn which may be thrown by the machine stay alert for any foreign objects which may have been missed These operating instructions must be kept and referred to in order to ensure that the equipment is properly used and maintained The instructions contain valuable information on operating maintenance and servicing conditions WARNI...

Page 4: ... not expose to rain or damp conditions No smoking Do not use near a flame or sparks Hot Surface Running engines produce heat Engine parts especially the exhaust become extremely hot Severe thermal burns can occur on contact Moving Parts Rick of Injury Rotating parts can contact or entangle hands feet hair clothing or accessories Traumatic amputation or severe laceration can result Keep guards in p...

Page 5: ...ally children or pets are nearby 5 The operator or user is responsible for accidents or hazards occurring to other people or their property SAFETY INSTRUCTIONS FOR WORKING WITH LAWNMOWER 1 Do not leave engines running in enclosed spaces where dangerous carbon monoxide could accumulate 2 Operate in daylight or good artificial lighting If possible do not use on overly wet ground 3 Ensure good stabil...

Page 6: ...ing part of the machine may result in personal injury 7 Use safety equipment Always wear eye protection Safety equipment such as a dust mask non skid safety shoes hard hat or hearing protection used for appropriate condition will reduce personal injuries 8 Dress properly Do not wear loose clothing or jewellery Keep your hair clothing gloves away from moving parts Loose clothes jewellery or long ha...

Page 7: ...different from intended could result in a hazardous situation PERSON PROTECTION 1 In case of any injury always proceed in accordance with the principles of first aid 2 If someone is cut cover the wound with a clean cloth press hard to stop the flow of blood 3 Do not let petrol or oil come in contact with your skin Keep petrol and oil away from the eyes If petrol or oil come into contact with the e...

Page 8: ...e air cooled OHV Overhead Valve Engine Displacement 150cc 163cc Rated Engine Power 2 31kW 2 67kW Rated Engine Speed 2900rpm 2900rpm Oil Tank Capacity 0 4L 0 47L Fuel Tank Capacity 0 8L 1 0L Guaranteed Noise Power Level LWA 95 dB A 97 dB A Emission Sound Pressure Level LPA 73 9 dB A uncertainty K 3 dB A 75 8 dB A uncertainty K 3 dB A Vibration ahv 3 896 m s2 uncertainty K 1 5 m s2 4 544 m s2 uncert...

Page 9: ... 7 60L Grass Collector 8 Air Filter Housing 9 Single Height Adjuster Lever 10 Rear Wheel 11 Engine Oil Filler Cap Dipstick 12 Fuel Tank Cap 13 Cutting Deck 14 Spark Plug Cap 15 Recoil Starter Handle 16 Rear Discharge Cover 17 Front Wheel 18 Exhaust Muffler 19 Recoil Guide 20 Throttle Lever 1 2 3 4 5 6 7 8 10 12 13 15 14 16 17 18 9 11 19 20 ...

Page 10: ...r Filter Housing 9 Single Height Adjuster Lever 10 Rear Wheel 11 Engine Oil Filler Cap Dipstick 12 Fuel Tank Cap 13 Cutting Deck 14 Spark Plug Cap 15 Recoil Starter Handle 16 Rear Discharge Cover 17 Front Wheel 18 Exhaust Muffler 19 Recoil Guide 20 Throttle Lever 21 Side Chute 22 Front Bumper 1 2 3 4 5 6 8 12 15 16 19 20 7 9 10 11 13 14 17 18 21 22 INSTRUCTION MANUAL ...

Page 11: ...IMPORTANT INFORMATION NOTE This product is a 4 stroke engine powered machine The engine MUST be filled with recommended 4 stroke SAE30 or 10W 30 air cooled lawnmower engine oil BEFORE starting Fresh unleaded petrol must be used in this unit DO NOT use Ethanol based fuels DO NOT mix oil with fuel ALWAYS REFER TO THE ENGINE MANUAL FOR FULL INSTRUCTIONS WARNING Prior to any assembly disconnect the sp...

Page 12: ...he housing There will be some resistance and do not pull too hard Wrap the Starter rope through the housing and seat the recoil starter housing 4 You can now release the OPC Brake lever CUTTING FUNCTIONS Model Specific NOTE These functions can be converted by changing accessory setting Please see the following chart for detail setting Fitted Mulch Plug WER21ALSP ONLY Grass Collector Side Discharge...

Page 13: ...and place the grass collector hooks over the springs and place into position 2 Lower the grass collector flap to sit onto the grass collector Using the grass collector ensures your cuttings are forced to the back of the collector using air generated by the rotation of the cutting blade Once full stop the machine and turn off the engine Remove the spark plug cap from the spark plug Empty the grass ...

Page 14: ...uttings under the mowing deck producing very fine mulch The cuttings are forced onto the lawn rapidly decomposing putting nutrients back into the soil SIDE DISCHARGE CHUTE WER21ALSP ONLY NOTE When using the side discharge function you need to fit the mulch plug prior to starting the machine 1 Unlock and lift the side discharge cover 2 Hook the side discharge chute onto the lawnmower using the bar ...

Page 15: ...as been pulled from the spark plug To adjust the height of cut the machine has been supplied with a single lever located at the right rear wheel Adjusting the height of cut should only be undertaken when the engine is off and the blade has come to a complete standstill To adjust the height of cut grab the height of cut lever and push it away from the gauge and then lift or lower the lever to the r...

Page 16: ...m Handy Parts A fuel additive added to your fuel at the time of purchase will help make your machine easier to start extend the shelf life of your fuel mixture for up to two years keeps the carburettor engine clean plus reduces emissions and increases fuel economy A 250ml bottle of SURE START FUEL ADDITIVE will treat 25 litres of fuel Only use 4 stroke SAE30 or 10W 30 air cooled lawnmower engine o...

Page 17: ...ecommend the dipstick on the oil filler cap is wiped with a clean cloth and dipped without screwing into the filler neck to ensure the oil level remains between the minimum and maximum marks on the dipstick 5 Replace and tighten the oil filler cap with built in dipstick AMBIENT TEMPERATURES The specification of oil required may change depending on the outdoot temperatures you are operating the mac...

Page 18: ... the throttle lever to its furthest point away from the operator 2 Pull the OPC Brake lever towards the main handle Do not let go 3 Grab the recoil starter handle and pull lightly until resistance is felt then pull rapidly 4 The engine should start 5 Rehouse the recoil starter handle Do not let it go until housed to prevent damage INSTRUCTION MANUAL ...

Page 19: ...d start a flooded engine 1 Release the OPC Brake lever 2 Remove the spark plug dry it and then reinstall it NOTE Install the spark plug carefully by hand to avoid cross threading After the plug is seated tighten 1 8 to 1 4 turn with socket spanner of spark plug to compress the washer 3 Pull the OPC Brake lever towards the upper handle 4 Operate the starter as described above STARTING THE ENGINE WA...

Page 20: ...gine may be flooded with excess fuel Use following procedure to clear and start a flooded engine 1 Release the OPC Brake lever 2 Remove the spark plug dry it and then reinstall it NOTE Install the spark plug carefully by hand to avoid cross threading After the plug is seated tighten 1 8 to 1 4 turn with socket spanner of spark plug to compress the washer 3 Pull the OPC Brake lever towards the uppe...

Page 21: ...engine and allow it to run and warm up See Starting the Engine section of the manual 3 Keep a firm grip on the upper handle with OPC Brake lever always engaged when attempting to cut 4 Pull the Drive lever up to the handle when you wish to self propel EMPTYING THE GRASS BAG As soon as grass clippings start to trail the lawnmower it is time to empty the grass bag NOTE Before taking off the grass co...

Page 22: ...height for the first cut of the season or in drought conditions 6 Do not remove grass debris in the mower deck or on the blade by hand or with your feet Instead use suitable tools such as a brush or broom 7 Check that all nuts bolts and screws are well tightened 8 Before mowing place the grass collector in its position 9 Before mowing make sure that the blade and the blade fixing screw are securel...

Page 23: ...oper maintenance storage of the machine may void your warranty Keep the machine clean for better and safer performance Turn off the engine before performing any maintenance If the engine must be run make sure the area is well ventilated The exhaust emits dangerous carbon monoxide gases MAINTENANCE Use only original equipment replacement parts Other parts may not perform as well may damage the unit...

Page 24: ...of the blade marker with the part number facing to the ground when the lawnmower is in the operating position Slide the blade adaptor onto the engine crankshaft Place the blade onto the blade adaptor Ensure the blade is aligned with and seated on the blade adaptor flange Place washer onto the blade Make sure the notches on the blade bell support are aligned with small holes on the blade Replace th...

Page 25: ...ions within this manual Oil capacity See Specification section of this manual Wash your hands with soap and water after touching used oil NOTE Please dispose of used motor oil in a manner that is compatible with the environment We suggest you put it in a sealed container to your local service for reclamation Do not throw it away into the refuge collection or pour it on the ground or in drains AIR ...

Page 26: ...more thread with the wrench after the washer is compressed If you are mounting an old one you should only screw 1 8 1 4 more thread CAUTION The spark plug must be securely tightened An improperly tightened plug can become very hot and possibly damage the engine Never use a spark plug with an improper heat range CLEANING CAUTION Do not use a water hose or pressure washer to clean the engine Water c...

Page 27: ...gine and let it run until any remaining petrol has been used up 3 Change the oil at the end of every season See removing oil within this manual 4 Clean the cooling fins of the cylinder and the housing 5 Be sure to clean the entire machine to protect the paint 6 Store the machine in a well ventilated place 7 Remove the spark plug Use an oil can to fill approx 20 ml oil into the combustion chamber O...

Page 28: ...rt position Move throttle lever back to Hare Fast position Spark plug cap loose Connect and tighten the spark plug cap Blocked fuel line or stale fuel Fuel becomes stale after 30 days and causes residues to build and gunk up the carburettor Change with fresh fuel If problem persists consult local Approved Service Dealer Vent in fuel cap is blocked Clean vent Water or dirt in fuel system Drain fuel...

Page 29: ...s and drawings for your machine Should you require a replacement part please call the Handy Distribution Spares Team on 01793 333212 option 1 for assistance Webb recommends the use of Handy Parts oils fuel additives nylon lines pre packed parts for all our machines ...

Page 30: ...PARTS DIAGRAM LIST WER19ALSP 1938290001 INSTRUCTION MANUAL ...

Page 31: ......

Page 32: ...INSTRUCTION MANUAL ...

Page 33: ......

Page 34: ...PARTS DIAGRAM WER21ALSP 1938291001 INSTRUCTION MANUAL ...

Page 35: ...PARTS LIST WER21ALSP 1938291001 ...

Page 36: ...as in accordance with EN ISO 5395 1 2013 A1 2018 EN ISO 5395 2 2013 A2 2017 Outdoor Noise Directive 2000 14 EC 2005 88 EC Guaranteed Noise Power Level LWA 95 dB A According to 2000 14 EC Emission Sound Pressure Level LPA 73 9 dB A uncertainty K 3 m s2 Vibration ahv 3 896 m s2 uncertainty K 1 5 m s2 Notified Body TÜV SÜD Product Service GmbH Addresses Ridlerstraße 65 80339 Münich Germany Authorised...

Page 37: ...as in accordance with EN ISO 5395 1 2013 A1 2018 EN ISO 5395 2 2013 A2 2017 Outdoor Noise Directive 2000 14 EC 2005 88 EC Guaranteed Noise Power Level LWA 97 dB A According to 2000 14 EC Emission Sound Pressure Level LPA 75 8 dB A uncertainty K 3 dB A Vibration ahv 4 544 m s2 uncertainty K 1 5 m s2 Notified Body TÜV SÜD Product Service GmbH Addresses Ridlerstraße 65 80339 Münich Germany Authorised...

Page 38: ... using the following pages or at www webbgardenpower co uk By registering your machine you agree to maintain the machine in accordance with the service schedules specified in this manual and services duly recorded Not applicable for Webb electric handheld machines You may be asked to produce this booklet as proof of servicing in the event of a claim Proof of purchase should also be kept as a refere...

Page 39: ...le starter cords Fluids lubricants Spark plugs Blades Lawnmowers Brushcutters Cutter bars Hedgecutters Drive clutch cable surfaces Nylon Lines Line Trimmers Carburettor cleaning Bearings Bushes Electric cable Grass collectors 3 Not covered by this warranty a The warranty policy does not cover any depreciation or damages caused by ordinary wear rusting or corrosion lack of correct maintenance or op...

Page 40: ...s the owner s responsibility to ensure that their Webb machine is maintained at specific intervals Any approved Webb service dealer can undertake a service which are specialised in our products and will be aware of your particular machine and any technical updates which will save valuable time money If you are using your machine in dry dusty or high temperatures you will need to service the machine...

Page 41: ...e actions have been completed PLEASE ENSURE THE SERVICE BOOK IS AVAILABLE FOR THE DEALER DURING SERVICE WORK 1st Service This must be stamped by an approved service dealer to qualify for a free second year warranty Excluding the Webb Electric Handheld machines 24 Months Date Date 36 Months 12 Months Date ...

Page 42: ...Service Record 48 Months Date Date Date Date Date Date Date Date 72 Months 96 Months 120 Months 60 Months 84 Months 108 Months 132 Months INSTRUCTION MANUAL ...

Page 43: ... regarding our products services offers or just opinions which may be used for marketing research or analysis purposes If you wish to be contacted by any of the following methods please tick the relevant boxes Post Telephone Email You may give Webb Lawnmowers notice in writing at any time that you no longer wish to receive direct marketing communications House Number House Name Address 1 Address 2 ...

Page 44: ...Webb Lawnmowers Murdock Road Dorcan Swindon Wiltshire SN3 5HY ...

Reviews: