background image


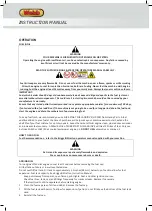
SPARK PLUG  

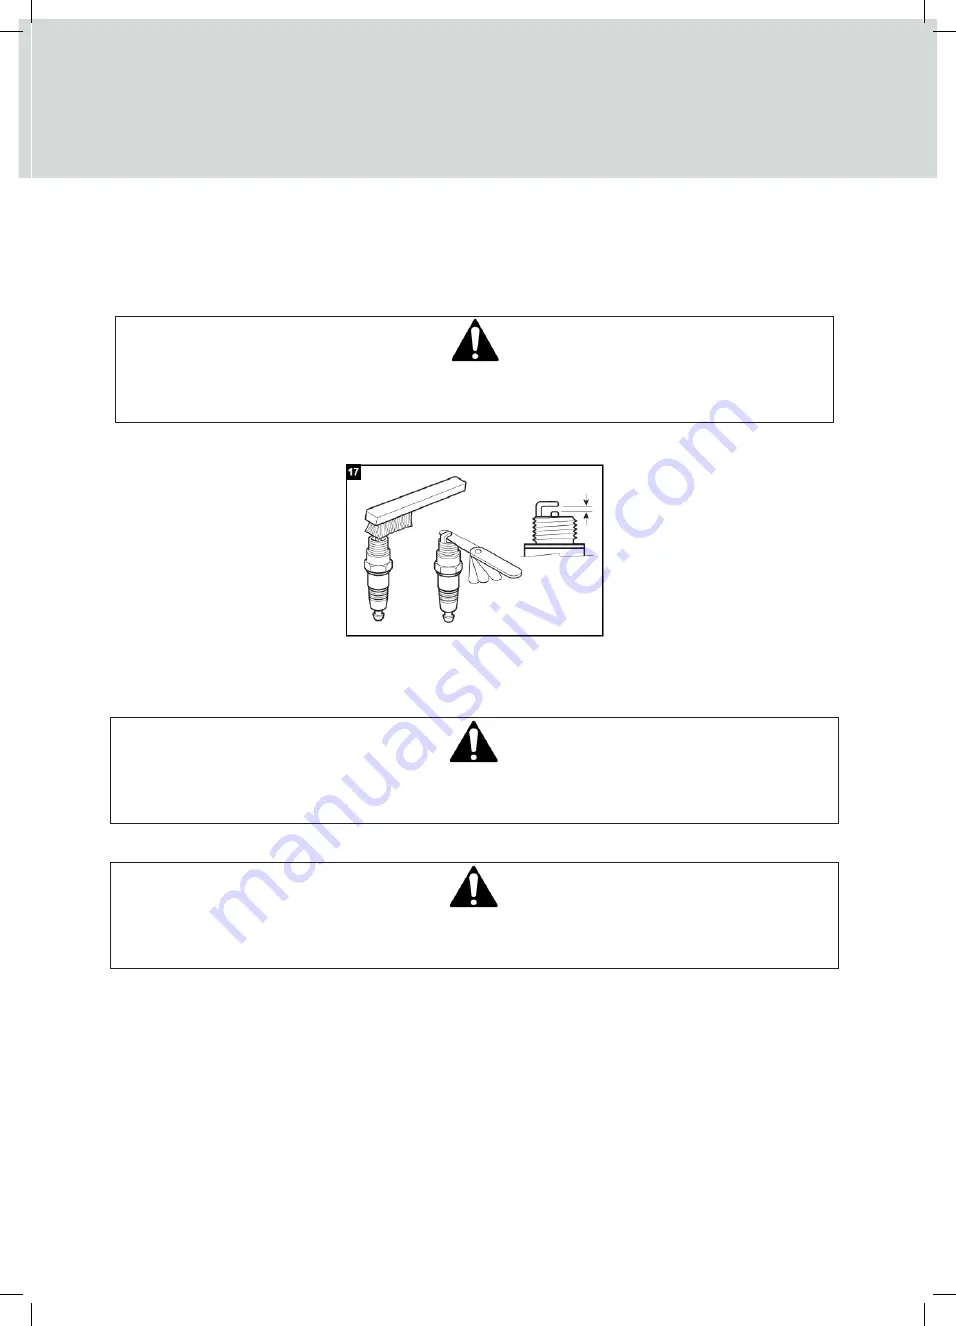
To ensure proper engine operation, the spark plug must be properly gapped and free of deposits. 

1.


Do not attempt to remove the plug from a hot engine in order to avoid possible damage to the threads. 

2.


Remove the spark plug cap. 


WARNING 

If the engine has been running, the exhaust (muffler) will be very hot. Be careful not to touch the exhaust 

(muffler). 

3.


Visually inspect the spark plug. Discard it if the insulator is cracked or chipped. 

4.


Measure the plug gap with a feeler gauge. Specifications of the plug gap can be found  


5.


Attach the plug washer, thread the plug in by hand to prevent cross-threading. 

6.


When mounting a new spark plug, you should screw 1/2 more thread with the wrench after the washer is 

compressed. If you are mounting an old one, you should only screw 1/8-1/4 more thread. 


CAUTION 

The spark plug must be securely tightened. An improperly tightened plug can become very hot and possibly 

damage the engine. Never use a spark plug with an improper heat range. 


CLEANING 


CAUTION 

Do not use a water hose or pressure washer to clean the engine. Water can damage the engine or 

contaminate the fuel system. 


Keep your machine clean. Thoroughly clean the machine at the end of each use, paying attention to 

stones or mud in and around the tines. 


Clean the engine regularly with a cloth or brush. Keep the cooling system (blower housing area) clean to 

permit proper air circulation which is essential to engine performance and life. Be certain to remove all 

dust, dirt and combustible debris from exhaust area. 


STORAGE & TRANSPORT


The following steps should be taken to prepare your machine for storage. 


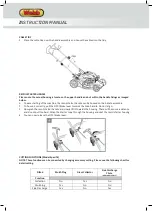
STORING THE LAWNMOWER FOR SHORT PERIODS 

The lawnmower can be stored for short periods of time (less than 15 days) without performing any storage 

maintenance.Before placing the lawnmower into storage always carry out the following: 

1.


Allow the engine to fully cool. 

2.


Ensure the grass collector is empty. 

INSTRUCTION MANUAL

Summary of Contents for 1938323001

Page 1: ...danger Whilst every e ort has been made to ensure the accuracy of information contained in this manual our policy of continuous improvement determines the right to make modi cations without prior war...

Page 2: ...al use only Commercial copying redistribution hiring or lending is prohibited No part of this publication may be stored in a retrieval system or transmitted in any other form or means without written...

Page 3: ...e mower is in use Before mowing remove all foreign objects from the lawn which may be thrown by the machine stay alert for any foreign objects which may have been missed These operating instructions m...

Page 4: ...not expose to rain or damp conditions No smoking Do not use near a flame or sparks Hot Surface Running engines produce heat Engine parts especially the exhaust become extremely hot Severe thermal burn...

Page 5: ...lly children or pets are nearby 5 The operator or user is responsible for accidents or hazards occurring to other people or their property SAFETY INSTRUCTIONS FOR WORKING WITH LAWNMOWER 1 Do not leave...

Page 6: ...ng part of the machine may result in personal injury 7 Use safety equipment Always wear eye protection Safety equipment such as a dust mask non skid safety shoes hard hat or hearing protection used fo...

Page 7: ...ifferent from intended could result in a hazardous situation PERSON PROTECTION 1 In case of any injury always proceed in accordance with the principles of first aid 2 If someone is cut cover the wound...

Page 8: ...roke air cooled OHV Overhead Valve B S 500E Single cylinder 4 stroke air cooled OHV Overhead Valve Engine Displacement 125cc 140cc Rated Engine Power 1 72kW 1 96kW Rated Engine Speed 2800rpm Oil Tank...

Page 9: ...Collector 7 Air Filter Housing 8 Single Height Adjuster Lever 9 Rear Wheel 10 Engine Oil Filler Cap Dipstick 11 Fuel Tank Cap 12 Cutting Deck 13 Spark Plug Cap 14 Recoil Starter Handle 15 Rear Discha...

Page 10: ...Housing 9 Single Height Adjuster Lever 10 Rear Wheel 11 Engine Oil Filler Cap Dipstick 12 Fuel Tank Cap 13 Cutting Deck 14 Spark Plug Cap 15 Recoil Starter Handle 16 Rear Discharge Cover 17 Front Whe...

Page 11: ...iday 8 30am to 5 00pm excl Bank Holidays IMPORTANT INFORMATION NOTE This product is a 4 stroke engine powered machine The engine MUST be filled with recommended 4 stroke SAE30 or 10W 30 air cooled law...

Page 12: ...n handle Do not let go 3 Now grab the recoil starter handle and slowly lift it towards the housing There will be some resistance and do not pull too hard Wrap the Starter rope through the housing and...

Page 13: ...he front and work round the collector Step 2 Continue working from the front and push each lug into position until completed WARNING Do not hit the collector with your hand or any hand tool this will...

Page 14: ...k plug Empty the grass cuttings MULCH PLUG NOTE Mulching stops collection of grass into the rear collector You will find the mulch plug loose in the carton or fitted to the machine If the mulch plug i...

Page 15: ...nly when the engine is switched off the spark plug cap has been pulled from the spark plug To adjust the height of cut the machine has been supplied with a single lever located at the right rear wheel...

Page 16: ...el additive added to your fuel at the time of purchase will help make your machine easier to start extend the shelf life of your fuel mixture for up to two years keeps the carburettor engine clean plu...

Page 17: ...ne minute we recommend the dipstick on the oil filler cap is wiped with a clean cloth and dipped without screwing into the filler neck to ensure the oil level remains between the minimum and maximum m...

Page 18: ...elling areas to make starting safe 2 Press the fuel primer bulb located on the side of the engine within the air filter casing three times 3 Pull the OPC Brake lever towards the main handle Do not let...

Page 19: ...le Do not let go 2 Grab the recoil starter handle and pull lightly until resistance is felt then pull rapidly 3 The engine should start 4 Rehouse the recoil starter handle Do not let it go until house...

Page 20: ...op the lawnmower moving just simply release the drive lever in good time 4 The self propel speed has been set at the factory and cannot be adjusted MOWING WITH GRASS COLLECTOR WARNING Always observe t...

Page 21: ...Instead use suitable tools such as a brush or broom MOWING WITH THE MULCH PLUG NOTE Mulching stops collection of grass into the rear collector 1 Lift the rear cover and remove the grass collector 2 I...

Page 22: ...ne and check thoroughly the mower in order to see if it is damaged Take the machine to a local Approved Service Dealer for inspection if necessary Repairs of this nature are not covered under the Manu...

Page 23: ...anti clockwise that hold the blade and blade boss to the engine crankshaft Remove the blade assembly and the blade adaptor from the crankshaft WARNING Periodically inspect the blade adaptor for cracks...

Page 24: ...this manual Wash your hands with soap and water after touching used oil NOTE Please dispose of used motor oil in a manner that is compatible with the environment We suggest you put it in a sealed cont...

Page 25: ...mproperly tightened plug can become very hot and possibly damage the engine Never use a spark plug with an improper heat range CLEANING CAUTION Do not use a water hose or pressure washer to clean the...

Page 26: ...20 ml oil into the combustion chamber Operate the starter to evenly distribute the oil in the combustion chamber Replace the spark plug 8 Store in a dry clean and frost protected place out of reach of...

Page 27: ...uel Fuel becomes stale after 30 days and causes residues to build and gunk up the carburettor Change with fresh fuel If problem persists consult local Approved Service Dealer Vent in fuel cap is block...

Page 28: ...INSTRUCTION MANUAL...

Page 29: ......

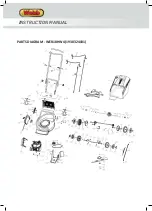
Page 30: ...PARTS DIAGRAM WER18HP4 1938323001 INSTRUCTION MANUAL...

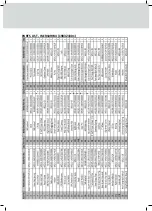
Page 31: ...ear Axle Assembly WE213 22200C030000 1 14 Bolt Hex M8 16 WE213 14 4 53 Thick Sleeve WE213 21041C03000A 2 15 Hex Bolt WE213 15 4 54 W Spring WE213 22061C03D01A 2 16 Left Bracket QG119 13071C03S01B 1 55...

Page 32: ...PARTS DIAGRAM WER18HW4 1938324001 INSTRUCTION MANUAL...

Page 33: ...PARTS LIST WER18HW4 198324001...

Page 34: ...dance with EN ISO 5395 1 2013 A1 2018 EN ISO 5395 2 2013 A2 2017 Outdoor Noise Directive 2000 14 EC 2005 88 EC Guaranteed Noise Power Level LWA 95 dB A According to 2000 14 EC Emission Sound Pressure...

Page 35: ...ordance with EN ISO 5395 1 2013 A1 2018 EN ISO 5395 2 2013 A2 2017 Outdoor Noise Directive 2000 14 EC 2005 88 EC Guaranteed Noise Power Level LWA 95 dB A According to 2000 14 EC Emission Sound Pressur...

Page 36: ...using the following pages or at www webbgardenpower co uk By registering your machine you agree to maintain the machine in accordance with the service schedules speci ed in this manual and services du...

Page 37: ...ter cords Fluids lubricants Spark plugs Blades Lawnmowers Brushcutters Cutter bars Hedgecutters Drive clutch cable surfaces Nylon Lines Line Trimmers Carburettor cleaning Bearings Bushes Electric cabl...

Page 38: ...the owner s responsibility to ensure that their Webb machine is maintained at speci c intervals Any approved Webb service dealer can undertake a service which are specialised in our products and will...

Page 39: ...s have been completed PLEASE ENSURE THE SERVICE BOOK IS AVAILABLE FOR THE DEALER DURING SERVICE WORK 1st Service This must be stamped by an approved service dealer to qualify for a free second year wa...

Page 40: ...Service Record 48 Months Date Date Date Date Date Date Date Date 72 Months 96 Months 120 Months 60 Months 84 Months 108 Months 132 Months INSTRUCTION MANUAL...

Page 41: ...regarding our products services o ers or just opinions which may be used for marketing research or analysis purposes If you wish to be contacted by any of the following methods please tick the relevan...

Page 42: ...Webb Lawnmowers Murdock Road Dorcan Swindon Wiltshire SN3 5HY...

Reviews: