background image


ADJUSTMENTS 

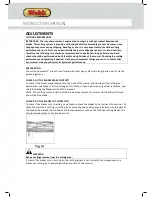
CUTTING PERFORMANCE 
IMPORTANT: The stay sharp system is engineered to cut grass without contact between the 

blades. This cutting system is precision set during the factory assembly process. However, since 

slippage may occur during shipping, handling or use, it is very important to check the cutting 

performance prior to first use and periodically thereafter. Slippage can occur in two directions, 

therefore the following two checks ae recommended to evaluate cutting performance. Both 

checks should be performed on both the left and right sides of the mower. Checking the cutting 

performance and adjusting if needed, are the most important things you can to to ensure that 

your mower always performs to its optimum performance. 
 

PREPARATION 

You will need several 1” wide strips of standard printer paper, A4 size in length and a pair of sturdy 

gardening gloves. 


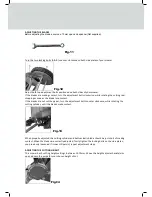
CHECK 1: DO THE BLADES MAKE CONTACT? 

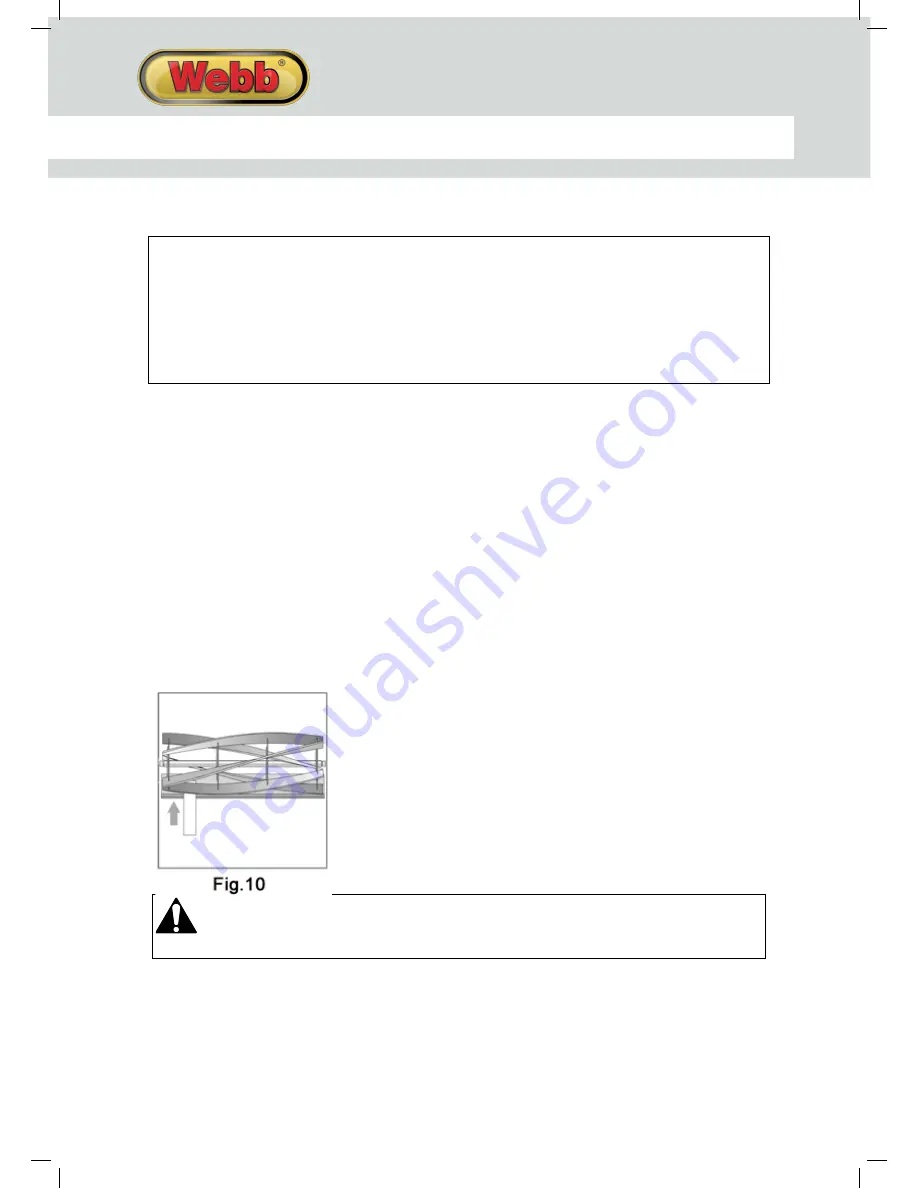
To check if the blades make contact, face the front of the mower and slowly pull the cutting reel 

downwards, one blade at a time, through a full rotation. If you hear scrapping or feel resistance, skip 

the to Adjusting the Blade section of this manual. 

NOTE: If the cutting reel and static bottom blade make contact, the mower will be difficult to push 

and will dull the blade. 


CHECK 2: DO THE BLADES CUT CORRECTLY? 

To check if the blades cut correctly, you will need to check the blades on both sides of the mower. To 

check the machine is cutting correctly, place a piece of good quality paper, along the whole length of 

the fixed bottom blade (from underneath the lawnmower), with each of the five cutting blades. This 

should provide evidence of a good even cut. 


WARNING  

Keep your fingers away from the cutting area. 
If most of the blades cut on both sides, the cutting system is set correctly. If you experience any 

blades not cutting, go to Adjusting the Blade section of this manual. 


INSTRUCTION MANUAL

Summary of Contents for WEH18

Page 1: ...cular attention to the safety instructions before use The manufacturer reserves the right to change the product specification and livery according to continues product improvements Operator s Manual Push Rear Roller Cylinder Lawnmower WEH18 193880002 ...

Page 2: ......

Page 3: ...CONTENTS SPECIFICATIONS SAFETY INSTRUCTIONS MAINTENANCE STORAGE COMPONENTS ASSEMBLY OPERATION TROUBLE SHOOTING PARTS DIAGRAM LIST WARRANTY DECLARATION OF CONFORMITY ...

Page 4: ...3880002 Height of Cut 25mm 76mm Collector 22 litre Number of Blades 5 Blade Material Hardened Steel The manufacturer reserves the right to change the product specification and livery according to continued product improvements INSTRUCTION MANUAL ...

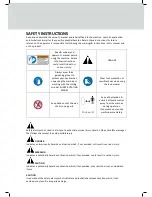
Page 5: ...r sensible shoes when using the lawnmower Keep hands out of the way of all moving parts 6m Keep all bystanders animals at least 6 metres away from the machine during operation If approached stop the machine immediately Safety alert symbol Used to alert you to potential personal injury hazards Obey all safety messages that follow this symbol to avoid possible injury DANGER Indicates an imminently h...

Page 6: ...use whilst barefoot or wearing open toed footwear KEEP BYSTANDERS AND CHILDREN AWAY Keep unauthorised persons a minimum distance of 6 metres away from the machine Do not allow children to handle use or climb on the lawnmower DO NOT OVERREACH Keep proper footing and balance at all times particularly if using on slopes The lawnmower should not be used on steep slopes and always be sure of footing AV...

Page 7: ...when damaged by foreign objects to maintain performance CLEANING Keep your lawnmower clean Thoroughly clean the lawnmower at the end of each use paying attention to grass cuttings in and around the wheels roller and blades We suggest regular application of multi purpose oil or lubricant i e WD 40 This should be applied to all cutting surfaces and cutting reel axle shaft Never put hands inside the ...

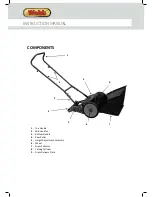
Page 8: ...2 3 4 9 8 COMPONENTS 1 Top Handle 2 Mid Handles 3 Bottom Handle 4 Rear Roller 5 Height Adjustment Assembly 6 Wheel 7 Grass Collector 8 Cutting Cylinder 9 Grass Delivery Plate 1 5 6 7 INSTRUCTION MANUAL ...

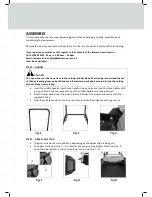
Page 9: ... gardening gloves on both hands and the lawnmower body is secured to stop the cutting cylinder blade from rotating Insert the middle handles into the top handle Line up holes and insert bolt and tighten with wing nut Ensure the concaved section of the middle handles are facing inwards Slot the lower handle over the pins on the main body of the mower and secure with the supplied E Clips Align the m...

Page 10: ...urdy gardening gloves CHECK 1 DO THE BLADES MAKE CONTACT To check if the blades make contact face the front of the mower and slowly pull the cutting reel downwards one blade at a time through a full rotation If you hear scrapping or feel resistance skip the to Adjusting the Blade section of this manual NOTE If the cutting reel and static bottom blade make contact the mower will be difficult to pus...

Page 11: ...e rotating the cutting cylinder until the blades make contact When properly adjusted the cutting cylinder and bottom static blade should be just short of making contact When the blades are correctly adjusted firmly tighten the locking bolts on the side plates you previously loosened If issues still persist repeat adjustment steps ADJUSTING THE CUTTING HEIGHT This mower has 9 cutting height setting...

Page 12: ...venness in the soil surface which can build up if you always mow in the same direction MOWING TIPS Prior to any cutting check the cutting area for any debris in advance Remove stones bricks trash and other debris which could cause damage to the cutting blade If you hit debris check the blades If damaged refer to your nearest approved service dealer for assistance To maintain a healthy lawn and eli...

Page 13: ...urpose oil or lubricant i e WD 40 This should be applied to all cutting surfaces and cutting reel axle shaft Never put hands inside the cylinder when it is rotating STORAGE For years of trouble free service make sure the lawnmower is clean and dry beforestoring Before storing clean the lawnmower thoroughly as indicated above Store indoors or in a protected area during severe weather and winter mon...

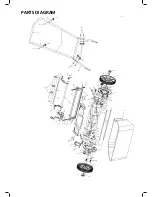
Page 14: ...PARTS DIAGRAM ...

Page 15: ...er 1 12 WE105 12 Reel Assembly 1 39 WE105 39 Knob 6 13 WE105 13 Cutter Bar Assembly 1 40 WE105 40 Lock Nut M10 2 14 WE105 14 Hex Bolt M8X55 2 41 WE105 41 Head Bolt M6X12 1 15 WE105 15 Right adjuster plate 1 42 WE105 42 Washer 6 9 16 WE105 16 Right Side Plate Assembly 1 43 WE105 43 Screw M6X14 1 17 WE105 17 Right Gear 1 44 WE105 44 Washer 10 1 18 WE105 18 E Ring 12 2 45 WE105 45 Carriage Bolt M8X50...

Page 16: ...nformity assessment procedure followed was in accordance with EN ISO 12100 2010 Notified Bodies Global Testing Services Ltd No 968 Meilong West Road Minhang District Shanghai 201104 Shanghai BVCE Certification Testing Technologies Co Ltd 4D1th Building Dongming Square Lujiazui Pudong New Area Shanghai City China Authorised signatory and technical file holder Date 27 09 2017 Signature Name Mr Simon...

Page 17: ...NOTES ...

Page 18: ...register your machine using the following pages or at www webbgardenpower co uk By registering your machine you agree to maintain the machine in accordance with the service schedules specified in this manual and services duly recorded You may be asked to produce this booklet as proof of servicing in the event of a claim Proof of purchase should also be kept as a reference Ensure you have the follow...

Page 19: ...by this warranty a The warranty policy does not cover any depreciation or damages caused by ordinary wear rusting or corrosion lack of correct maintenance or operation misuse abuse lack of transportation or accident b The warranty policy does not cover any costs necessary for the standard periodic maintenance services instructed by the operators manual or service parts replacement which would incl...

Page 20: ...hich are specialised in our products and will be aware of your particular machine and any technical updates which will save valuable time money If you are using your machine in dry dusty or high temperatures you will need to service the machine more regularly Fuel Due to ongoing efforts by fuel companies to reduce emissions unleaded petrol will oxidize deteriorate in storage overtime leaving resid...

Page 21: ...en the correct service actions have been completed PLEASE ENSURE THE SERVICE BOOK IS AVAILABLE FOR THE DEALER DURING SERVICE WORK 1st Service This must be stamped by an approved service dealer to qualify for a free second year warranty 24 Months Date Date 36 Months 12 Months Date SERVICE BOOK ...

Page 22: ...Service Record 48 Months Date Date Date Date Date Date Date Date 72 Months 96 Months 120 Months 60 Months 84 Months 108 Months 132 Months A A H E Pe P We pro inf pa for If y If y Yo INSTRUCTION MANUAL ...

Page 23: ...t to your and or your machine We value your trust by giving us this information about yourself and we are committed to protecting your privacy From time to time Webb its associated companies authorised dealers or third parties working on our behalf may wish to contact you regarding our products services offers technical improvements or just opinions which may be used for marketing research or anal...

Page 24: ...Webb Lawnmowers Murdock Road Dorcan Swindon Wiltshire SN3 5HY ...

Reviews: