background image

Setting Up Websense V-Series Appliances

40 

 Websense V-Series Appliances

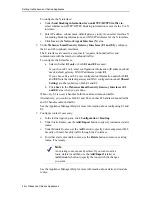
To configure the N interface:

a.

Under 

Send blocking information for non-HTTP/HTTPS traffic via

select whether non-HTTP/HTTPS blocking information is sent via the C or N 
interface.

b.

Enter IP address, subnet mask, default gateway (only if you select interface N 
for sending blocking information), and DNS IP addresses for the N interface.

c.

Click 

Save

 in the 

Network Agent Interface (N)

 area.

8.

Under 

Websense Email Security Gateway Interfaces (E1 and E2)

, configure 

the E1 and E2 (optional) interfaces.

The E interfaces are used to accept users’ requests (inbound traffic) and 
communicate with the Internet (outbound traffic).

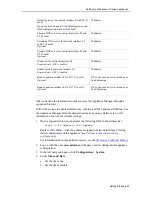
To configure the E interfaces:

a.

Select whether 

E1 only

 or both 

E1 and E2

 are used.

If you choose E1 only, enter configuration information (IP address, subnet 
mask, default gateway, DNS IP addresses) under 

E1

.

If you choose E1 and E2, enter configuration information under both 

E1


and 

E2

. Note that default gateway and DNS configuration (under 

Shared 

Setting

) are shared between both E1 and E2.

b.

Click 

Save

 in the 

Websense Email Security Gateway Interfaces (E1 

and E2) 

area when you are done.

When only E1 is used, it handles both inbound and outbound traffic.

Alternatively, you could use both E1 and E2 such that E1 handles inbound traffic 
and E2 handles outbound traffic.

See the Appliance Manager Help for more information about configuring E1 and 
E2.

9.

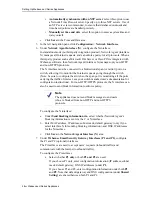
Configure routes if necessary:

a.

In the left navigation pane, click 

Configuration > Routing

.

b.

Under Static Routes, use the 

Add/Import

 button to specify customized, static 

routes.

c.

Under Module Routes, use the 

Add

 button to specify non-management Web 

Security or Email Security traffic through the C interface.

d.

For either static or module routes, use the 

Delete

 button to remove existing 

routes, if necessary.

See the Appliance Manager Help for more information about static and module 
routes.

Note

An existing route cannot be edited. If you want to edit a 
route, delete it and then use the 

Add/Import

 (static) or 

Add

 (module) button to specify the route with the changes 

you want.

Summary of Contents for V10000 G2

Page 1: ...Getting Started v7 6 1 and higher v7 6 x Websense V Series Appliance V10000 G2 V10000 G3 and V5000 G2...

Page 2: ...rks of Intel Corporation This product includes software developed by the Apache Software Foundation www apache org Copyright c 2000 The Apache Software Foundation All rights reserved Other product nam...

Page 3: ...3 Set up the appliance hardware 13 V10000 V10000 G2 and V10000 G3 hardware setup 13 V10000 V10000 G2 V10000 G3 Web mode with Web Security Gateway 14 V10000 G2 V10000 G3 Email mode 14 V10000 G2 and V10...

Page 4: ...0 G2 Email mode 34 V10000 G2 and V10000 G3 Web and Email mode with Web Security Gateway 36 V10000 G2 and V10000 G3 Web and Email mode with Web Security 42 V5000 G2 Web and Email mode with Web Security...

Page 5: ...figuration and network settings System administration tools for patch management troubleshooting and backup and restore Customization of subscribed features such as proxy caching Web filtering and ema...

Page 6: ...nce you must first restore it to its factory image Then run firstboot after re imaging and select a different security mode See Restoring to Factory Image It is always a best practice to perform a ful...

Page 7: ...n Service Network Agent Web Security Gateway If you configure Web Security Gateway during firstboot then your appliance also includes Websense Content Gateway On an appliance in Web mode only TRITON U...

Page 8: ...ver are performed by off appliance components Software that runs off appliance The Websense components mentioned in this section must be installed off appliance Additionally Microsoft SQL Server must...

Page 9: ...dpoint agent Printer agent The crawler Integration agent Email components The following Email Security Gateway components never run on the appliance They are Windows only components TRITON Email Secur...

Page 10: ...Infrastructure is comprised of common user interface logging and reporting components required by the TRITON modules TRITON Infrastructure also optionally includes SQL Server 2008 R2 Express that may...

Page 11: ...N Email Security is used to configure and manage general system properties administrator roles user directories email filtering email policies and Personal Email Manager end user facility options It i...

Page 12: ...with your Websense subscription Refer to Microsoft documentation for installation and configuration instructions If you do not have SQL Server you can use the Websense Installer to install SQL Server...

Page 13: ...iance hardware The Quick Start poster which comes in the appliance shipping box shows you all items included in each Websense appliance shipment The 2 page Quick Start poster explains how to set up th...

Page 14: ...l databases are downloaded from Websense servers through these interfaces Ensure that E1 and E2 if used is able to access the download servers at download websense com Make sure the above address is p...

Page 15: ...ion varies slightly depending on the security mode you choose for the appliance V5000 G2 Web mode with Web Security Gateway Network interface C must be able to access a DNS server This interface typic...

Page 16: ...be able to access the mail server V5000 G2 Email mode Interface P1 and P2 if used must be able to access a DNS server These interfaces typically have continuous access to the Internet once the applian...

Page 17: ...nse Web Security Web Security Gateway Web Security Gateway Anywhere Hostname example appliance domain com IP address for network interface C Subnet mask for network interface C Default gateway for net...

Page 18: ...es using Web Security Gateway Email mode Appliance Manager Web and Email mode Appliance Manager Content Gateway Manager for sites using Web Security Gateway Integration method for this appliance for s...

Page 19: ...ccess the Appliance Manager To reach the Logon Portal open a supported browser and enter this URL in the address bar http IP address Replace IP address with the address assigned to network interface C...

Page 20: ...ateway Models V10000 G2 and V10000 G3 also offer expansion interfaces E1 and E2 that can be bonded with P1 and P2 respectively either for load balancing or active standby If you use the P2 interface t...

Page 21: ...mask for network interface P2 Required only if P2 is enabled Subnet mask Choose interface for transporting blocking information for non HTTP and non HTTPS traffic interface C or interface N Choose on...

Page 22: ...ime Protocol server Specify up to three NTP servers Use of an NTP server is recommended to ensure that database downloads and time based policies are handled precisely Full policy source IP address Th...

Page 23: ...inbound traffic and P2 handles outbound traffic To enable this configuration be sure to set appropriate routing rules for P1 and P2 on the Configuration Routing page For example you might set outboun...

Page 24: ...each Websense Content Gateway interface P1 and P2 independently You do not have to bond at all You do not have to bond both Also you can choose different bonding modes for P1 and P2 for example P1 E1...

Page 25: ...erver can run in multiple locations Choose User directory and filtering if the appliance currently being configured is not the location of the policy information but will run Policy Server and User Se...

Page 26: ...odule of the TRITON Unified Security Center Data Security or Email Security modules the TRITON Unified Security Center must be installed on a separate machine from the appliance In this case be sure t...

Page 27: ...server for network interface N Optional IP address Full policy source IP address This appliance provides choose one Full policy source User directory and filtering you must specify the IP address of a...

Page 28: ...select this option to enter a system time and date yourself c Click Save in the Time and Date area 5 In the left navigation pane click Configuration Network Interfaces 6 Under Network Agent Interface...

Page 29: ...y Database for your deployment will run on the appliance being configured Only one appliance in the network runs these two components as well as the other filtering components Policy Server must also...

Page 30: ...ty Center runs on this appliance TRITON Web Security is the Web Security module of the TRITON Unified Security Center For a Web Security deployment you can choose to run the TRITON Unified Security Ce...

Page 31: ...Secondary NTP server domain Optional Domain Tertiary NTP server domain Optional Domain IP address for network interface E1 IP address Subnet mask for network interface E1 Subnet mask Default gateway...

Page 32: ...ourself c Click Save in the Time and Date area 5 In the left navigation pane click Configuration Network Interfaces 6 Under Websense Email Security Gateway Interfaces E1 and E2 configure the E1 and E2...

Page 33: ...and from the primary interface is balanced between the primary interface E1 and its bonded interface P1 c Click Save in the Expansion Interfaces P1 and P2 area To bond P2 to E2 Follow the instructions...

Page 34: ...NTP server Optional Be sure that interface C can access the NTP server If interface C does not have Internet access you can install an NTP server locally on a subnet that can be accessed by interface...

Page 35: ...Network Interfaces 6 Under Websense Email Security Gateway Interfaces P1 and P2 configure the P1 and P2 optional interfaces The P interfaces are used to accept users requests inbound traffic and commu...

Page 36: ...r Email mode they cannot be bonded when the appliance is in Web and Email mode If you use the P2 interface the P1 interface is bound to eth0 and the P2 interface is bound to eth1 Keep this in mind whe...

Page 37: ...nterface P2 Required only if P2 is enabled IP address Subnet mask for network interface P2 Required only if P2 is enabled Subnet mask Choose interface for transporting blocking information for non HTT...

Page 38: ...a Set the time zone b Set the time and date Automatically synchronize with an NTP server select this option to use a Network Time Protocol server Specify up to three NTP servers Use of an NTP server...

Page 39: ...nario P1 should not be used for outbound traffic For additional information on clusters see the Content Gateway Manager Help 7 Under Network Agent Interface N configure the N interface The N interface...

Page 40: ...both E1 and E2 Note that default gateway and DNS configuration under Shared Setting are shared between both E1 and E2 b Click Save in the Websense Email Security Gateway Interfaces E1 and E2 area whe...

Page 41: ...the full policy source a machine running Policy Broker If the full policy source is another appliance enter the IP address of its C network interface Choose Filtering only if the appliance being confi...

Page 42: ...rface C Domain Secondary NTP server Optional Domain Tertiary NTP server Optional Domain Choose interface for transporting blocking information for traffic interface C or interface N If interface N tra...

Page 43: ...in and the password set during initial appliance configuration 3 In the left navigation pane click Configuration System 4 Under Time and Date a Set the time zone b Set the time and date Default gatewa...

Page 44: ...onitoring all the ports carrying the traffic of interest see your switch manufacturer s documentation for configuration instructions For non HTTP HTTPS protocols the N interface can also be used to se...

Page 45: ...and module routes 9 Select the policy mode of this appliance a In the left navigation pane click Configuration Web Security Components b Specify the role of this appliance with respect to Websense Web...

Page 46: ...11 Click Log Off at the top right when you are ready to log off Appliance Manager V5000 G2 Web and Email mode with Web Security After completing the initial configuration required by the firstboot sc...

Page 47: ...d set during initial appliance configuration 3 In the left navigation pane click Configuration System 4 Under Time and Date a Set the time zone b Set the time and date Secondary DNS server for network...

Page 48: ...onitoring all the ports carrying the traffic of interest see your switch manufacturer s documentation for configuration instructions For non HTTP HTTPS protocols the N interface can also be used to se...

Page 49: ...and module routes 9 Select the policy mode of this appliance a In the left navigation pane click Configuration Web Security Components b Specify the role of this appliance with respect to Websense Web...

Page 50: ...e appliance s C network interface 10 Click Save 11 Click Log Off at the top right when you are ready to log off Appliance Manager Install off appliance or optional components After the appliance has b...

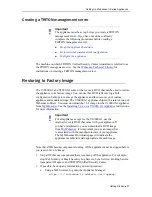
Page 51: ...ust be stopped before you reset to factory image 1 Stop all Websense components that are running off the appliance For example stop Web Security or Email Security Log Servers Sync Service Linking Serv...

Page 52: ...he on screen instructions at the terminal and provide the necessary information See Perform initial command line configuration for details about what information is requested 10 Restore the backed up...

Reviews: