background image

`çãéäÉíÉ=háí==^`qolp=
`çãéäÉíáçå=çÑ=~ëëÉãÄäó=Öêçìéë


1392

1389

718 

655 

1032

1034

1033

228 

573 

574 

574 

573 

729 

728 

731 

727 

632 

632 

NS


cáå~ä=~ëëÉãÄäó=

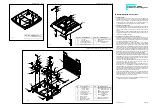
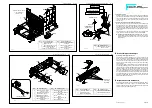
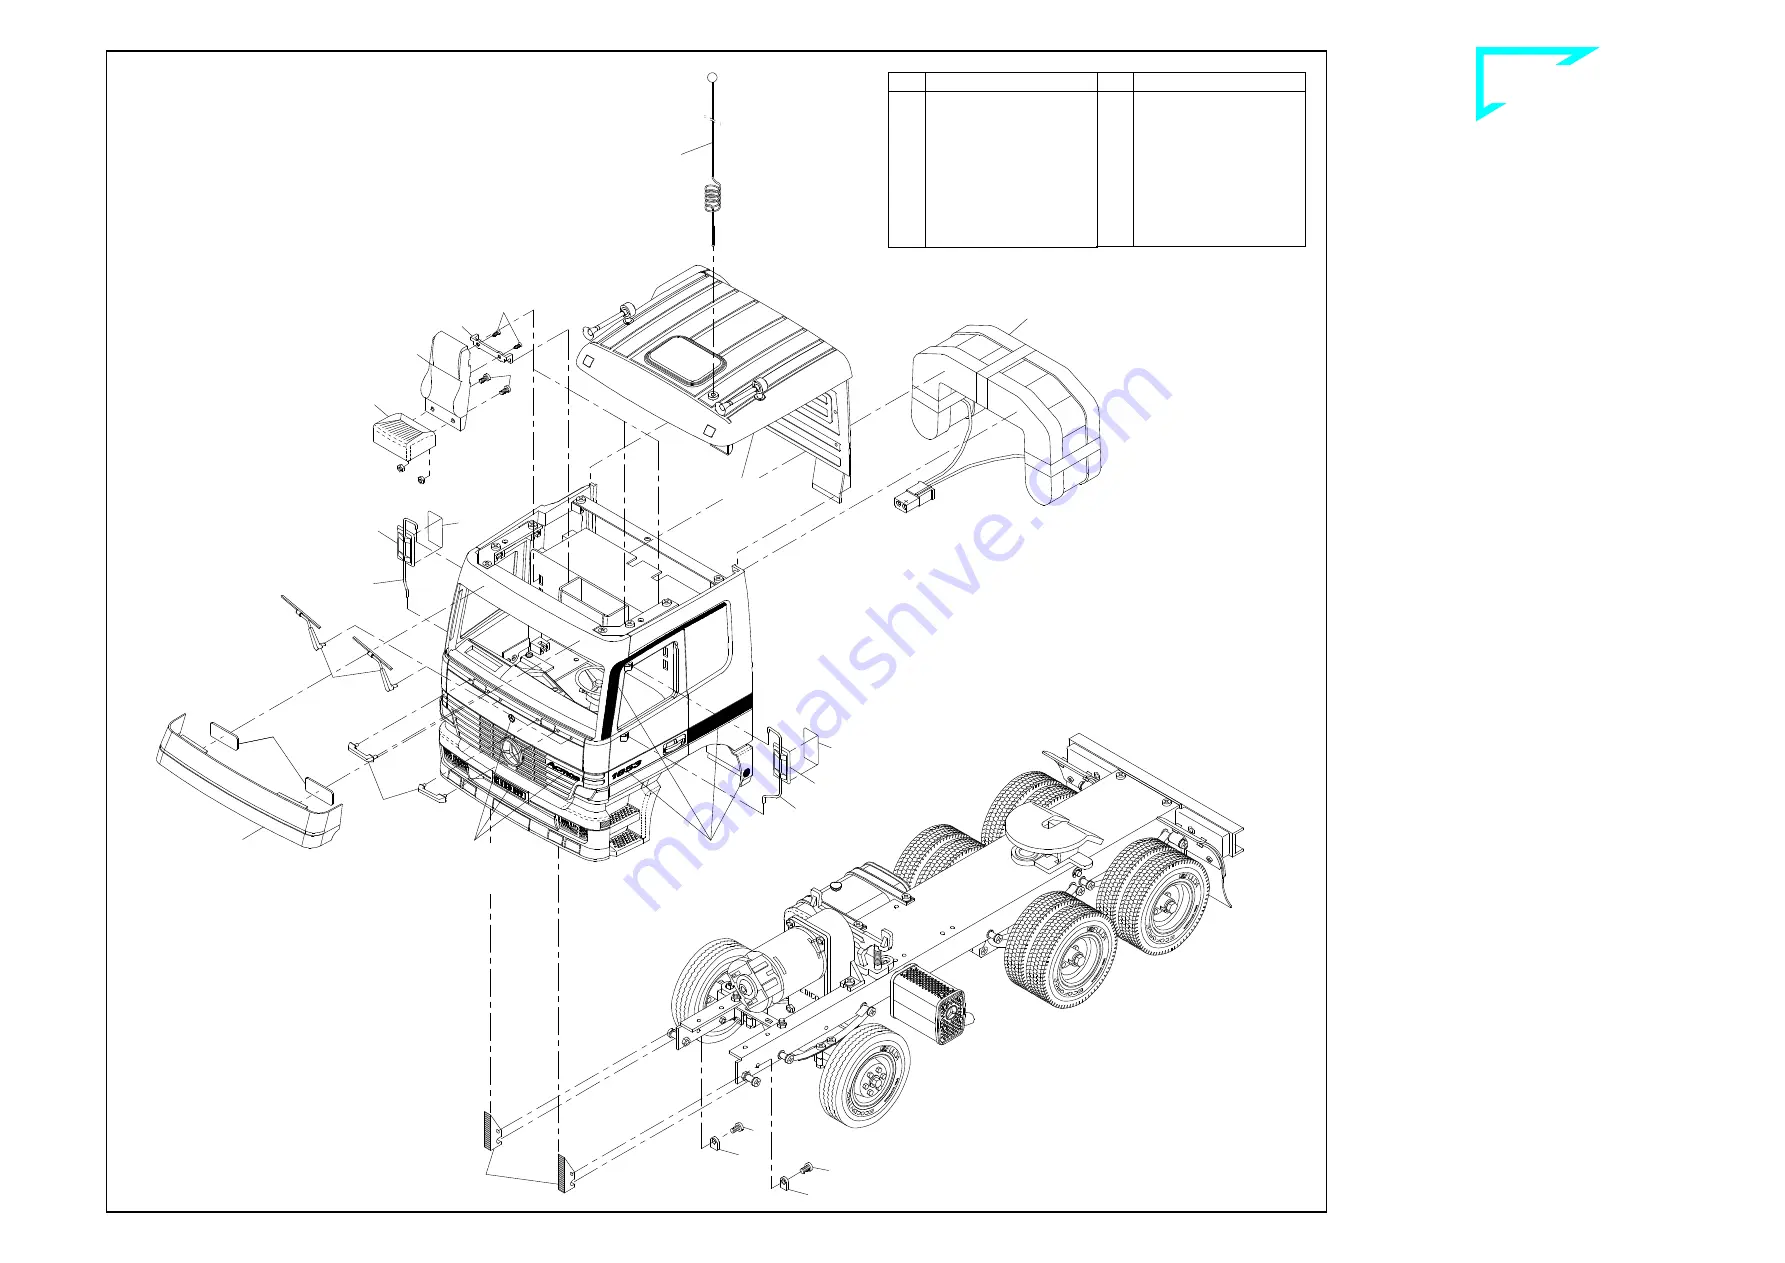
16.1 Attachment of the cab onto the frame 

Attach  the  cab  by  fixing  the  front  panel  onto  the  frame.  Open  slots  
at the flange on the bottom of the front panel serve for this purpose: 
Slide  them  onto  those  bushings  screwed  onto  the  front  frame  (see 
notes  below),  and  then  fix  them  with  two  hinge  supports  632  and  
with screws 1. Thus the cab tilts forwards. 

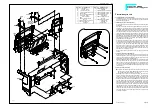
16.2 Mounting the seats 

Use  screws  1  and  nuts  M3  to  attach  the  seat  socket  729  onto  the 
seat back 728. With two screws 727 fix the U-bow 731 onto the lower 
fixing holes of the seat back. Hang the mounted seats into the slots of 
the seat rear panel. 

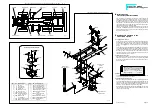
16.3 Attachment of battery and roof 

From  the  rear  set  first  the  battery  1392  into  the  cab.  The  space  be-
tween  battery  and  battery  plate  may  serve  for  the  installation  of  a 
Diesel Engine Sound, Art.-No. 193.  

As  described  before,  the  proper  roof  is  not  fixed  directly  to  the  cab. 
From  top  slide  the  rear  panel  -previously  mounted  to  the  roof-  be-
tween both side panels; that pigot mounted to the roof serves for se-
curing  it.  The roof gets locked by turning those door locks you have 
added above the doors. 

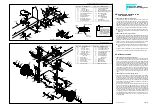
16.4 Attaching the small exterior components 

As shown in the illustration add now all stickers you have chosen for 
your cab from the decal sheet 1014

Press the two windscreen wipers 228 and the two front handles 1032 
into  the  holes  at  the  front  panel.  The  sun  visor  1389  is  attached 
above the windshield with two adhesive pads 655. Insert the antenna 
718  into  the  antenna  socket  after  sliding  the  ball  onto  the  tip  of  the 
antenna. 

Finally add the side mirrors. Stick the reflector foil 574 onto the mirrors 
573  and  press  them  onto  the  mirror  supports  1033  and  1034.  Hang 
on  the  complete  mirror  to  the  mirror  supports  you  have  already 
mounted to the doors. 


80-e.DOC / K-Actros 

Page  12


Final assembly       ill.  16 

B-80-10a 
B-80-10b 

Assembly group Roof 

Stickers to be 

taken off the  

decal sheet 1014 

Stickers to be 

taken off the  

decal sheet 1014 

Fixing part on the front panel 

flange of the fully assembled cab 

Qty. 

No.  Assembly part 

729  Socket, bucket seat 

731  U-bow, bucket seat 

1014  Decal sheet  ACTROS 

1032  Front handle  ACTROS 

1033  Mirror support -lh-   

ACTROS 

1034  Mirror support -rh-   

ACTROS 

1389  Sun visor ACTROS 

1392  12V battery ACTROS 


Qty. 

No.  Assembly part 

1  Screw  M3 x 6 

228  Windscreen wiper -lh- 

228  Windscreen wiper -rh- 

573  Mirror black 

574  Reflector foil 

632  Scharnierhalter 

655  Klebepad, doppelseitig 

718  Antenna with ball  

727  Countersunk tapping 

screw  2.2 x 6.5 

728  Back, bucket seat 


Summary of Contents for 80 white

Page 1: ...motor rated voltage 12 volts 7 segment collector Idling speed 6000 rpm Torque 5 Ncm approx 500 pcm at 4000 rpm Power drawn under load at max torque approx 3 A Idling power consumption with connected g...

Page 2: ...x 8 Part no 17 M3 x 35 Part no 949 M3 x 25 Part no 6 M3 x 20 Part no 5 M3 x 16 Part no 4 M3 x 12 Part no 3 M3 x 10 Part no 57 M3 x 8 Part no 2 M3 x 6 Part no 1 Self cutting screw M3 x 8 Part no 111 Se...

Page 3: ...ix it with a further pin 827 Afterwards the shorter leg note the corresponding mark of the hinge 973 has to be added to the other hinges in the same way 4th step Attention The holes on the supports 97...

Page 4: ...locking sheet by using each one bolt 1046 and screws 742 Build another similar post onto the guide sheet 996 as the hole is not central please note the correct side di mension in the illustration is o...

Page 5: ...d bottom of the outer left blinker lens 1008 fit into the slots in the grooves on the left bumper side Now set the left hand lamp housing 1006 that way onto the fix ing domes inside the bumper that th...

Page 6: ...to the side panel by moving the supports you achieve the final adjustment Press the windscreen 1019 into the front panel For this purpose slide the screen from inside into the groove on the left side...

Page 7: ...uts M3 to attach the servo supporting angle un derneath the frame 9 3 Mounting the PCB support Use two adhesive pads 655 to affix the PCB support 723 behind the servo supporting angle under the frame...

Page 8: ...en inserted Before tightening down the screws 5 ensure that the spring sets are not under tension and can move freely 11 2 Mounting the wheels and steering linkage First mount the standard tyres 53 on...

Page 9: ...inserted one square nut 12 each into the grooves at the side of the differential the springs can be attached with screws 1 The differential has two cams on the wheel mounts the grooves in the hubs ar...

Page 10: ...by approx 2 mm and afterwards to unscrew them again First press the outer exhaust panel 1040 into the slot on the lower exhaust half shell 1042 and then mount the exhaust pipe 1043 with one screw 57 a...

Page 11: ...4 to connect from underneath the following parts left mud flap 1027 fixing device of the fender and lower rear panel The fixing device of the fender has to be secured at the following points with one...

Page 12: ...aching the small exterior components As shown in the illustration add now all stickers you have chosen for your cab from the decal sheet 1014 Press the two windscreen wipers 228 and the two front hand...

Page 13: ...he current to 750 mA and will disable the circuit in case of an overload or short Switching off the supply voltage for about one second will reset this element provided that the reason for the malfunc...

Page 14: ...ontrol LED starts blinking again This signifies that the programming procedure of the speed controller has been completed The transmitter of the RC unit has successfully detected the pulse coming from...

Page 15: ...ousing lh ACTROS 27018 1 1007 Headlight housing rh ACTROS 27020 1 1008 Blinker lens outside lh ACTROS 27026 1 1009 Blinker lens outside rh ACTROS 27028 1 1010 Blinker lens lh ACTROS 27030 1 1011 Blink...

Reviews: