`çãéäÉíÉ=háí==^`qolp=
`çãéäÉíáçå=çÑ=~ëëÉãÄäó=Öêçìéë
72
71
1
21
57
57
723
655
655
710
709
2
1
25
73
25
709
342
342
341
44
74
46
341
47
908
908
13
13
1390
789
30
3
13
26
13
13
26
13
3
32
33
18
20
27
52
20
2
29
36
55
19
19
2
20
5
18
20
27
52
53
53
29
30
30
36
5
32
33
13
3
13
26
3
13
13
26
109
41
42
4
41
41
41
42
4
34
34
NM
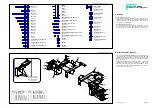
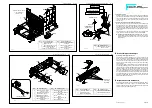
`çãéçåÉåíë=~íí~ÅÜÉÇ=íç=íÜÉ==
êÉ~ê=Ñê~ãÉ=ëÉÅíáçå=
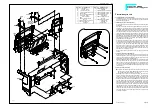
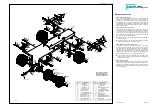
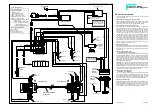
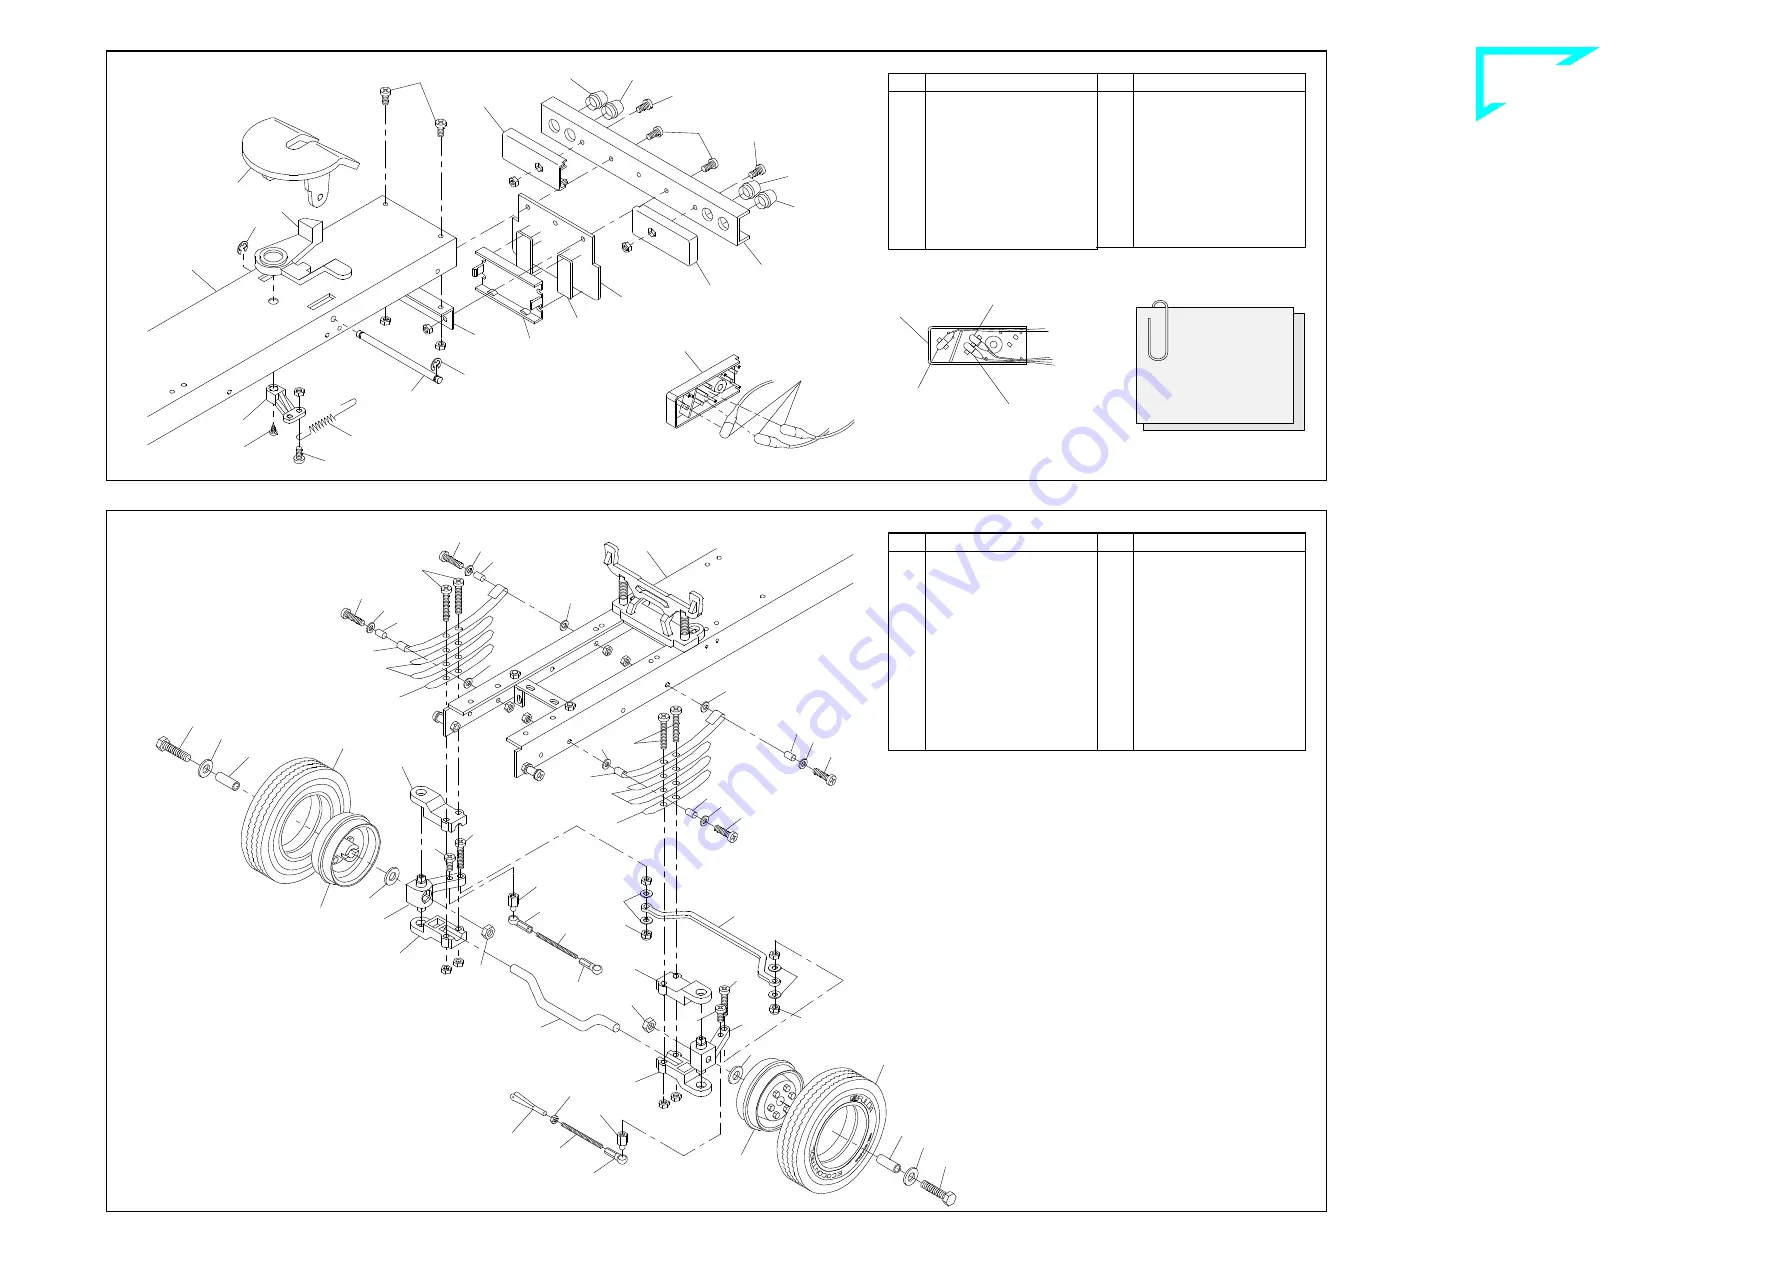
10.1 Mounting the fifth-wheel components
Attach the spring 74 to the link lever 44 with a screw 1 and M3 nut.
Insert the bar 72 into the opening from above, securing it from below
with the link lever and a tapping screw 21. Mount the fifth-wheel 71
from above, inserting the feet into the slots in the frame. Slide the
shaft 73 through the holes at the side of the frame and the feet of the
fifth-wheel, catching the free end of the spring 74 between the feet
when doing so. The shaft is secured with two retaining washers 25.
Please ensure when attaching the fifth-wheel that the ribbon cable
with the two circuit boards is located between the frame and the
shaft (ill. 8).
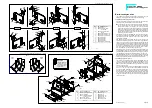
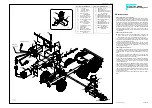
10.2 Mounting the rear bumper assembly
First insert the bulbs 713 in the lamp caps 709 as shown in the figure.
Now affix the assembled caps to the rear bumper 47 using one each
screw 57 and M3 nut. From the rear insert the lenses into the bumper:
outwards the blinker lenses 341, inwards the rear light lenses 342.
Attach the frame tail piece 46 underneath the frame using screws 1
and M3 nuts. Then the bumper and carrier plate 710 are set in front
of the frame tail piece and attached with screws 2 and M3 nuts.
Take particular care that the bulb cables are not clamped between
the bumper and the frame tail piece; this could cause a short cir-
cuit!
Using two adhesive pads 655, affix the PCB support 723 on the front
surface of the carrier plate, centred and flush with the bottom edge.
NN
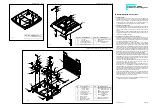
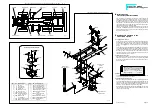
cêçåí=~ñäÉ=ëÉÅíáçå=
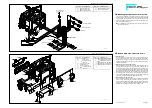
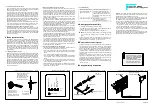
11.1 Mounting the suspension with front axle
First install the screws 3 together with washers 13, bushings 26, and
M3 nuts at the rearward holes in the frame, provided for attaching the
springs. Then attach the open ends of the two long spring leaves 32
at the bushings and use an identical set of parts to screw the closed
ends to the front of the frame 45. One nut 19 each is pressed into the
hexagonal depressions at the steering lever 42. Use two screws 5
and M3 nuts to attach to the long spring leafs, previously mounted,
two medium spring leaves 33 and a short spring leaf 34 along with
two half-axle guards 41, into which the front axle 55 and steering
lever 42 have been inserted. Before tightening down the screws 5
ensure that the spring sets are not under tension and can move
freely.
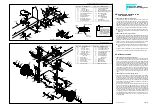
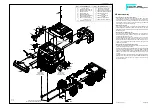
11.2 Mounting the wheels and steering linkage
First mount the standard tyres 53 on the rims 52. Then use screws
18 and one washer 20 each in front of and behind the axle tube 27
located in the hub to bolt the wheels to the steering lever, using the
nut already inserted. To the outer holes on the steering levers fix two
screws 4 along with nuts M3. To this unit add now the track rod 1390
using washers 13 and stop nuts 908; do not tighten the stop nuts but
leave the track rod moveable.
With screws 2 fix two ball bolts 29 to the inner holes on the steering
levers for the attachment of the steering rods. To a steering rod 36
add one nut 109, fork head 789 and ball socket 30. The steering rod
has to be bent slightly, depending on the size of the servo unit. After-
wards clip this steering rod for the servo linking to the left-hand ball
bolt. For operation of the blinker switch, add to the right-hand ball
bolt another steering rod 36, equipped with two ball sockets 30. Ad-
just the distance between the ball sockets so that the wheels are in
the straight-ahead position when the lever of the blinker switch is in
its neutral setting.
80-e.DOC / K-Actros
Page 8
Front axle section ill. 11
Components attached to the rear frame section ill. 10
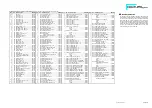
Qty.
No. Assembly part
10
--- Nut M3
2
2 Screw M3 x 8
4
3 Screw M3 x 12
2
4 Screw M3 x 16
4
5 Screw M3 x 20
12
13 Washer 3.2
2
18 Hex head screw
M4 x 25
2
19 Nut M4
4
20 Washer 4.3
4
26 Bushing 4 x 0.5 x 7
2
27 Axle tube
2
29 Ball bolt M3
3
30 Ball socket
Qty.
No. Assembly part
2
32 Spring long, “AF“
4
33 Spring medium, “AF“
2
34 Spring short, “AF“
2
36 Steering rod M2 x 50
4
41 Half-axle guard
2
42 Steering lever
2
52 Rim, chromed
2
53 Standard tyre
“Ecocontrol“
1
55 Front axle
1
109 Nut M2
1
789 Fork head
2
908 Stop nut M3
1
1390 Track rod, flat
Frame
B-44-9
Frame
Note!
The kit contains two
additional red lenses
342 for the US chas-
sis version equipped
with red blinkers.
Inserting the bulbs
Bulb for
brake light
Bulb for blinker
Bulb for rear light
B-44-9
Act
709
709
713
Qty.
No. Assembly part
1
73 Shaft for fifthwheel
1
74 Draw spring
2
341 Blinker lens high, orange
4
342 Lens/rear light high, red
2
655 Adhesive pad,
double-sided
2
709 Lamp cap
1
710 Carrier plate for
support PCB
6
713 Bulb 3V
1
723 PCB support, small
Qty.
No. Assembly part
7
--- Nut M3
3
1 Screw M3 x 6
2
2 Screw M3 x 8
1
21 Tapping screw 2.2 x 4.5
2
25 Retaining washer 3.2
1
44 Link lever
1
46 Frame tail piece
1
47 Bumper, rear
2
57 Screw M3 x 10
1
71 Standard fifthwheel
1
72 Bar for kingpin

