22
SERVICE AND ADJUSTMENTS
INTERLOCKS AND RELAYS
Loose or damaged wiring may cause your tractor to run
poorly, stop running, or prevent it from starting.
•
Check wiring. See electrical wiring diagram in the Repair
Parts section.
TO REPLACE FUSE
Replace with 15 amp automotive-type plug-in fuse. The fuse
holder is located behind the dash.
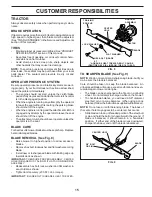
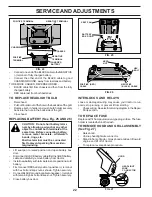
TO REMOVE HOOD AND GRILL ASSEMBLY
(See Fig. 27)
•
Raise hood.
•
Unsnap headlight wire connector.
•
Stand in front of tractor. Grasp hood at sides, tilt toward
engine and lift off of tractor.
•
To replace, reverse above procedure.
FIG. 27
HEADLIGHT
WIRE
CONNECTOR
HOOD
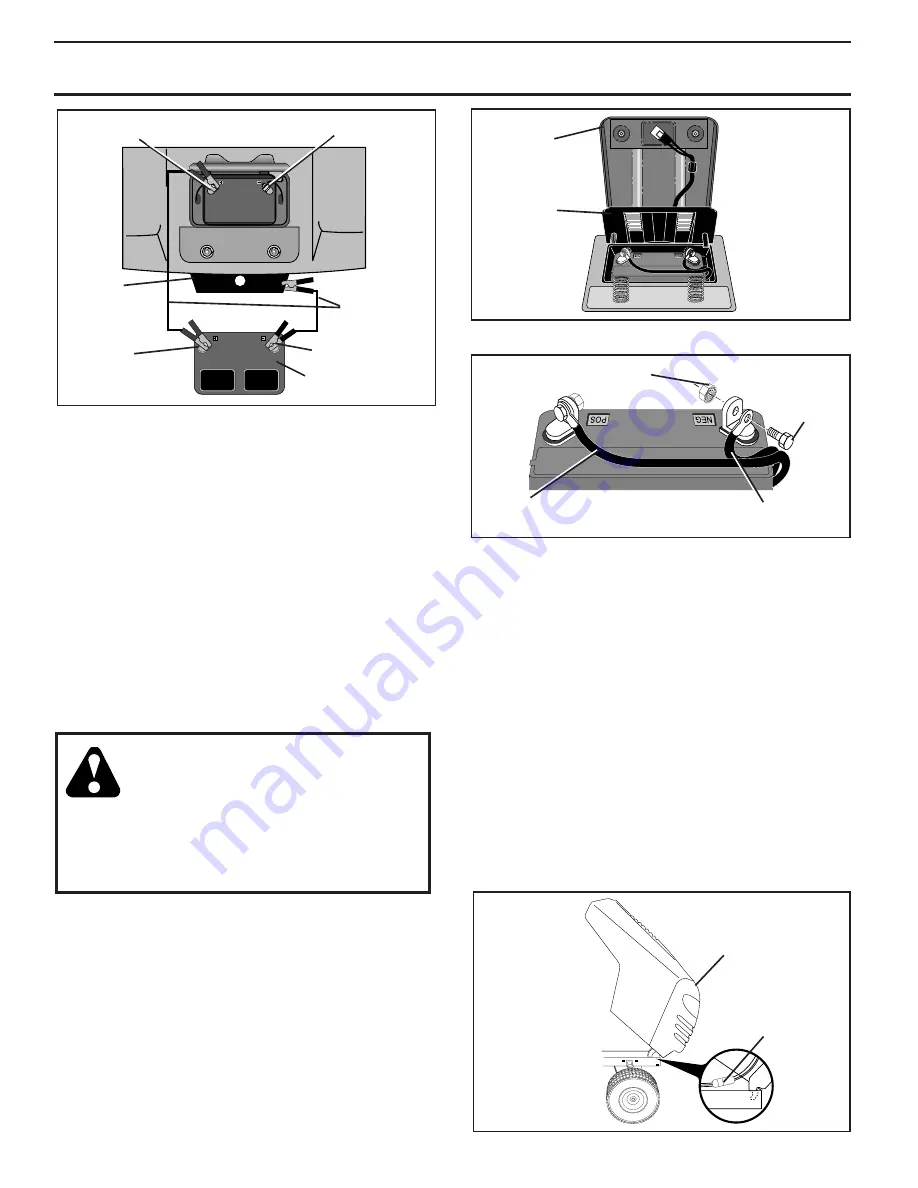
NEGATIVE
TERMINAL
POSITIVE
TERMINAL
NEGATIVE TERMINAL
POSITIVE TERMINAL
CHARGED
BATTERY
CABLES
CHASSIS
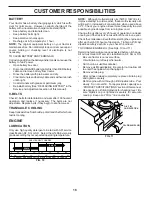
FIG. 24
•
Connect one end of the BLACK cable to the NEGATIVE
(-) terminal of fully charged battery.
•
Connect the other end of the BLACK cable to good
CHASSIS GROUND, away from fuel tank and battery.
TO REMOVE CABLES, REVERSE ORDER -
•
BLACK cable first from chassis and then from the fully
charged battery.
•
RED cable last from both batteries.
TO REPLACE HEADLIGHT BULB
•
Raise hood.
•
Pull bulb holder out of the hole in the backside of the grill.
•
Replace bulb in holder and push bulb holder securely
back into the hole in the backside of the grill.
•
Close hood.
Positive terminal must be connected
first to prevent sparking from acciden-
tal grounding.
FIG. 25
FIG. 26
SEAT PAN
BATTERY
BOX DOOR
KEPS
NUT
HEX
BOLT
POSITIVE (RED)
CABLE
NEGATIVE
(BLACK) CABLE
REPLACING BATTERY (See Fig. 25 AND 26)
CAUTION: Do not short battery termi-
nals by allowing a wrench or any other
object to contact both terminals at the
same time. Before connecting battery,
remove metal bracelets, wristwatch
bands, rings, etc.
•
Lift seat pan to raised position and open battery box
door.
•
Disconnect BLACK battery cable first then RED battery
cable and carefully remove battery from tractor.
•
Install new battery with terminals in same position as old
battery.
•
First connect RED battery cable to positive (+) terminal
with hex bolt and keps nut as shown. Tighten securely.
•
Connect BLACK grounding cable to negative (-) terminal
with remaining hex bolt and keps nut. Tighten securely.
•
Close battery box door.
Summary of Contents for 174193
Page 44: ...44 SERVICE NOTES...
Page 48: ......


