background image

13

OPERATION

MOWING TIPS

Tire chains cannot be used when the mower housing is
attached to tractor.

Mower should be properly leveled for best mowing
performance.  See “TO LEVEL MOWER HOUSING” in
the Service and Adjustments section of this manual.

The left hand side of mower should be used for trimming.

Drive so that clippings are discharged onto the area that
has been cut.  Have the cut area to the right of the
machine.  This will result in a more even distribution of
clippings and more uniform cutting.

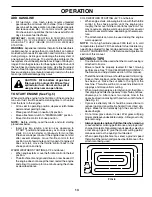
When mowing large areas, start by turning to the right so
that clippings will discharge away from shrubs, fences,
driveways, etc.  After one or two rounds, mow in the
opposite direction making left hand turns until finished
(See Fig. 8 ).

If grass is extremely tall, it should be mowed twice to
reduce load and possible fire hazard from dried clip-
pings.  Make first cut relatively high; the second to the
desired height.

Do not mow grass when it is wet.  Wet grass will plug
mower and leave undesirable clumps.  Allow grass to dry
before mowing.

Always operate engine at full throttle when mowing

to assure better mowing performance and proper dis-
charge of material.  Regulate ground speed by selecting
a low enough gear to give the mower cutting perfor-
mance as well as the quality of cut desired.

When operating attachments, select a ground speed
that will suit the terrain and give best performance of the
attachment being used.

FIG. 8

TO START ENGINE (See Fig. 5)

When starting the engine for the first time or if the engine has
run out of fuel, it will take extra cranking time to move fuel
from the tank to the engine.

Sit on seat in operating position, depress clutch/brake
pedal and set parking brake.

Place gear shift lever in neutral (N) position.

Move attachment clutch to “DISENGAGED” position.

Move throttle control to choke position.

NOTE: 

 Before starting, read the warm and cold starting

procedures below.

Insert key into ignition and turn key clockwise to
“START” position and release key as soon as engine
starts. Do not run starter continuously for more than
fifteen seconds per minute. If the engine does not start
after several attempts, move throttle control to fast
position, wait a few minutes and try again. If engine still
does not start, move the throttle control back to the
choke position and retry.

WARM WEATHER STARTING (50° F and above)

When engine starts, move the throttle control to the fast
position.

The attachments and ground drive can now be used. If
the engine does not accept the load, restart the engine
and allow it to warm up for one minute using the choke
as described above.

ADD GASOLINE

Fill fuel tank.  Use fresh, clean, regular unleaded
gasoline with a minimum of 87 octane.  (Use of  leaded
gasoline will increase carbon and lead oxide deposits
and reduce valve life).  Do not mix oil with gasoline.
Purchase fuel in quantities that can be used within 30
days to assure fuel freshness.

IMPORTANT:

  WHEN OPERATING IN TEMPERATURES

BELOW 32°F(0°C), USE FRESH, CLEAN WINTER GRADE
GASOLINE TO HELP INSURE GOOD COLD WEATHER
STARTING.

WARNING

:  Experience indicates that alcohol blended fuels

(called gasohol or using ethanol or methanol) can attract
moisture which leads to separation and formation of acids
during storage.  Acidic gas can damage the fuel system of
an engine while in storage.  To avoid engine problems, the
fuel system should be emptied before storage of 30 days or
longer.  Drain the gas tank, start the engine and let it run until
the fuel lines and carburetor are empty.  Use fresh fuel next
season.  See Storage Instructions for additional information.
Never use engine or carburetor cleaner products in the fuel
tank or permanent damage may occur.

CAUTION:  Fill to bottom of gas tank
filler neck.  Do not overfill.  Wipe off any
spilled oil or fuel.  Do not store, spill or
use gasoline near an open flame.

COLD WEATHER STARTING ( 50° F and below)

When engine starts, allow engine to run with the throttle
control in the choke position until the engine runs
roughly, then move throttle control to fast position. This
may require an engine warm-up period from several
seconds to several minutes, depending on the tempera-
ture.

The attachments can also be used during the engine
warm-up period.

NOTE:

  If at a high altitude (above 3000 feet) or in cold

temperatures (below 32 F) the carburetor fuel mixture may
need to be adjusted for best engine performance. See “TO
ADJUST CARBURETOR” in the Service and Adjustments
section of this manual.

Summary of Contents for 180530

Page 1: ...DEL NO WE16542E 16 5 HP 42 Inch LawnTractor For Parts and Service contact our authorized distributor call 1 800 849 1297 For Technical Assistance call 1 800 829 5886 180530 09 04 01 RH PRINTED IN U S...

Page 2: ...en changes in speed or direction SAFE OPERATION PRACTICES FOR RIDE ON MOWERS IMPORTANT THIS CUTTING MACHINE IS CAPABLE OF AMPUTATING HANDS AND FEET AND THROWING OBJECTS FAILURE TO OBSERVE THE FOLLOWIN...

Page 3: ...tires lose traction disengage the blades and proceed slowly straight down the slope If machine stops while going uphill disengage blades shift into reverse and back down slowly Donotturnonslopesunless...

Page 4: ...ns and the proper tools to service or repair this tractor Please read and retain this manual The instructions will enable you to assemble and maintain your tractor properly Always observe the SAFETY R...

Page 5: ...sher 1 Locknut 5 16 18 1 Hex Bolt 5 16 18 x 1 1 4 1 Hex Bolt 3 8 16 x 1 1 Lockwasher 3 8 Steering Boot Steering Extension Shaft Steering Wheel Adapter 1 Bolt 1 Washer 17 32 x 1 3 16 x 12 Gauge Seat 2...

Page 6: ...EEL See Fig 1 ASSEMBLE EXTENSION SHAFT AND BOOT Slide extension shaft onto lower steering shaft Align mount ing holes in extension and lower shafts and install 5 16 hex bolt and locknut Tighten secure...

Page 7: ...OTE You may now roll or drive your tractor off the skid Follow the appropriate instruction below to remove the tractor from the skid INSTALL SEAT See Fig 3 Adjust seat before tightening adjustment bol...

Page 8: ...DECK LEVELNESS For best cutting results mower housing should be properly leveled See TOLEVELMOWERHOUSING intheService and Adjustments section of this manual CHECK FOR PROPER POSITION OF ALL BELTS See...

Page 9: ...RD FAST SLOW ENGINE ON ENGINE OFF OIL PRESSURE LIGHTS ON FUEL CHOKE MOWER HEIGHT PARKING BRAKE LOCKED UNLOCKED REVERSE NEUTRAL HIGH LOW ATTACHMENT CLUTCH ENGAGED MOWER LIFT DANGER KEEP HANDS AND FEET...

Page 10: ...d off THROTTLE CHOKE CONTROL Used for starting and controllingenginespeed CLUTCH BRAKE PEDAL Used for declutching and brak ing the tractor and starting the engine PARKINGBRAKE Locksclutch brakepedalin...

Page 11: ...becuttoapproximately2 1 2 inches during the cool season and to over 3 inches during hot months For healthier and better looking lawns mow often and after moderate growth For best cutting performance g...

Page 12: ...trolofyourtractor BEFORE STARTING THE ENGINE CHECK ENGINE OIL LEVEL The engine in your tractor has been shipped from the factory already filled with summer weight oil Check engine oil with tractor on...

Page 13: ...ts move throttle control to fast position wait a few minutes and try again If engine still does not start move the throttle control back to the choke position and retry WARM WEATHER STARTING 50 F and...

Page 14: ...ery 7 Tighten front axle pivot bolt to 35 ft lbs maximum Do not overtighten 1 12 3 2 5 5 6 7 GENERAL RECOMMENDATIONS The warranty on this tractor does not cover items that have beensubjectedtooperator...

Page 15: ...l with the ground If blade is balanced it should remain in a horizontal position If either end of the blade moves downward sharpen the heavy end until the blade is balanced TRACTOR Always observe safe...

Page 16: ...ctor is maintenancefree Donotattempttoopenorremovecapsor covers Adding or checking level of electrolyte is not necessary TO CLEAN BATTERY AND TERMINALS Corrosionanddirtonthebatteryandterminalscancause...

Page 17: ...nggentlyonflatsurface Ifvery dirty or damaged replace cartridge Reinstall cartridge nut precleaner cover and secure with knob s IMPORTANT PETROLEUM SOLVENTS SUCH AS KEROSENE ARE NOT TO BE USED TO CLEA...

Page 18: ...o carburetor replacementisrequired With engine cool remove filter and plug fuel line sec tions Place new fuel filter in position in fuel line with arrow pointingtowardscarburetor Be sure there are no...

Page 19: ...ion Move attachment lift lever forward to lower mower to its lowest position Roll belt off engine pulley Remove small retainer spring and lift clutch spring off pulley bolt Remove large retainer sprin...

Page 20: ...ment nut on that side NOTE Threefullturnsofadjustmentnutwillchangemower height about 1 8 Recheck measurements after adjusting NUT E D D MANDREL FIG 18 NUT F FRONT LINKS FIG 19 FRONT TO BACK ADJUSTMENT...

Page 21: ...emove belt from stationary idler and clutching idler Pull belt slack toward rear of tractor Remove belt upwards from transaxle pulley by deflecting belt keep ers Pull belt toward front of tractor and...

Page 22: ...t square key Replacewashersandsnapretainingringsecurelyinaxle groove Replace axle cover FIG 24 RETAINING RING WASHERS SQUARE KEY REAR WHEEL ONLY AXLE COVER NOTE To seal tire punctures and prevent flat...

Page 23: ...PMENT AND EXPERIENCE TO MAKE ANY NECESSARY ADJUSTMENTS CLAMP SCREW ENGINE TO ADJUST THROTTLE CONTROL CABLE See Fig 29 The throttle control has been preset at the factory and adjustment should not be n...

Page 24: ...G IN ESSENTIAL FUEL SYSTEM PARTS SUCH AS CARBURETOR FUEL FILTER FUEL HOSE OR TANK DURING STORAGE ALSO EXPERIENCE INDICATES THAT ALCOHOL BLENDED FUELS CALLED GASOHOL OR USING ETHANOL OR METHANOL CAN AT...

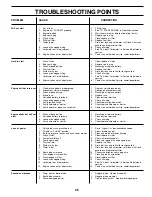
Page 25: ...ty ignition switch 7 Check replace ignition switch 8 Faulty solenoid or starter 8 Check replace solenoid or starter 9 Faulty operator presence switch es 9 Contact an authorized service center departme...

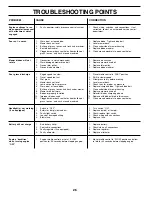
Page 26: ...Mower deck not level 4 Level mower deck 5 Low uneven tire air pressure 5 Check tires for proper air pressure 6 Worn bent or loose blade 6 Replace sharpen blade Tighten blade bolt 7 Buildup of grass le...

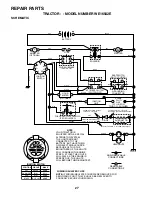
Page 27: ...TE YOUR TRACTOR IS EQUIPPED WITH A SPECIAL ALTERNATOR SYSTEM THE LIGHTS ARE NOT CONNECTED TO THE BATTERY BUT HAVE THEIR OWN ELECTRICAL SOURCE BECAUSE OF THIS THE BRIGHTNESS OF THE LIGHTS WILL CHANGE W...

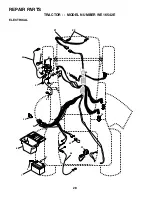
Page 28: ...28 REPAIR PARTS TRACTOR MODEL NUMBER WE16542E ELECTRICAL 28 29 26 24 42 43 27 27 25 41 27 27 40 33 30 8 2 1 27 16 16 52 48 22 21...

Page 29: ...ed 25 146147 Cable Battery 6 Ga w 16 wire red 26 175158 Fuse 20 AMP 27 73510400 Nut Keps Hex 1 4 20 unc 28 4207J Cable Ground 6 Ga 12 black 29 121305X Switch Plunger Nc Gray 30 175566 Switch Ign 33 14...

Page 30: ...EL NUMBER WE16542E CHASSIS AND ENCLOSURES 37 37 3 2 35 3 26 3 35 26 33 10 34 1 208 11 17 29 28 208 13 207 20 207 23 12 51 57 53 52 54 55 24 26 25 26 25 3 31 24 30 209 8 209 6 16 9 15 209 209 5 5 58 18...

Page 31: ...UNC 28 140434 Grill Lens Asm 29 140273X599 Lens Grille Private label 30 169467X550 Fender Asm 31 136619 BracketFender 33 145244X550 Footrest Lh 34 145243X550 Footrest Rh 35 72110606 Bolt RdHd Sht Sqn...

Page 32: ...8 76 77 1 25 19 24 26 2 53 35 34 37 36 35 62 36 64 65 59 56 212 55 63 116 70 77 61 22 27 26 85 52 253 30 32 32 30 52 253 11 85 80 4 3 13 84 145 79 6 113 18 51 5 18 6 16 66 96 26 27 51 48 151 202 49 47...

Page 33: ...16 X 1 1 4 57 130801 V Belt Ground Drive 59 169691 Keeper Belt Span Ctr 61 17060614 Screw 3 8 16 X 875 62 8883R Cover Pedal Blk Round 63 175410 Engine Pulley LT YT 64 71170764 Bolt Hex 65 10040700 Was...

Page 34: ...TOR MODEL NUMBER WE16542E STEERING ASSEMBLY 44 51 54 5 9 5 7 7 9 4 3 32 43 6 43 8 10 40 11 8 6 9 46 46 8 6 9 2 47 47 26 30 28 1 41 42 37 36 37 38 63 11 39 68 67 67 67 13 65 85 85 68 15 15 15 29 29 82...

Page 35: ...ire Form 19 75 Mech 36 155099 Bushing Strg 5 8 Id Dash 37 152927 Screw TT 10 32 x 5 x 3 8 Flange 38 140045X428 Insert Cap Strg 39 19133812 Washer 13 32 x 2 3 8 x 12Ga 40 7810H LocknutCenter 41 100711L...

Page 36: ...36 REPAIR PARTS TRACTOR MODEL NUMBER WE16542E ENGINE 2 1 OPTIONAL EQUIPMENT Spark Arrester 29 44 46 32 31 33 37 33 40 62 13 4 72 78 81 3 16 78 23 45 14 38...

Page 37: ...Drain Oil Easy 16 11050600 Washer Lock Ext Tooth 3 8 23 169837 ShieldBrowning 29 137180 ArrestorSpark 31 174642 Tank Fuel 2 00 Fr 32 140527 Cap Asm Fuel 33 123487X Clamp Hose Blk 37 137040 Line Fuel 2...

Page 38: ...2 Washer 17 32 x 1 3 16 x 12 Ga 25 127018X Bolt Shoulder 5 16 18 x 62 26 10040800 Lockwasher 26 23 1 24 16 15 12 13 17 25 4 3 8 9 7 8 9 7 2 6 22 21 5 10 5 14 1 127427 Seat 2 140551 Bracket Pnt Pivot S...

Page 39: ...ponent dimensions given in U S inches 1 inch 25 4 mm KEY PART NO NO DESCRIPTION KEY PART NO NO DESCRIPTION 10 157140 DecalDangerEnglish 11 101892X Decal Clutch brake English 14 160396 Decal V belt Sch...

Page 40: ...40 REPAIR PARTS TRACTOR MODEL NUMBER WE16542E MOWER LIFT 15 20 16 1718 20 20 15 20 4 5 6 2 3 1 6 5 4 7 8 12 11 31 32 31 32 19 19 13 13 13 13...

Page 41: ...9413X GripHandle 8 124526X ButtonPlunger 11 139865 Link Lift Lh 12 139866 Link Lift Rh 13 4939M RetainerSpring 15 173288 Link Front 16 73350800 Nut Jam Hex 1 2 13 Unc 17 175689 Trunnion 18 73800800 Nu...

Page 42: ...1 32 33 146 148 145 150 45 144 147 147 142 149 142 49 50 51 54 52 53 55 56 34 1 46 44 21 22 24 25 26 27 2 28 29 23 21 21 21 18 18 20 2 48 59 19 4 3 5 6 21 40 143 36 40 37 40 159 152 151 153 154 157 15...

Page 43: ...lder 10 24 Grade 5 51 69180 Locknut 52 139888 Bolt Shoulder 5 16 18 UNC 53 131845 Arm Assembly Pad Brake 54 133943 Washer Hardened 55 155046 Arm Idler 56 165723 Spacer Retainer 59 141043 Guard TUV Idl...

Page 44: ...44 SERVICE NOTES...

Page 45: ...limited to 90 days from the date of original purchase 5 This Warranty applies only to products which have been properly assembled adjusted operated and main tained in accordance with the instructions...

Page 46: ...the Power Train Component and parts The cost of normal maintenance and replacement of service items which are not defective shall be paid for by the original purchaser C Securing Warranty Service War...

Page 47: ...IGHTING GUIDE ONLY RIDE UP AND DOWN HILL NOT ACROSS HILL SUGGESTED GUIDE FOR SIGHTING SLOPES FOR SAFE OPERATION Operate your Tractor up and down the face of slopes not greater than 15 never across the...

Page 48: ......

Reviews: