26
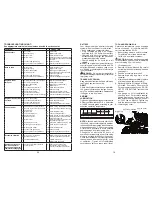
PROBLEM
CAUSE
CORRECTION
Will not start
1
Out of fuel.
1
Fill fuel tank.
2
Bad spark plug.
2
Replace spark plug.
3
Dirty air filter.
3
Clean/replace air filter.
4
Water in fuel.
4
Empty fuel tank and carburetor, refill
tank with fresh gasoline and replace
fuel filter.
5
Loose or damaged wiring.
5
Check all wiring.
6
Engine valves out of adjustment.
6
Contact a qualified service center.
Hard to start
1
Dirty air filter.
1
Clean/replace air filter.
2
Bad spark plug.
2
Replace spark plug.
3
Weak or dead battery.
3
Recharge or replace battery.
4
Stale or dirty fuel.
4
Empty fuel tank and refill tank with
fresh, clean gasoline.
5
Loose or damaged wiring.
5
Check all wiring.
6
Engine valves out of adjustment.
6
Contact a qualified service center.
Engine will not
turn over
1
Clutch/brake pedal not depressed.
1
Depress clutch/brake pedal.
2
Deck clutch is engaged.
2
Disengage deck clutch.
3
Weak or dead battery.
3
Recharge or replace battery.
4
Blown fuse.
4
Replace fuse.
5
Corroded battery terminals.
5
Clean battery terminals.
6
Loose or damaged wiring.
6
Check all wiring.
7
Faulty ignition switch.
7
Check/replace ignition switch.
8
Faulty solenoid or starter.
8
Check/replace solenoid or starter.
9
Faulty operator presence switch(es).
9
Contact a qualified service center.
Engine clicks but will
not start
1
Weak or dead battery.
1
Recharge or replace battery.
2
Corroded battery terminals.
2
Clean battery terminals.
3
Loose or damaged wiring.
3
Check all wiring.
4
Faulty solenoid or starter.
4
Check/replace solenoid or starter.
Loss of power
1
Cutting too much grass/too fast.
1
Raise cutting height/reduce speed.
2
Build-up of grass, leaves and trash
under mower.
2
Clean underside of mower housing.
3
Dirty air filter.
3
Clean/replace air filter.
4
Low oil level/dirty oil.
4
Check oil level/change oil.
5
Faulty spark plug.
5
Clean & regap or change spark plug.
6
Stale or dirty fuel.
6
Empty fuel tank and refill tank with
fresh, clean gasoline.
7
Water in fuel.
7
Empty fuel tank and carburetor, refill
tank with fresh gasoline.
8
Spark plug wire loose.
8
Connect & tighten spark plug wire.
9
Dirty engine air screen/fins.
9
Clean engine air screen/fins.
10
Dirty/clogged muffler.
10
Clean/replace muffler.
11
Loose or damaged wiring.
11
Check all wiring.
12
Engine valves out of adjustment.
12
Contact a qualified service center.
Excessive vibration
1
Worn, bent or loose blade.
1
Replace blade. Tighten blade bolt.
2
Bent blade mandrel.
2
Contact a qualified service center.
3
Loose/damaged part(s).
3
Tighten loose part(s).
Replace damaged parts.
Engine continues to
run when operator
leaves seat with atta-
chment clutch engaged
1
Faulty operator-safety presence
control system.
1
Check wiring, switches and
connections. If not corrected,
Contact a qualified service center.
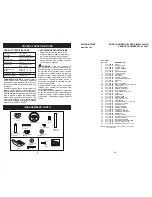
TROUBLESHOOTING CHART:
See ap pro pri ate section in manual un less di rect ed to service center.
19
BATTERY
Your riding mower has a battery charging
sys tem which is suf fi cient for normal use.
• Keep battery and connectors clean.
• Only recharge battery with charger
approved for a 12V 6 amp. hour battery.
• Charging with any other charger or an
automotive style charger can cause per-
manent damage to the battery.
• Charge battery for 24 hours for a full
charge.
NOTE:
The original equipment battery on
your riding mower is maintenance free. Do
not attempt to open or remove caps or cov-
ers. Adding or checking level of elec tro lyte
is not necessary.
WARNING:
Do not jump start battery.
Permanent damage to the battery or personal
injury may occur.
TRANSAXLE COOLING
Keep transaxle free from build-up of dirt and
chaff which can restrict cooling.
V-BELT
Check V-belt for deterioration and wear after
100 hours of operation and replace if neces-
sary. The belt is not ad just able. Re place belt
if it begins to slip from wear.
NOTE:
Al though multi-vis cos i ty oils (5W30,
10W30 etc.) im prove start ing in cold weather,
the oils will result in increased oil consumption
when used above 32°F. Check your engine
oil level more frequently to avoid possible
engine damage from running low on oil.
Change the oil after every 25 hours of
operation or at least once a year if the riding
mower is not used for 25 hours in one year.
Check the crankcase oil level before starting
the engine and after each eight (8) hours
of operation. Tighten oil fill cap/dipstick
securely each time you check the oil level.
ENGINE
LUBRICATION
Only use high quality detergent oil rated with
API service classification SG-SL. Select the
oil’s SAE viscosity grade according to your
expected operating temperature.
TEMPERATURE RANGE ANTICIPATED BEFORE NEXT OIL CHANGE
SAE VISCOSITY GRADES
-20 0 30 40
80
100
-30
-20 0 20 30
40
F
C
32
-10
10
60
5W-30
SAE 30
oil_visc_chart1_e
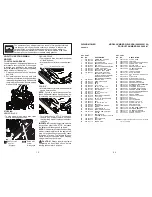
Engine Cover
Oil Fill Cap/Dipstick
Drain Plug
TO CHANGE ENGINE OIL
Determine temperature range expected
before oil change. All oil must meet API
service classification SG-SL.
• Be sure riding mower is on level surface.
• Oil will drain more freely when warm.
• Catch oil in a suitable container.
CAUTION:
If engine has been operated
for an extended period of time immediately
prior to draining oil, oil will be hot.
1. Lift engine cover.
2. Remove oil fill cap/dipstick. Be careful
not to allow dirt to enter the engine when
changing oil.
3. Position a container to catch oil.
4. Remove drain plug and drain oil into
container.
5. After oil has drained completely, replace
oil drain plug and tighten securely.
6. Refill engine with oil through oil fill dip-
stick tube. Pour slowly. Do not overfill.
For approximate capacity see “PROD-
UCT SPECIFICATIONS” section of this
manual.
7. Use gauge on oil fill cap/dipstick for
checking level. For accurate reading,
tighten dipstick cap securely onto the
tube before removing dipstick. Keep oil
at “FULL” line on dipstick. Tighten cap
onto the tube securely when finished.
8. Lower engine cover.


