background image

52

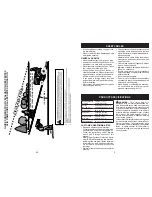
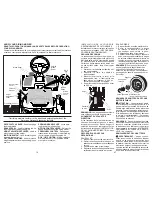
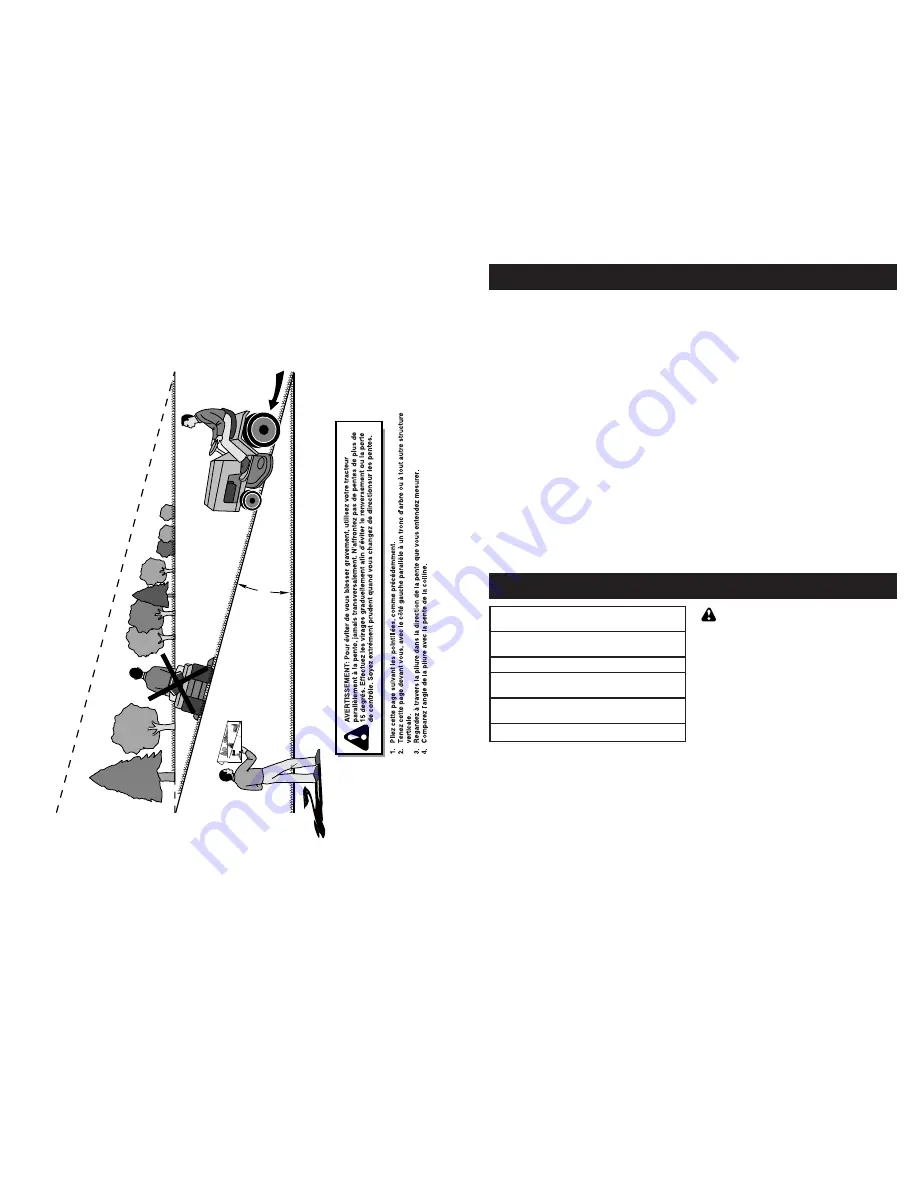
GUIDE SUGGÈRE POUR L'ÉVALUATION DES PENTES 

AFIN D'AMÉLIORER LA SÉCURITÉ D'UTILISATION

TONDEZ LES PENTES EN MONTANT OU EN 

DESCENDANT MAIS, JAMAIS EN TRAVERS

15 DEGRÉS MAX

PLIEZ SUIVANT LES POINTILLÉS 

CECI EST UNE PENTE A 15 DEGRÉS

5

PRODUCT SPECIFICATIONS

•  If fuel is spilled on clothing, change cloth-

ing immediately.

•  Never overfill fuel tank. Replace gas cap 

and tighten securely.

GENERAL SERVICE

•  Never operate machine in a closed area.
•  Keep all nuts and bolts tight to be sure the 

equipment is in safe working condition.

•  Never tamper with safety devices. Check 

their proper operation regularly.

•  Keep machine free of grass, leaves, or 

other debris build-up. Clean oil or fuel spill-

age and remove any fuel-soaked debris. 

Allow machine to cool before storing.

•  If you strike a foreign object, stop and 

inspect the machine. Repair, if necessary, 

before restarting.

•  Never make any adjustments or repairs 

with the engine running.

•  Check grass catcher components and the 

discharge chute frequently and replace 

with manufacturer’s recommended parts, 

when necessary.

•  Mower blade is sharp. Wrap the blade or 

wear gloves, and use extra caution when 

servicing them.

•  Check brake operation frequently. Adjust 

and service as required.

•  Maintain or replace safety and instruction 

labels, as necessary.

•  Ensure the area is clear of bystanders 

before operating. Stop machine if anyone 

enters the area.

•  Never carry passengers.
•  Do not mow in reverse unless absolutely 

necessary. Always look down and behind 

before and while backing.

•  When loading or unloading this machine, 

do not exceed the maximum recom-

mended operation angle of 15°.

SAFETY RULES

Gasoline Capacity

and type:

1.25 Qt. (1.18 L)

Unleaded Regular

Oil Type:

(API: SG-SL)

SAE 30 (above 32°F/0°C)

SAE  5W30 (below 32°F/0°C)

Oil Capacity:

20 oz. (0.59 L)

Spark Plug:

Champion RC12YC

Gap: .030"(0.76 mm)

Ground Speed 

(Mph/Kph):

Forward: 0-4/6.4 

Reverse: 0-1/1.6

Blade Bolt Torque: 45-55 FT. LBS. (62-75 Nm)

CUSTOMER RESPONSIBILITIES

•  Read and observe the safety rules.

•  Follow a regular schedule in main tain ing, 

caring for and using your riding mower.

• Follow the instructions under “Main te-

 nance” and “Stor age” sec tions of this 

manual. 

•  Wear proper Personal Protective Equip-

ment (PPE) while operating this machine, 

including (at a minimum) sturdy footwear, 

eye protection, and hearing protection.  

Do not mow in shorts and/or open toed 

footwear.

•  Always let someone know you are outside 

mowing.

WARNING:  

This riding mower is 

equipped with an internal com bus tion en-

gine and should not be used on or near any 

un im proved forest-covered, brush-covered 

or grass-cov ered land unless the engine’s 

exhaust system is equipped with a spark 

arrester meeting applicable local or state 

laws (if any).  If a spark arrester is used, it 

should be maintained in effective working 

order by the operator.

In the state of California the above is required 

by law (Section 4442 of the California Public 

Resources Code).  Other states may have 

similar laws.  Federal laws apply on federal 

lands.  A spark arrester for the muffler is 

available through your nearest authorized 

service center.

Summary of Contents for One WE261

Page 1: ...nty Please read the operator s manual carefully and make sure you understand the instructions before using the machine Operator s Manual Manuel de l Op rateur WE261 Vouspouvezutiliserdel essenceconten...

Page 2: ...dance with the instructions furnished 4 The Warranty does not apply to any products used for rental or commercial purposes 5 This Warranty applies only to products which have been properly assembled a...

Page 3: ...or unloading the machine into a trailer or truck Always wear eye protection when operat ing machine Data indicates that operators age 60 years and above are involved in a large percentage of riding mo...

Page 4: ...sponsible adult other than the operator Be alert and turn machine off if a child enters the area Before and while backing look behind and down for small children Never carry children even with the bla...

Page 5: ...mow in reverse unless absolutely necessary Always look down and behind before and while backing When loading or unloading this machine do not exceed the maximum recom mended operation angle of 15 SAF...

Page 6: ...de gazon de feuilles et de d chets autour du mandrin 5 Nettoyer autour des mandrins afin d ouvrir les orifices de l vent La lame de la tondeuse ne tourne pas 1 Obstruction du m canisme de l embrayage...

Page 7: ...la bougie 6 Carburant vent ou sale 6 Vider le r servoir de carburant et le remplir d essence neuve et propre 7 Eau dans le carburant 7 Vider le r servoir de carburant et le carburateur remplir le r se...

Page 8: ...le plateau de coupe de la tondeuse pendantsonremisage Lorsquelatondeuse est remis e pour un certain temps bien la nettoyer tertoutessalet s graisse feuilles etc Remiser dans un endroit propre et sec...

Page 9: ...teur au dessus du r glage l usine du haut r gime peut tre dangereux Si le r gulateur de haut r gime du moteur sem ble avoir besoin d un r glage contacter un centre de r parations agr lequel dispose de...

Page 10: ...oquer l essieu avant de mani re s re 2 Retirer le cache poussi re la bague de retenueetlarondellepourpouvoird poser la roue 3 R paration de pneu et remontage 4 Reposerlarondelleetlabaguederetenue soli...

Page 11: ...he eyes which can result in severe eye damage Always wear safety glasses or eye shields while operating your riding mower or performing any adjustments or repairs We recommend a wide vision safety mas...

Page 12: ...turn the ignition key clockwise to engine ON position ROS ON Position Engine ON Position Normal Operating Deflector Shield Mower Height Adjustment High Position Mower Height Adjustment Low Position De...

Page 13: ...hon de la jauge sur le tube avant de retirer la jauge Maintenir le niveau de l huile au rep re FULL sur la jauge Serrer fermement le capuchon sur le tube lors que termin 13 ADD GASOLINE Fill fuel tank...

Page 14: ...de blessure corporelle REFROIDISSEMENT BO TE PONT Emp cher l accumulation de salet et de paille autour de la bo te pont pouvant res treindre le refroidissement COURROIE TRAP ZO DALE V rifier l tat et...

Page 15: ...orsque le moteurestenmarcheaveclecommutateur d allumage sur la position ON du syst me de fonctionnement en marche arri re ROS est l embrayage engag le moteur ne s arr te PAS SOIN DE LA LAME Pour de me...

Page 16: ...damage your riding mower and void your warranty 41 ENTRETIEN IMPORTANT Ne pas graisser ni huiler les points pivot qui ont des roulements en nylon sp ciaux Les lubrifiants visqueux attirent la poussi r...

Page 17: ...ther charger or an automotive style charger can cause per manent damage to the battery Charge battery for 24 hours for a full charge NOTE The original equipment battery on your riding mower is mainten...

Page 18: ...proximit d une flamme nue ATTENTION Les carburants m lang s l alcool gasohol ou avec de l thanol ou du m thanol peuvent attirer l humidit ce qui cause la s paration et la formation d acides pendant l...

Page 19: ...onner la machine avec l accessoire engag Ne tondez pas en marche arri re moins qu absolutly n cessaire UTILISATION DU SYST ME DE FONC TIONNEMENT EN MARCHE ARRI RE N utilisez que si vous tes certain qu...

Page 20: ...ein de stationnement teindra le moteur 1 Enfoncer la p dale d embrayage et de freinage jusqu au fond et tenir 2 Enfoncer le levier du frein de stationne ment et rel cher la pression sur la p dale de f...

Page 21: ...rotor and brake pad if distance between rotor and brake pad is more than 02 gap brake needs to be adjusted 4 Tighten caliper nut until 02 gap is reached TO ADJUST STEERING WHEEL ALIGNMENT Ifsteeringwh...

Page 22: ...use ou sur la documentation livr e avec la machine Il est conseill d apprendre et de comprendre leur signification DANGER GARDEZ LES MAINS ET PIEDS LOIN PAR DESSUS TEMP RATURE LUMI RE GARDER L AIRE LI...

Page 23: ...ridingmower See CLEAN ING in the Maintenance section of this manual 2 Inspect and replace belt if necessary See belt replacement instructions in the Service and Adjustments section of this manual 3 Lu...

Page 24: ...place damaged parts TROUBLESHOOTING CHART 33 REMARQUE Vous pouvez maintenant descendre la tondeuse autoport e de la plateforme Suivre les instructions appropri es ci dessous afin de faire descendre la...

Page 25: ...Mettre le si ge sur l assiette de si ge de fa on ce que la t te du boulon paulement se trouve au dessus de la grande fente dans l assiette 3 Enfoncerlesi geafind enclencherlat te du boulon paulement d...

Page 26: ...nterne et ne doit pas tre utilis e sur ou pr s de terrains non entretenus couverts de buissons d arbrisseaux ou d herbe moins que le syst me d chap pement soit quip d un pare tincelles conforme la l g...

Page 27: ...compter de la date d achat par l acheteur original nous r parerons ou remplacerons notre discr tion sans frais les pi ces ou la main d uvre engag es dans le remplacement de pi ces toutes pi ces lesque...

Page 28: ...de roue Utiliser uniquement des accessoires con us sp cifiquement pour cette tondeuse autoport e AVERTISSEMENT Lesbornesdebatterie etlesaccessoiresrelatifscontiennentduplomb et des composants de plomb...

Reviews: