background image

www.weedrazers.com

7

Notes:

Safety Instructions

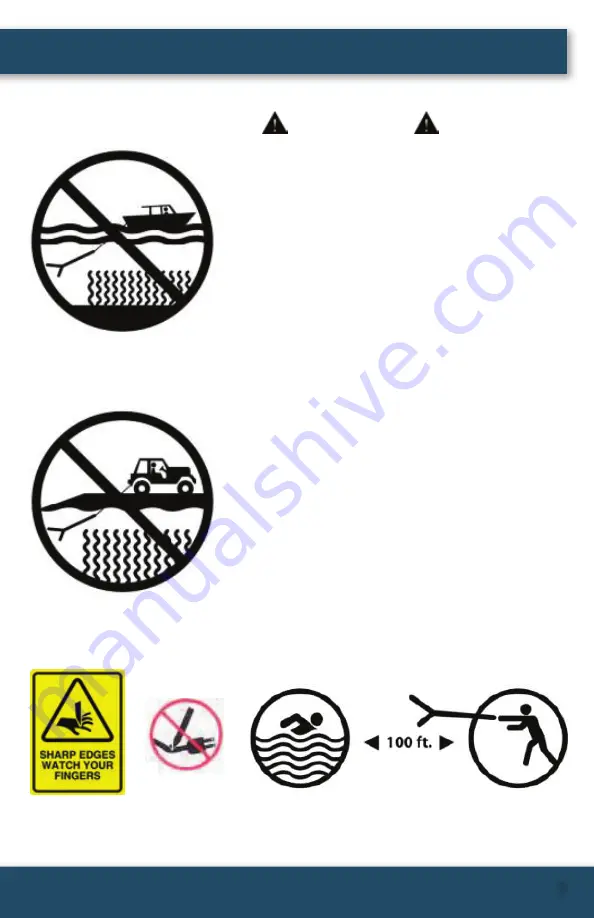
1.  Always wear cut resistant gloves when 

handling the Weed Razer, especially during 
and after removal of the blade covers.

2.  The Weed Razer is to be operated by hand 

only. Do not pull the Weed Razer behind a 
boat or any other machine driven equipment. 
Doing so will void the warranty and damage 
your Weed Razer.

3.  Do not use with children in immediate area.
4.  Do not use the Weed Razer when humans 

and/or animals are present within 100 feet 
from the launch point.

5.  Do not place or use near electrical wires or 

cords.

6.  Never touch the sharp edges of the blades 

with bare hands at any time. 

7.  Leave blade covers on the cutting edges 

when not in use. 

8.  Check all bolts, connections, and rope before 

use.

9.  Avoid areas with underwater structures.
10.  When not in use, store in  a safe location out 

of the reach of children.

NOTE:

 Failing to comply can result in severe 

lacerations, dismemberment, and even death.

Do not pull behind a boat

Do not pull behind a vehicle 

or any mechanical device 

Do not use when humans or animals are within 

100 feet from the launch point

WARNING

Summary of Contents for 580110

Page 1: ...ct Contents 2 Assembly Instructions 3 4 Operating Instructions 4 Blade Sharpening Instructions 5 6 Safety Instructions 7 Replacement Parts 8 Product Warranty 8 Table of Contents Item 580110 Product Ma...

Page 2: ...ile assembling the tool and when tool is not in use Failing to comply can result in severe lacerations dismemberment and even death SAFETY FIRST Instructions containing a warning within this manual ar...

Page 3: ...end of the triangular bracket Next seat the second triangular Support Bracket D over the assembly with the domed side facing up and place a washer and nut on each of the four bolts be sure to simply h...

Page 4: ...the spring loaded buttons on one end of the Handle Connector E slide into the open end of the Handle B and turn until the buttons snap into the holes in the handle Repeat this process for the second h...

Page 5: ...while standing or leaning over the cutting edge Step 4 Grip the handle of the Sharpener L so that the guard is between your hand and the blade surface Step 5 To remove burs from the blade surface use...

Page 6: ...times with consistent pressure Repeat this process for the other side of the blade NOTE We recommend using the process in STEP 6 for greater consistency in sharpening Step 8 In the end of the sharpen...

Page 7: ...als are present within 100 feet from the launch point 5 Do not place or use near electrical wires or cords 6 Never touch the sharp edges of the blades with bare hands at any time 7 Leave blade covers...

Page 8: ...from use in commercial environment misuse abuse negligence and or accidents The manufacturer agrees at its option during the warranty period to repair any defect in material or workmanship or to furn...

Reviews: