background image

Introduction

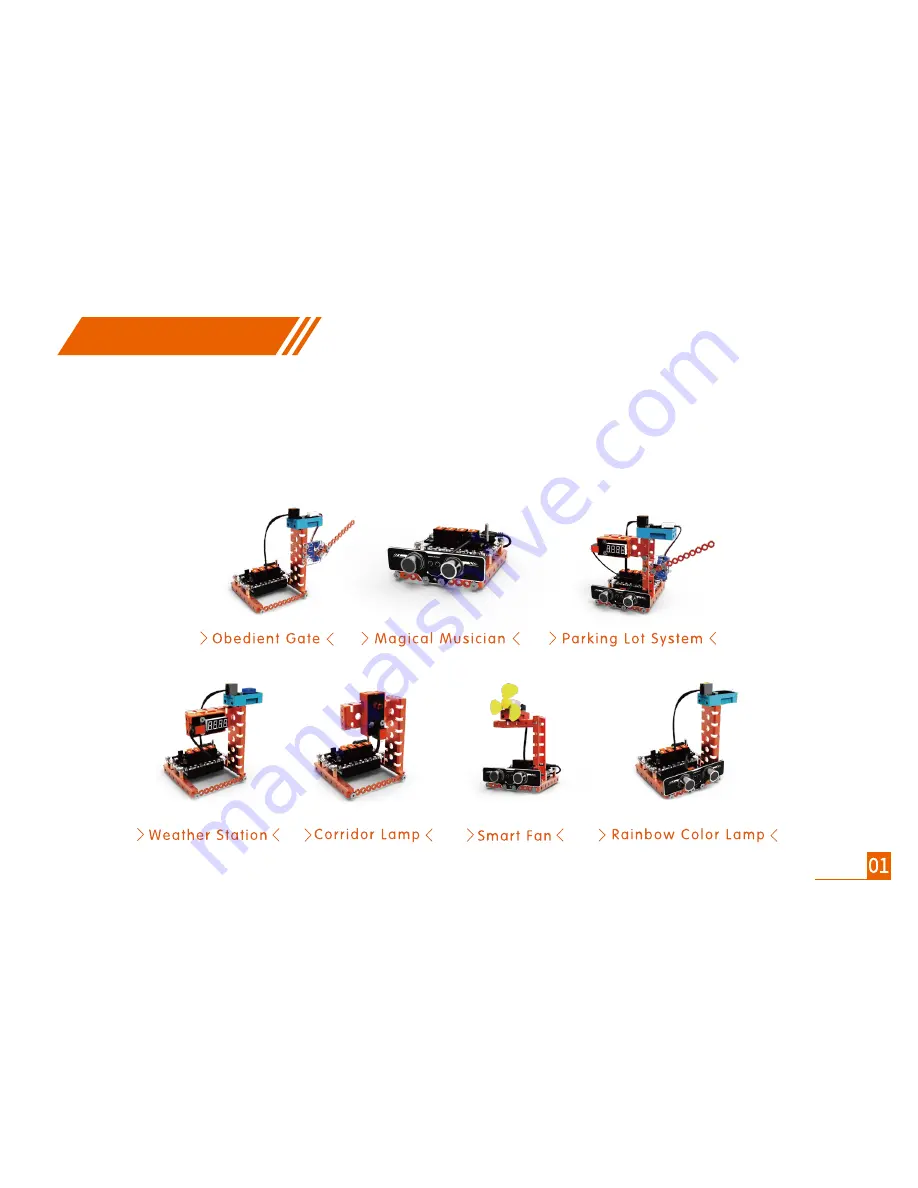
Home Inventor Kit is a DIY kit that consist of 10 electronic modules and compact designed mechanical parts. 
By simulating the life scene of automatic home, building 7 interesting projects of smart home appliance, children will observe 

home appliances in their daily life and get to know how them work. 

Summary of Contents for Home Inventor Kit

Page 1: ...electronic modules Easy to Code Graphical programming Arduino compatible Easy to extend WeeeMake platform Level up study User Manual when clicked forever set set 5V 130 motor if else then to a ultrasonic sensor PortA distance PortB 100 speed set 5V 130 motor PortB 0 speed a 20 ...

Page 2: ......

Page 3: ...ructure Assembly Guide Rainbow Color Lamp Assembly Guide Smart Fan Assembly Guide Magical Musician Assembly Guide Corridor Lamp Assembly Guide Obedient Gate Assembly Guide Weather Station Assembly Guide Parking Lot System Software Sensors and Electronic Modules Guide Home Inventor Kit Warranty ...

Page 4: ...st of 10 electronic modules and compact designed mechanical parts By simulating the life scene of automatic home building 7 interesting projects of smart home appliance children will observe home appliances in their daily life and get to know how them work ...

Page 5: ...Part list ...

Page 6: ...Battery Instruction Battery information ...

Page 7: ...ew M2 Screw M3 PH1 Screwdriver M1 6 M4 Multifunction Wrench H2 5 Screwdriver Screw M4 Screw M2 10 Screw M4 6 Screw M4 8 Screw M4 20 Brass Stud M4 10 Tapping Screw M2 6 Tapping Screw M2 8 Plastic Rivet 2064 Nut M2 Nut M4 1 0 2 3 4 5 ...

Page 8: ... AA Battery Holder 1x Velcro please tear off the double sided protective sheet of Velcro and stick it to the center of acrylic bracket Note Pay attention to the hole position and direction when installing mainboard 3x Plastic Rivet 2064 1x ELF mini Bracket 1x ELF mini V2 0 4x AA Battery 1x Velcro 1x 4 AA Battery Holder ...

Page 9: ...1x Velcro 1xVelcro 1x 3 7V Li polymer Battery 1x 3 7V Li polymer Battery No included 1x 3 7V Li polymer Battery Interface Assembly Guide Basic Structure ...

Page 10: ...208 88 8x Screw M4 6 2x Linkage 0208 88 4x Brass Stud M4 10 2x Beam 1010 100 2x Beam 1010 100 4x Brass Stud M4 10 8x Screw M4 6 4x Screw M4 6 4x Screw M4 6 1x ELF mini V2 0 Mainboard Assembly Guide Basic Structure ...

Page 11: ...Assembly Guide Rainbow Color Lamp Use touch sensor to control the RGB LED Touch the touch sensor it will turn on the RGB LED and change color when touch the sensor every time ...

Page 12: ...0 2x Screw M4 6 2x Screw M4 6 1x Touch Sensor 1x Touch Sensor 1x RGB Ultrasonic Sensor V1 0 1x RGB Ultrasonic Sensor V1 0 2x Screw M4 20 2x Screw M4 20 2x Screw M4 8 2x Screw M4 8 2x Nut M4 2x Nut M4 Assembly Guide Rainbow Color Lamp ...

Page 13: ...20cm RGB Ultrasonic Sensor V1 0 RJ11 Cable 20cm Port A Touch Sensor RJ11 Cable 20cm Port C 2x RJ11 Cable 20cm Wiring Instruction RGB Ultrasonic Sensor V1 0 Port A Touch Sensor Port C Assembly Guide Rainbow Color Lamp ...

Page 14: ...LF mini V2 0 2 Press number button 1 on IR remote control 3 Use touch sensor to control the RGB LED Touch the touch sensor it will turn on the RGB LED and change color when touch the sensor every time Coding Rainbow Color Lamp How to play ...

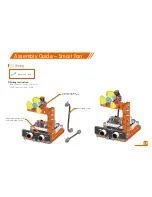
Page 15: ...Assembly Guide Smart Fan Use ultrasonic sensor to detect if anyone is in front of the fan if yes turn on the fan automat ically Energy saver ...

Page 16: ... Motor Module 1x RGB Ultrasonic Sensor V1 0 1x RGB Ultrasonic Sensor V1 0 2x Screw M4 20 2x Screw M4 20 2x Screw M4 8 2x Screw M4 8 4x Nut M4 4x Nut M4 Assembly Guide Smart Fan Note When installing the electronic module please lock screws properly to fix electronic module in position and prevent deforming the electronic bracket ...

Page 17: ...le RJ11 Cable 20cm Port B 2x RJ11 Cable 20cm RGB Ultrasonic Sensor V1 0 RJ11 Cable 20cm Port A 2x RJ11 Cable 20cm Wiring Instruction RGB Ultrasonic Sensor V1 0 Port A 130 DC Motor Module Port B Assembly Guide Smart Fan ...

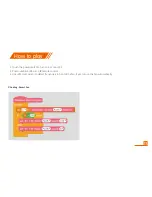
Page 18: ...ower switch to turn on ELF mini V2 0 2 Press number button 2 on IR remote control 3 Use ultrasonic sensor to detect if anyone is in front of the fan if yes turn on the fan automatically Coding Smart Fan How to play ...

Page 19: ...Assembly Guide Magical Musician Ultrasonic sensor can detect distance to the object in front of it Define different distance value to play different tone play piano in the air like a magic ...

Page 20: ... 20cm RGB Ultrasonic Sensor V1 0 RJ11 Cable 20cm Port A 1x RJ11 Cable 20cm 1x RGB Ultrasonic Sensor V1 0 1x RGB Ultrasonic Sensor V1 0 2x Screw M4 8 2x Screw M4 8 2x Nut M4 2x Nut M4 Assembly Guide Magical Musician ...

Page 21: ...n ELF mini V2 0 2 Press number button 3 on IR remote control 3 Define different ultrasonic value to play different tone put your finger in front of ultrasonic sensor and play piano in the air like a magic Coding Magical Musician How to play ...

Page 22: ... Lamp Do you have sound control lamp in your house When you passing by the lamp will turn on automatically This robot use sound sensor to control the LED module once it detected sounds the LED lamp will turn on automatically ...

Page 23: ... M4 2x Nut M4 Assembly Guide Corridor Lamp Note When installing the electronic module please lock screws properly to fix electronic module in position and prevent deforming the electronic bracket 4x Screw M4 6 4x Screw M4 6 1x Beam 1030 68 1x Beam 1030 68 1x Beam 1030 100 1x Beam 1030 100 ...

Page 24: ...1x RJ11 Cable 20cm 1x RJ11 Cable 20cm Single LED Module Red RJ11 Cable 20cm Port A Assembly Guide Corridor Lamp ...

Page 25: ...r switch to turn on ELF mini V 2 0 2 Press number button 4 on IR remote control 3 Use sound sensor to control the LED module Clap your hands and the LED lamp will turn on automatically Coding Corridor Lamp How to play ...

Page 26: ...Assembly Guide Obedient Gate Use IR remote control to control the 9g servo motor Open the gate or close the gate all in your hand ...

Page 27: ...ate 2x Screw M4 6 2x Screw M4 6 1x Beam 1030 100 1x Beam 1030 100 2x Screw M2 10 2x Screw M2 10 2x Screw M4 8 2x Screw M4 8 2x Nut M2 2x Nut M2 2x Nut M4 2x Nut M4 1x 9g Servo 1x 9g Servo 1x 9g Servo Bracket 1x 9g Servo Bracket ...

Page 28: ...1x Tapping Screw M2 6 1x Tapping Screw M2 6 2x Tapping Screw M2 8 2x Tapping Screw M2 8 1x 9g Servo Tiller 1x 9g Servo Tiller 2x Nut M4 2x Nut M4 2x Screw M4 8 2x Screw M4 8 1x Linkage 0208 88 1x Linkage 0208 88 Assembly Guide Obedient Gate ...

Page 29: ...rming the electronic bracket 9g Servo Motor RJ11 Adapter Module RJ11 Adapter Module Port C 2x Screw M4 20 2x Screw M4 20 1x RJ11 Adapter Module 1x RJ11 Adapter Module 1x RJ11 Cable 20cm 1x RJ11 Cable 20cm RJ11 Adapter Module RJ11 Cable 20cm Port C 9g Servo RJ11 Adapter Module 4 AA Battery Holder Assembly Guide Obedient Gate ...

Page 30: ...r switch to turn on ELF mini V2 0 2 Press number button 5 on IR remote control 3 Use IR remote control to control the 9g servo motor Press button to open gate press button to close gate Coding Obedient Gate How to play ...

Page 31: ...Assembly Guide Weather Station Use temperature and humidity sensor to detect the value of temperature and humidity and show on 4 digital LED module as a weather station ...

Page 32: ...w M4 20 4x Screw M4 20 2x Nut M4 2x Nut M4 Assembly Guide Weather Station Note When installing the electronic module please lock screws properly to fix electronic module in position and prevent deforming the electronic bracket 4x Screw M4 6 4x Screw M4 6 1x Beam 1030 68 1x Beam 1030 68 1x Beam 1030 100 1x Beam 1030 100 ...

Page 33: ...20cm 2x RJ11 Cable 20cm 4 Digital LED Module RJ11 Cable 20cm Port B Temperature Humidity Sensor RJ11 Cable 20cm Port C 4 Digital LED Module Port B Temperature and Humidity Sensor Port C Assembly Guide Weather Station ...

Page 34: ...rn on ELF mini V2 0 2 Press number button 6 on IR remote control 3 Use temperature humidity sensor to detect the value of temperature and humidity and show on Digital LED Module as aweather station Coding Weather Station How to play ...

Page 35: ...detect if any car needs to enter the parking lot if yes open the gate that controlled by servo and count on 4 digital LED module If a car needs to leave the parking lot use IR remote control to open the gate and number on 4 digital LED module will reduce by 1 ...

Page 36: ...M4 6 4xScrew M4 6 1x Beam 1030 68 1x Beam 1030 68 1x Beam 1030 100 1x Beam 1030 100 2x Screw M2 10 2x Screw M2 10 2x Screw M4 8 2x Screw M4 8 2x Nut M2 2x Nut M2 2x Nut M4 2x Nut M4 1x 9g Servo 1x 9g Servo 1x 9g Servo Bracket 1x 9g Servo Bracket ...

Page 37: ...x Tapping Screw M2 6 1 x Tapping Screw M2 6 2 x Tapping Screw M2 8 2 x Tapping Screw M2 8 1x9g Servo Tiller 1x9g Servo Tiller 2xNut M4 2xNut M4 2xScrew M4 8 2xScrew M4 8 1xLinkage 0208 88 1xLinkage 0208 88 Assembly Guide Parking Lot System ...

Page 38: ...0 2x Screw M4 20 2x Screw M4 20 2x Screw M4 8 2x Screw M4 8 4x Nut M4 4x Nut M4 1x RGB Ultrasonic Sensor V1 0 1x RGB Ultrasonic Sensor V1 0 1x RJ11 Adapter Module 1x RJ11 Adapter Module 1x 4 Digital LED Module 1x4 Digital LED Module 3x RJ11 Cable 20cm 3x RJ11 Cable 20cm 4 Digital LED Module RJ11 Cable 20cm Port B RJ11 Adapter Module RJ11 Cable 20cm Port C 9g Servo RJ11 Adapter Module 4 AA Battery ...

Page 39: ... sensor will detect if any car needs to enter the parking lot if yes open the gate that controlled by servo and count 4 Digital LED Module 4 If a car needs to leave the parking lot use IR remote control to open the gate and number on LED segment display will reduce by 1 Coding Parking Lot System How to play ...

Page 40: ...or kit WeeeCode Graphical Programming Software Arduino is an open source electronics platform based on easy to use hardware Arduino boards and software IDE The Arduino Software IDE allows you to write programs and upload them to your board Arduino senses the environment by receiving inputs from many sensors and affects its surroundings by controlling lights motors and other actuators The ELF mini m...

Page 41: ... Sound Sensor RJ11 Port ATmega328P Light Sensor LED Micro USB Wireless Communication Port Power Indicator Motor Port DC 3 7V Power Port 3 7V Li polymer Battery DC 6V Power Port 4 AA Battery Holder IR Receiver Touch Power Switch Buzzer LED ...

Page 42: ...t IR Remote Control insert CR2025 Button Cell not included in package 2 IR remote control guide Tip The battery of IR remote control is CR2025 button cell CR2025 Button Cell not included in package 1 7 set models servo down servo open once servo up ...

Page 43: ...unibus driver reduced the IO pin of main control chip Distance defecting resolution is 2cm Comes with 6 RGB LEDs support 256 brightness values for red green blue and 16 777 216 color combinations Adopt RJ11 port for easy connection 3 4mm installation holes Comes with built in MCU the module type can be automatically identified by main control Adopt unibus driver reduced the IO pin of main control c...

Page 44: ... 6 0v DC Running Current 80 100mA Limit angle 210 5 Peak stall torque 1 3 1 7kg cm No load speed 0 09 0 10 sec 60 Stall current 650mA 750mA 32 3 x 12 3 x 30 6 mm L x W x H Small volume and light weight A servo hub and a servo bracket are included Red LED power indicator Overcurrent protection 3 pin anti reverse connector Adopt RJ11 port for easy connection 2 4mm installation holes Operating voltag...

Page 45: ...cy energy and if not installed and used in accordance with the instructions may cause harmful interference to radio communications However there is no guarantee that interference will not occur in a particular installation If this equipment does cause harmful interference to radio or television reception which can be determined by turning the equipment off and on the user is encouraged to try to co...

Page 46: ...age surface The following parts or items are not covered by this Limited Warranty 1 Batteries fuses screws wires and other supplies 2 Transportation shipping or insurance costs 3 The cost of product demolition installation assembly adjustment or re installation To obtain warranty service please contact the authorized dealer Warrantee and show the receipt as proof of purchase date The Warrantee wil...

Page 47: ......

Page 48: ...为美 致新 ...

Page 49: ...2018 06 07 ...

Reviews: