7-6 | MVW3000
7
7-6 | MVW3000
7
Optional Accessories and Boards
A
rpm
Rc ≥ 500 Ω
PTC
Rc ≥ 500 Ω
Terminal Strip
XC4
Factory Default Function
Specifications
1
NC
Not connected
-
2
DI8
Motor thermistor input 1 - PTC 1 (see P0270
in the programming manual)
Actuation 3.9 kΩ, Release:1.6 kΩ
Minimum resistance: 100 Ω
3
DGND
(DI8)
Motor thermistor input 2 - PTC 2 (see P0270
in the programming manual)
Reference to DGND (DI8) through a 249 Ω
resistor
4
DGND
0 V reference of the 24 Vdc
Grounded via a 249 Ω resistor
5
DO1
Transistor output 1: not used
Isolated, open collector, 24 Vdc, 50 mA
maximum, eequired load (Rc) ≥ 500 Ω
6
COMUM Common point for Digital Input DI7 and
Digital Outputs DO1 and DO2
-
7
DO2
Transistor output 2: not used
Isolated, open collector, 24 Vdc, 50 mA
maximum, required load (Rc) ≥ 500 Ω
8
24 Vdc
Power Supply for the digital inputs/outputs
24 Vdc ±8 %, isolated,
Capacity: 90 mA
9
DI7
Isolated Digital Input: Not used
Minimum high level: 18 Vdc
Maximum low level: 3 Vdc
Maximum voltage: 30 Vdc
Input current: 11 mA @ 24 Vdc
10
SREF
Reference for RS-485
Serial RS-485 isolada
11
A-LINE RS-485 A-LINE (-)
12
B-LINE RS-485 B-LINE (+)
13
AI4 +
Analog input 4: Speed reference
Program P0221 = 4 or P0222 = 4
Differential analog input programmable at
P0246:
-10 V to +10 V or (0 to 20) mA/(4 to 20) mA
Resolution: 14 bits (0.006 % of full scale
range)
Impedance: 40 kΩ (-10 V to +10 V)
500 Ω [(0 to 20) mA/(4 to 20) mA]
14
AI4 -
15
AGND
0 V reference for analog output
(internally grounded)
Analog outputs signals:
-10 V to +10 V
Scales: see P0255 and P0257 in the
programming manual available for download
on:
www.weg.net
Resolution: 14 bits (0.006 % of ±10 V range)
Required load (Rc) ≥ 2 kΩ
16
AO3
Analog output 3: Speed
17
AGND
0 V reference for analog output
(internally grounded)
18
AO4
Analog output 4: Motor current
19
+ V
Available to be connected to an external
power supply to feed the encoder repeater
output (XC8)
External power supply: 5 V to 15 V
Consumption: 100 mA @ 5 V not including
the outputs
20
COM 1 0 V reference of the external power supply
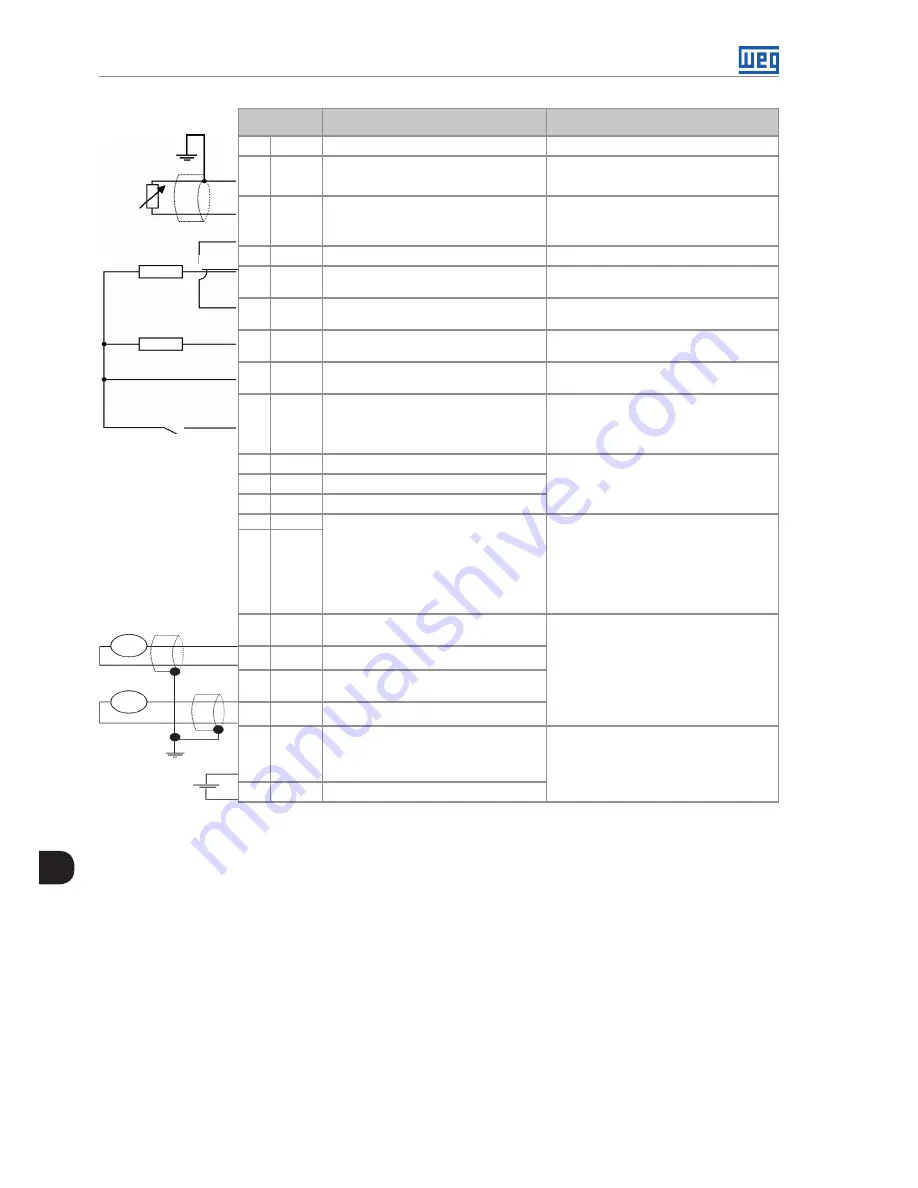
Figure 7.6:
Terminal Block description (complete EBA board)
ENCODER CONNECTION:
refer to
Section 7.3 INCREMENTAL ENCODER on page 7-14
.
INSTALLATION
The EBA board is installed directly on the MVC4 control board, secured with spacers and connected via terminal
blocks XC11 (24 V) and XC3.
Mounting instructions:
1. De-energize the control rack.
2. Configure the board via S2 and S3 DIP switches (refer to the
Table 7.4 on page 7-8
).
3. Carefully insert XC3 connector (EBA) into the female connector XC3 on the MVC4 control board. Make sure
that all pins fit in the XC3 connector.
Summary of Contents for MVW3000 A0040 V023
Page 2: ......
Page 4: ......
Page 5: ...User s Manual Series MVW3000 Language English Document 10004823674 00 Publication Date 03 2017...
Page 6: ...Summary of Reviews Version Review Description R00 First edition...
Page 12: ...1 4 MVW3000 1 Safety Notices...
Page 58: ...6 18 MVW3000 6 Installation Connection and Energization...


