background image

14

WEGO

 ENDURO 300 l


User Manual

• NEVER attempt to disassemble or service your unit.
• DO NOT expose the unit to extreme heat, shocks, 

magnetic fields, electrical noise, strong vibration or  
long-term exposure to direct sunlight.

• DO NOT drop or step on the watch.
• TO CLEAN THE UNIT: wipe with a lightly moistened 

cloth. Apply mild soap to the area if there are 
stubborn stains or marks. Do not expose the unit 
to strong chemicals such as gasoline, cleaning 
solvents, acetone, alcohol or insect repellents, as 
they may damage the unit’s seal, case and/or finish.

• STORE the unit in a dry place when you are not 

using it.

CARE & MAINTENANCE

Summary of Contents for Enduro 300

Page 1: ...JoinWeGo com USER MANUAL measure your heart rate for a better healthier you heart rate monitor...

Page 2: ...ow to Wear 3 Optical HRM Mode 4 HRM Mode Start Lap Stop and Reset 5 Chrono Mode Alarm Chime Mode 6 Set Mode Time Mode 7 Unit User Mode 8 HRM Mode Contrast Mode 9 Night Mode 10 Set Chime and Alarm 11 H...

Page 3: ...ers and heart rate monitors are engineered for QUALITY and VALUE using the LATEST TECHNOLOGY in data tracking WeGo s line includes products for all individuals regardless of their fitness level or act...

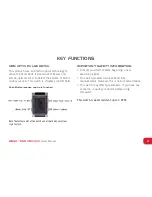
Page 4: ...ess no HR belt Note that actual color of the watch and artwork may vary from style to style Push Button location and main function IMPORTANT SAFETY INFORMATION Consult your doctor before beginning a n...

Page 5: ...t higher on your forearm If the Heart rate data displayed in the watch is not stable or erratic try to move the watch along your forearm within the best wearing position as shown Important notes Befor...

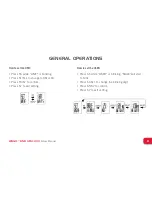
Page 6: ...RATIONS OPTICAL HRM MODE How to turn ON the Optical HRM Press S5 while in TIME mode to go to HRM mode Press S7 from TIME mode to go to HRM mode Press S7 from TIME mode to go to CHRONO mode Note In any...

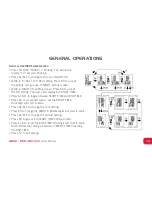
Page 7: ...n displayed in Bottom row Max In Zone Chronograph Calorie and Clock How to Start take Lap Stop and Reset in CHRONO and HRM mode Press S1 to START STOP or Re START Press S11 to take manual Lap The disp...

Page 8: ...ALARM AND CHIME MODE How to set the Alarm and Chime in Alarm mode Press S7 from Time mode to go to Alarm mode Press S5 to scroll Alarm 1 to 5 through Chime screen The 5 alarms can be set individually...

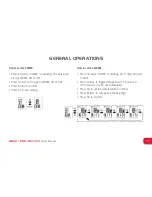
Page 9: ...ote In Time mode press and hold S1 to change view from T1 Time 1 to T2 Time 2 and vice versa SET MODE How to set the various setting parameters in SET mode Press S7 from Time mode to go to SET mode an...

Page 10: ...S5 while UNIT is blinking Press S1 S11 to change to KM or MI Press S5 S7 to confirm Press S7 to exit setting How to set the USER Press S5 while USER is blinking MALE will start to blink Press S1 S11...

Page 11: ...o blink Press S1 S11 to change the blinking digit Press S5 S7 to confirm Press S7 to exit setting How to set the CONTRAST Press S5 while CONTRAST is blinking Contrast percentage will start to blink Pr...

Page 12: ...o accept the ON setting The watch will display the START TIME Press S1 S11 to toggle between START TIME and END TIME Press S5 or 3 seconds auto to set the START TIME Hour digit will start to blink Pre...

Page 13: ...ME ON or OFF Press S5 S7 to confirm Press S7 to exit setting How to set the ALARM Press S5 while ALRM is blinking AL 1 digit will start to blink Press S1 S11 to toggle through Alarm 1 to alarm 5 The 5...

Page 14: ...ther object that will interfere with the sensor The heart rate is taken directly through your skin to the watch sensor so it is very important that there are no obstructions that will interfere with t...

Page 15: ...ode or Leak Do Not Swallow Keep Battery Out of Reach of Children The WEEE symbol on the product or on its packaging indicates that the product must not be disposed of with normal household waste Inste...

Page 16: ...ect sunlight DO NOT drop or step on the watch TO CLEAN THE UNIT wipe with a lightly moistened cloth Apply mild soap to the area if there are stubborn stains or marks Do not expose the unit to strong c...

Page 17: ...ouch SOLUTION Decrease finger pressure on the Sensor Pads CAUSE dead skin on wrist finger or chest SOLUTION Rub off excessive dead skin with a towel CAUSE a thin layer of body grease insulates the ECG...

Page 18: ...eturn it prepaid to EB SPORT GROUP 585 OAK RIDGE ROAD HAZLETON PA 18202 Complete this Guarantee Certificate and enclose it or a copy of it with the product Please contact Customer Service at 866 694 4...

Page 19: ...uarantee does not cover crystal or battery FOR PURCHASES MADE IN THE UK Should you experience problems with this item please return it to the point of purchase This will not affect your statutory righ...

Page 20: ...BPM and Max HR Display Date Dual Time Zone Daily Alarms Lap Split Time Water Resistant 50M PULSE PACE PLUS Optical Heart Rate Technology Time Chronograph HR Quick On Demand HR Reading HR Zone Max HR C...

Page 21: ...POSITION 65 WARNING This product may contain chemicals known to the State of California to cause cancer birth defects and or reproductive harm WARNING Heart rate monitoring systems may be inaccurate O...

Reviews: