background image

Cleaning

 Use the usual commercial means of care for polyester tents for the cleaning of the tent.

• 

 Do not wash the tent in the washing machine.

• 

 Do not have the tent cleaned by the dry-cleaner.

• 

Packing and storing

 Pack the components of the tent in a dry and clean condition to avoid the creation of 

• 

mould. Allow the parts to dry thoroughly if they have become wet during use.
 Store the parts of the tent at a dry place. The fabric, the rods and zipper may be 

• 

attacked 

by mould or corrosion if stored in a wet condition.

The site

 Select a site that is as level as possible and free from depressions in the ground.

• 

 Remove stones, rocks, branches of trees and other objects before you begin with the erec-

• 

tion of the tent. Sharp edges may not only damage the tent but they can also be very an-
noying.
 Erect the tent in such a way that the entrance is out of the direction of the wind. Also make, 

• 

if possible, use of natural wind breaking effects.

General instructions

 Make the transport bag completely empty.

• 

 Separate, if required, the outside tent and the inside tent.

• 

 Connect all rods in the required way.

• 

 Place the accessories, such as earth nails, tent pegs, tensioning cables, etc. in the proper 

• 

way around you.

Erecting

1.  Spread the outer tent on the ground with the channels facing upward.

2.  Push the 3 fibreglass poles through the channels.

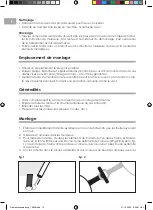
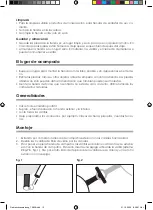
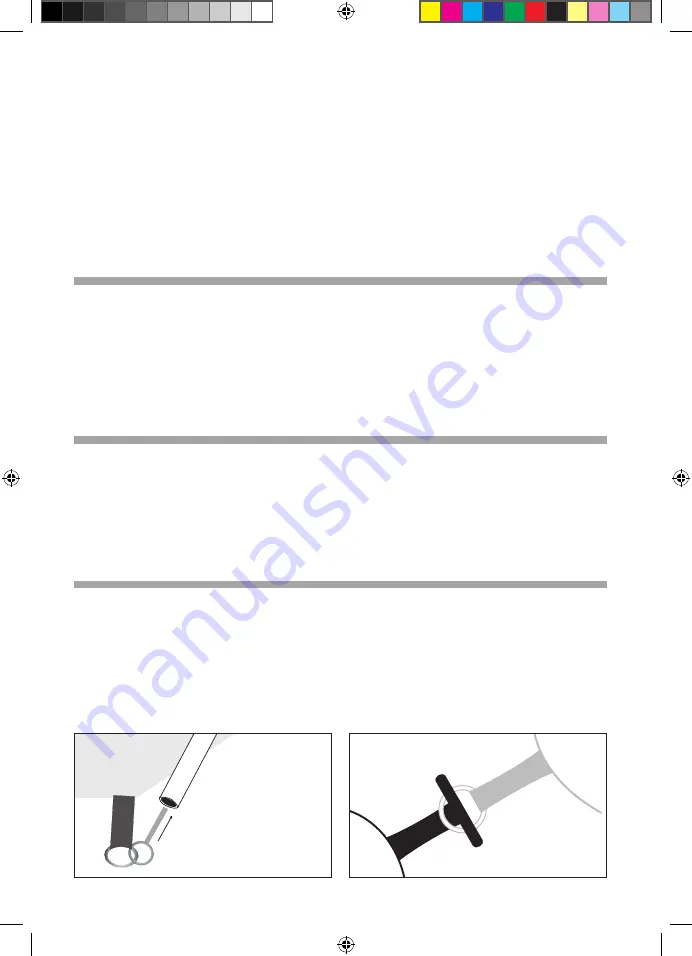
3.  To erect the tent, the poles are to be bent one after another and tensioned with the tent. 

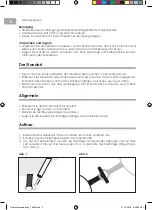
To do so, insert a spike in the end of a rod (Ring-Pin-System, ill.1). On the other side, pull the 
material over the rod as it bends and insert the spike in the free end of the rod.

ill. 1

ill. 2

Gebrauchsanweisung_15838.indd   7

01.10.2009   8:59:00 Uhr

Summary of Contents for Tunnel Deluxe 15838

Page 1: ...Aufbauanleitung Instructions Instructions de montage Instrucciones de montaje Art 15838 Tunnel Deluxe Gebrauchsanweisung_15838 indd 1 01 10 2009 8 58 57 Uhr ...

Page 2: ...Tienda exterior Innenzelt Inner Tent Tente intérieure Tienda interior Langes Gestänge Long frame rods Arceaux longs Varillaje largo Stahlstangen steel pales mâts en acier barras de acero Abspannleinen Guy lines Cordelettes avec tendeurs Cuer das tensoras Erdnägel Nail pegs Piquets Clavos Gebrauchsanweisung_15838 indd 2 01 10 2009 8 58 59 Uhr ...

Page 3: ...dem Aufbau des Zeltes vertraut So können Sie das Zelt am Urlaubsort schnell und problemlos aufbauen Gehen Sie sicher dass Sie alle Teile des Zeltes eingepackt haben Erkundigen Sie sich welche Beschaffenheit der Boden im Urlaubsort hat sandig steinig und nehmen Sie geeignete Erdnägel oder Heringe mit Beim Gebrauch Lassen Sie die Entlüftung stets geöffnet damit sich kein Schwitzwasser im Zelt ansamm...

Page 4: ...Steine Äste oder andere Gegenstände bevor Sie mit dem Aufbau be ginnen Scharfe Kanten können nicht nur das Zelt beschädigen sie können auch sehr stören Richten Sie das Zelt so auf dass der Eingang nicht im Wind steht Nutzen Sie auch natürli chen Windschutz Allgemein Entleeren Sie die Transporttasche komplett Trennen Sie ggf Außen und Innenzelt Stecken Sie die Fiberglasstangen zusammen Legen Sie da...

Page 5: ... und die andere mit Erdnägeln befestigen Abbau Vorbereitung Reinigen Sie das Zelt von innen und außen trocken 1 Schließen Sie die Reißverschlüsse 2 Entfernen Sie die Abspannleinen 3 Entfernen Sie alle Erdnägel aus dem Boden 4 Entfernen Sie das Innenzelt 5 Ziehen Sie an jeder Ecke den Dorn aus dem Gestänge 6 Schieben Sie die Gestänge nacheinander aus den Kanälen 7 Falten und rollen Sie das Zelt auf...

Page 6: ...n of the tent In this way you make sure that you can erect the tent quickly and without any problems at the camping ground Make sure you have packed together all components of the tent Try to find out in advance which nature the soil of the camping ground has for instance sandy gravel and pack suitable earth nails or tent pegs When using the tent Allow the venting appliances always to remain open ...

Page 7: ...not only damage the tent but they can also be very an noying Erect the tent in such a way that the entrance is out of the direction of the wind Also make if possible use of natural wind breaking effects General instructions Make the transport bag completely empty Separate if required the outside tent and the inside tent Connect all rods in the required way Place the accessories such as earth nails...

Page 8: ...rations Clean and dry the tent inside and out 1 Close the zips 2 Remove the guy lines 3 Remove all nail pegs from the ground 4 Remove the inner tent 5 Pull the spike out of the rod at each corner 6 Push the rods out of the channels one after the other 7 Fold and roll the tent to the right size for the bag Packing 1 Pack the cleaned nail pegs and the frame rods in the bags provided 2 Place all part...

Page 9: ...t recommandé de se familiariser avec le montage de la tente afin d éviter les problèmes et de ne pas perdre de temps durant les vacances S assurer que toutes les pièces sont présentes Se renseigner sur le type de terrain sable pierres etc et se munir de piquets adéquats Durant l utilisation Ne pas obstruer les ouvertures de ventilation afin d éviter la formation de condensation Ne pas utiliser d i...

Page 10: ...e l entrée ne soit pas face au vent et en tenant comp te des obstacles éventuels formant une protection naturelle contre le vent Généralités Vider complètement le sac de transport lors du montage de la tente Séparer la toile de tente et la chambre intérieure le cas échéant Emboîter tous les mâts Préparer tous les accessoires piquets cordes etc Montage 1 Étendez complètement la tente extérieure sur...

Page 11: ...ente à sec intérieurement et extérieurement 1 Fermez les fermetures à glissière 2 Enlevez les cordelettes 3 Retirez tous les piquets du sol 4 Sortez la tente intérieure 5 Sortez les arceaux des œillets à chaque coin 6 Sortez les arceaux des fourreaux en les poussant les uns après les autres 7 Pliez et roulez la tente de manière à ce qu elle rentre dans le sac Emballage 1 Mettez les piquets propres...

Page 12: ...n problemas en el lugar elegido para las vacaciones Asegúrese de que lleva todas las piezas de la tienda Infórmese sobre las condiciones del suelo que tiene el lugar escogido para las vacaciones arenoso con piedras y lleve clavos de tierra o piquetas adecuadas En la tienda Deje siempre abierta la ventilación de la tienda para que no se acumule agua conden sada en el interior de la misma No rocíe e...

Page 13: ...ueden dañar la tienda sino que también pueden ser molestas Monte la tienda de forma que la entrada no esté de cara al viento Utilice también los cortavientos naturales Generalidades Vacíe todo el maletín portátil Separe si fuera necesario la tienda exterior y la interior Junte todas las varillas Deje preparados los accesorios por ejemplo clavos de tierra piquetas cuerdas tenso ras Montaje 1 Extien...

Page 14: ...de los lazos sobre la punta de la barra y el otro fijándolo con clavos para tierra Desarmar la tienda Preparación Limpie la tienda por dentro y por fuera y deje que se seque 1 Cierre las cremalleras 2 Quite las cuerdas tensoras 3 Quite los clavos del suelo 4 Quite la tienda interior 5 Quite de cada esquina el punzón de la varilla 6 Quite las varillas de los tubos 7 Doble y enrolle la tienda hasta ...

Page 15: ...Gebrauchsanweisung_15838 indd 15 01 10 2009 8 59 02 Uhr ...

Page 16: ...friedola Gebr Holzapfel GmbH Helgoländer Str 1 3 D 37269 Eschwege Germany www wehncke de Gebrauchsanweisung_15838 indd 16 01 10 2009 8 59 02 Uhr ...

Reviews: