4. Anchor the tent to the ground at the corners and at the rings at the poles ends with the
pegs.
5. The guy lines secure the tent. Attach the guy lines to the grommets on the outer tent and
fix the other end to the ground with nail pegs. The guy line should still be fairly slack. Move
the plastic slider to tension or loosen the guy line.
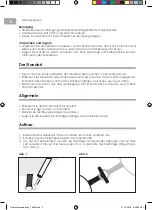
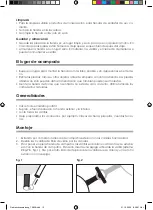
6. Hang the inner tent into outer tent by putting the toggles of the inner tent into the rings of
the outer tent (ill. 2).
7. The door can either be rolled up or propped up with two poles. Assemble the poles and
insert the pointed end of the pole through the eyelet at the corner of the door. Tension the
entrance by putting one end of the guy line over the point of the metal pole and fix the
lower loop to the ground with a peg.
Taking the tent down
Preparations:
Clean and dry the tent inside and out.
1. Close the zips.
2. Remove the guy lines.
3. Remove all nail pegs from the ground.
4. Remove the inner tent.
5. Pull the spike out of the rod at each corner.
6. Push the rods out of the channels one after the other.
7. Fold and roll the tent to the right size for the bag.
Packing
1. Pack the cleaned nail pegs and the frame rods in the bags provided.
2. Place all parts of the tent in the carrying bag. They should be as clean and dry as pos-
sible.
If any parts of the tent are still wet, you should remove them from the bag and dry them as
soon as possible, e.g. on arriving home.
Attention!
When you are working with rods in general: When joining the components
of the rods, take care that your fingers will not be caught in them.
Fibre glass rods: The individual rods are under tension when you insert them
into the second metal eye. Take care that they do not spring out of your
hand you might get hurt.
GB
Gebrauchsanweisung_15838.indd 8
01.10.2009 8:59:00 Uhr


