4
1.
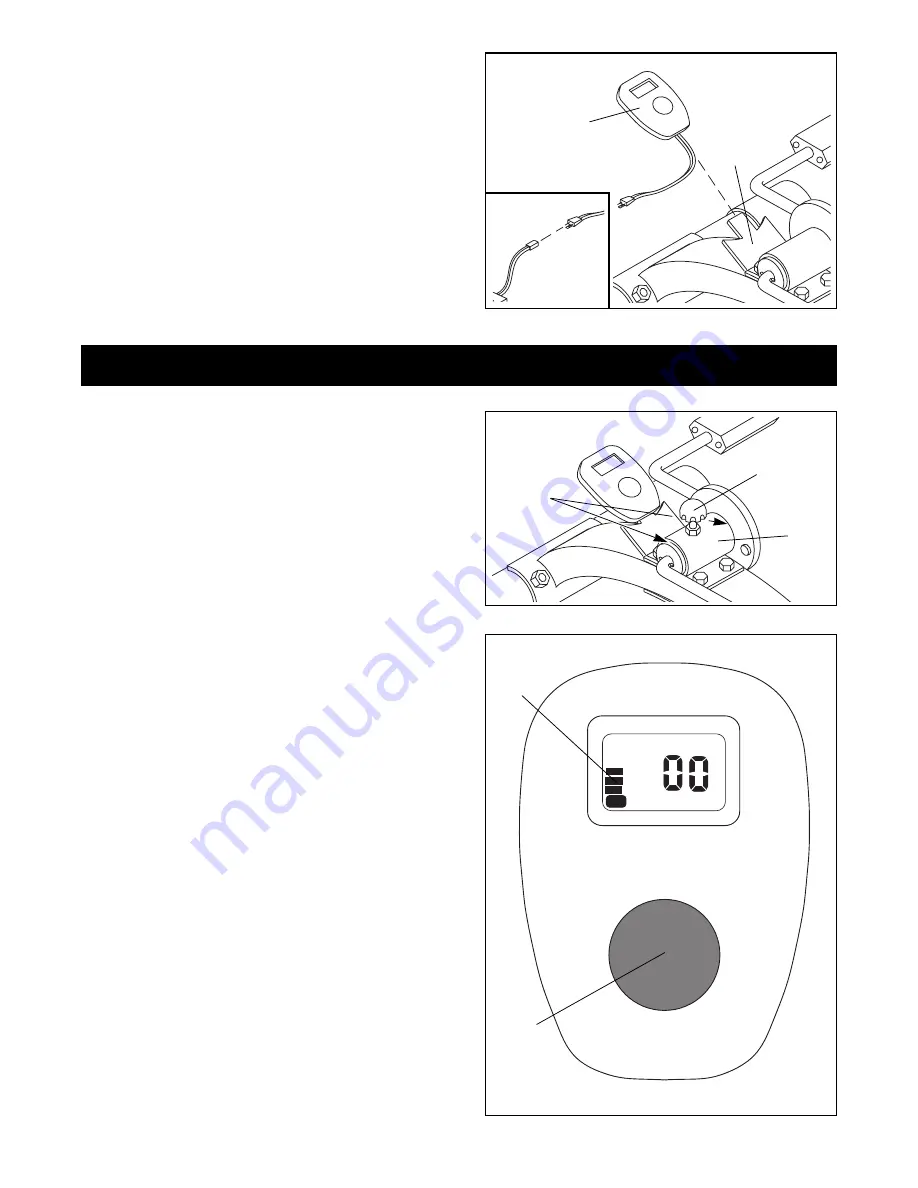
Adjusting the Pedal Resistance
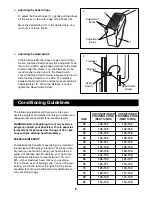
To adjust the resistance on the Pedals, tighten or
loosen the Resistance Knob (16) on top of the Crank
Assembly (6).
Note: To get the best performance from the 44XC,
apply a few drops of multi-purpose oil to the pedal
bushings every three months.
2.
Using the Electronic Monitor
If there is a piece of clear plastic on the Electronic
Monitor, remove it before operating the Monitor. The
Electronic Monitor will turn on when the Pedals are
turned or the MODE/RESET Button is pushed.
The Monitor features five different modes to provide
you with instant exercise feedback:
¥ TIME displays the time you have exercised.
¥ SPEED shows the speed with which you are
pedalling, in kilometers per hour.
¥ DISTANCE displays the distance you have ped-
aled, in kilometers.
¥ CALORIES shows the approximate number of
Calories you have burned while exercising.
¥ SCAN displays the other modes in a repeating
cycle, showing each mode for five seconds.
In addition, the Status Bar (B) shows the speed with
which you are pedalling.
You can manually select each mode by pressing the
MODE/RESET Button (C) until the desired mode is
displayed. To reset the display, hold down the Button
for 3 to 4 seconds. The Monitor will turn off automati-
cally if neither the Pedals nor the Button are moved
for about five minutes.
CAL
SCAN TIME SPEED DISTANCE CALORIES
STP
2
1
Using and Adjusting the 44XC
16
Apply Oil
Here
6
B
C
2.
Remove the Battery Door (not shown) from the back
of the Electronic Monitor (13). Install two ÒAAÓ batter-
ies (not included). Make sure the batteries are orient-
ed correctly.
Re-install the Battery Door.
Push the Electronic Monitor (13) in place on the
Monitor Bracket (7).
Plug the Monitor Wire into the Reed Switch Wire as
shown in the inset drawing. The Reed Switch is locat-
ed underneath the Frame near the Flywheel.
2
13
7


