background image

  3


Outdoor wireless kit

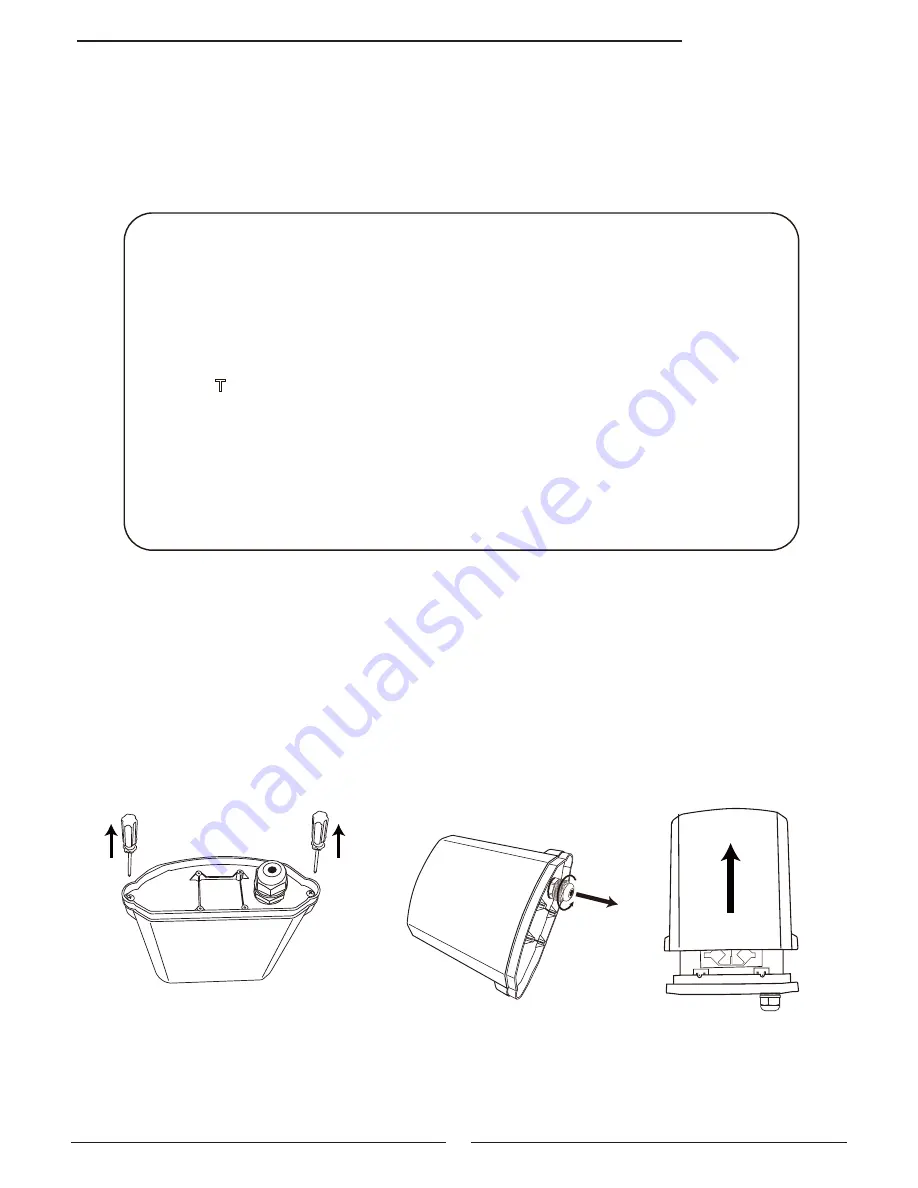
V. Installation

(TRANSMITTER)

e

r

u

s

o

l

c

n

e


n

e

p

O


.

3

f

f

o


d

n

a

l

g


e

l

b

a

C


.

2

f

f

o


w

e

r

c

S


.

1

Pairing process

Press the pair keys of transmitter and receiver. Both of them will search 
each other to finish setting with encryption. when the “Link” light is on, that 
means successful.

Note:
     1. The pairing is successful after delivery.
     2. After successful pairing process, while the Link light is off, it shows that   
         there is no connection between the transmitter and the receiver. 
         It means the transmission rage is a little too far to connect between
         the transmitter and the receiver. The reception between the transmitter &      
         the receiver is not stable. Please reduce the distance between the
         transmitter and the receiver until it works.

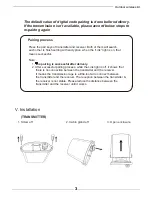
The default value of digital code pairing is done before delivery.
If the transmission isn’t available, please accord below steps to 
re-pairing again

Summary of Contents for TR-2020DK

Page 1: ...User Manual 2 4 GHz Outdoor Wireless Kit...

Page 2: ...less video transceiver is specially designed for outdoor wireless CCTV installation Transmitting Video Audio RS485 Data for PTZ camera together by one set Built in high gain antenna with all in one co...

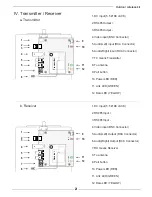
Page 3: ...nnector 7 TX means Transmitter 8 To antenna 9 Pair button 10 Power LED RED 11 Link LED GREEN 12 Data LED YELLOW 2 RS485 Input 3 RS485 Input 4 Video input BNC Connector 1 DC input 5 5 DC JACK 5 Audio L...

Page 4: ...livery 2 After successful pairing process while the Link light is off it shows that there is no connection between the transmitter and the receiver It means the transmission rage is a little too far t...

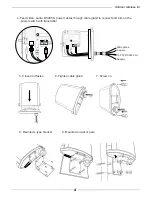
Page 5: ...4 Feed video audio RS485 power cables through cable gland to connect and turn on the power switch with transmitter 5 Close and fasten 6 Tighten cable gland 7 Screw on Camera To PTZ RS485 Port Micropho...

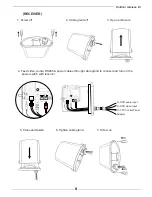
Page 6: ...lose and fasten 6 Tighten cable gland 7 Screw on RECEIVER 4 Feed video audio RS485 power cables through cable gland to connect and turn on the power switch with receiver To DVR video input To PTZ Cont...

Page 7: ...6 Outdoor wireless kit Notice Please make both Transmitter Receiver face to face and keep them on the same direction FACE TO FACE 8 Mounted L type bracket 9 Mounted to wall or pole...

Page 8: ...deo connector Audio connector Supply voltage Supply current Output power Sensitivity Video input output level Audio input output level r e v i e c e R r e t t i m s n a r T 2 400 2 483 GHz FHSS mode A...

Reviews: