background image

8

EN LIFE-BASE

WM

 6833

0

4

/2

021

2 Safety

2.1.3 Intended users

Users within the scope of the intended medical purpose
are medical personnel trained for emergency medicine. 
This includes:

Emergency physicians

Intensive medicine specialists

Paramedics

Other similar

2.1.4 Contraindications

There are no known contraindications for the use of this product.

2.2 Intended application areas

Mobile use in emergency medicine for primary care in 
prehospital emergency response

During transport between hospital rooms and departments

During transport between the hospital and other sites in 
an ambulance, ship, airplane or helicopter

2.3 Possible side-effects and 

complications

There are no known side-effects for the use of this product.

2.4 Exclusions and restrictions of 

intended purpose

The device is 

not 

approved for the following uses:

Operation in combination with magnetic resonance scanners 
(MRT, NMR, NMI)

Operation in toxic environment

Summary of Contents for LIFE-BASE 1 NG

Page 1: ...IFE BASE 1 NG LIFE BASE III LIFE BASE light LIFE BASE 1 NG XL LIFE BASE 3 NG LIFE BASE 1 NG XS LIFE BASE Mini II LIFE BASE 4 NG Read the instructions for use before using this product Failure to obser...

Page 2: ...Safe use of the portable unit and accessories 11 3 Description 12 3 1 Overview 12 3 2 Accessories and other parts 20 4 Assembly 25 4 1 Attaching the protective bag to the portable unit 25 4 2 Attachi...

Page 3: ...e or equipment rail 103 6 5 Storing device accessories 109 7 Disassembly 110 7 1 Removing the protective bag from the portable unit 110 7 2 Removing the accessories bag from the portable unit or prote...

Page 4: ...d accessories without a charging interface 160 12 2 Portable units and accessories with a charging interface 160 12 3 Contaminated parts 160 13 Scope of supply 161 13 1 Accessories and other parts 161...

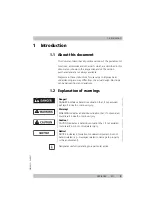
Page 5: ...he actual design No claims can be derived from any deviations 1 2 Explanation of warnings Danger DANGER indicates a hazardous situation that if not avoided will result in death or serious injury Warni...

Page 6: ...flow these warnings are embedded in the action The symbols and signal words described above are used Example of an embedded warning 1 Suspend the portable unit on the pole using the pole mounting 2 Wa...

Page 7: ...e see 2 1 Intended purpose page 7 Do not use the portable unit in the event of contraindications Follow the instructions for use of the attached devices and their accessories Follow the assembly instr...

Page 8: ...application areas Mobile use in emergency medicine for primary care in prehospital emergency response During transport between hospital rooms and departments During transport between the hospital and...

Page 9: ...ces by providing the medical accessories required for treatment quickly and in an use oriented manner 2 6 Requirements for the user The user must meet the following requirements The user has a medical...

Page 10: ...epairs and maintenance work carried out by WEINMANN Emergency 2 7 3 Do not make any modifications to the construction of the portable unit or accessories If modifications are made to the construction...

Page 11: ...can be damaged or damage the device Do not load the portable unit with additional weight e g by leaning on it sitting on it standing on it using it as an access aid to hit windows and doors 2 9 2 Do n...

Page 12: ...table unit 3 Loop for tension belt long Serves to fasten the breathing circuit of the ventilator Secures the portable unit if it is fastened to a pole or equipment rail with the holding claws 4 Loop f...

Page 13: ...21 LIFE BASE EN 13 3 Description 3 1 2 LIFE BASE light 1 2 No Name Description 1 Handle Serves to lift and carry the portable unit 2 Loop for shoulder strap Serves to fasten the shoulder strap to the...

Page 14: ...on the portable unit 3 Cross bar Serves to fasten the portable unit to the wall mounting 4 Loop for tension belt long Serves to fasten the low pressure hose of the ventilator if you are not using a pr...

Page 15: ...tive bag to the portable unit 3 Cross bar Serves to fasten the portable unit to the wall mounting 4 Vibration absorber only with MEDUMAT Transport Reduces vibrations and impacts in order to protect th...

Page 16: ...astener Fixes the protective bag to the portable unit 3 Cross bar Serves to fasten the portable unit to the wall mounting 4 Spacer plate Serves to fasten the devices on the portable unit 5 Hanger Serv...

Page 17: ...o lift and carry the portable unit 2 Loop for shoulder strap Serves to fasten the shoulder strap to the portable unit 3 Patient valve bracket Holds the patient valve on the portable unit 4 Snap fasten...

Page 18: ...nit 3 Spacer plate only with LIFE BASE 3 NG Serves to fasten the devices on the portable unit 4 Cross bar Serves to fasten the portable unit to the wall mounting 5 Cylinder bracket Fastens the oxygen...

Page 19: ...Serves to lift and carry the portable unit 5 Snap fastener Fixes the protective bag to the portable unit 6 Protective hoops Protect the devices and accessories from damage 7 Vibration absorber only wi...

Page 20: ...on 3 2 Accessories and other parts 3 2 1 Straps Strap Name Description Shoulder strap for attachment to the handle Serves to lift and carry the portable unit Shoulder strap for attachment to the loops...

Page 21: ...of the ventilator Secures the portable unit if it is fastened to a pole or equipment rail with the holding claws Tension belt long Fastens the breathing circuit of the ventilator Secures the portable...

Page 22: ...d in the scope of supply see 13 1 Accessories and other parts page 161 Bag Name Description Protective bag with or without accessories bags Protects the portable unit and the devices attached to it fr...

Page 23: ...Name Description Wall mounting BASE STATION 1 NG Serves to hold the portable unit in an emergency vehicle Wall mounting BASE STATION Mini II Serves to hold the portable unit in an emergency vehicle Wa...

Page 24: ...eiling mounting BASE STATION 1 NG Serves to hold the portable unit in an ambulance Retaining claw Fastens the portable unit or the wall mounting on an equipment rail Pole mounting Fastens the portable...

Page 25: ...se are explained Otherwise assembly is the same for all versions 4 1 Attaching the protective bag to the portable unit 4 1 1 Attaching the protective bag for LIFE BASE light 1 Place the protective bag...

Page 26: ...k and loop fasteners on the front of the protective bag Result The protective bag is attached to the portable unit 4 1 2 Attaching the protective bag for LIFE BASE 1 NG XS 1 Place the portable unit on...

Page 27: ...g over the portable unit up to the handle or With the monitor defibrillator Guide the slot on the protective bag over the bottom of the portable unit from the front 3 Close the hook and loop fastener...

Page 28: ...se the protective bag window Clamp the breathing circuit in the space between the portable unit and the ventilator Fasten the breathing circuit to the protective bag using the tension belts or With th...

Page 29: ...e portable unit on a flat firm surface 2 With LIFE BASE 1 NG Position the portable unit from behind on the base of the protective bag or With LIFE BASE 1 NG XL Guide the bottom of the portable unit fr...

Page 30: ...ic locks or hook and loop fasteners on the front and back of the protective bag Result The protective bag is attached to the portable unit 4 1 4 Attaching the protective bag for LIFE BASE III LIFE BAS...

Page 31: ...table unit from behind 2 4 Close the snap fasteners on the portable unit 5 With LIFE BASE 4 NG with brackets Fasten the hook and loop straps to the protective hoops 6 Close the clips or magnetic locks...

Page 32: ...r protective bag 4 2 1 Attaching the side accessories bag Applies to Protective bags with attachable accessories bags 1 Hook in the zipper on the accessories bag in the zipper on the protective bag 2...

Page 33: ...2 Determine the position of the hook and loop fastener on the portable unit 3 Adhere the hook part of the hook and loop fastener to the portable unit 4 Press on the hook part of the hook and loop fas...

Page 34: ...FE BASE 1 NG 1 Open the hook and loop fasteners on the back of the accessories bag 2 Feed the hook and loop straps through the loops on the protective bag 3 Close the hook and loop fasteners on the ba...

Page 35: ...essories bag to the portable unit with the snap fasteners 2 Close the hook and loop fastener on the back of the portable unit Result The accessories bag is attached to the portable unit 4 2 5 Attachin...

Page 36: ...unit 4 3 1 Attaching the shoulder strap to the handle Applies to LIFE BASE 1 NG XS 1 Place the hook and look fastener of the shoulder strap around the handle 2 Close the hook and loop fastener of the...

Page 37: ...the portable unit 2 Close the hook and loop fasteners of the shoulder strap Result The shoulder strap is attached to the portable unit 4 3 3 Attaching the tension belts to the portable unit Applies to...

Page 38: ...BASE 4 NG Damage to cylinder brackets The tensioning force of the cylinder brackets can be set differently If the cylinder brackets can only be closed by applying significant force the brackets may be...

Page 39: ...ook the tensioning hoop 2 from the lock in position on the cylinder brackets 3 Insert the oxygen cylinder from the front or side into the portable unit 4 Notice Damage to cylinder brackets Turn the te...

Page 40: ...the oxygen cylinder for firm fit When doing so note The latches on the cylinder brackets must not come open The oxygen cylinder must not move 8 If the oxygen cylinder moves Adapt the length of the cy...

Page 41: ...cylinder brackets 1 2 Unhook the retaining bolt 2 3 Insert the oxygen cylinder from the side into the portable unit 4 Notice Damage to cylinder brackets Turn the retaining bolt to adapt the tensionin...

Page 42: ...7 Check the oxygen cylinder for firm fit When doing so note The latches on the cylinder brackets must not come open The oxygen cylinder must not move 8 If the oxygen cylinder moves Adapt the tensioni...

Page 43: ...Standard Required auxiliary equipment Screwdriver with crosshead PH1 1 Position the device with the control panel membrane facing downwards 2 Determine the holes for the device on the portable unit 3...

Page 44: ...to the power supply according to the instructions for use 6 Complete attachment of the device to the portable unit see 4 5 7 Completing assembly page 80 Result The device is attached to the portable...

Page 45: ...unit see 4 3 Attaching the belt to the portable unit page 36 2 Position the device with the control panel membrane facing downwards 3 Determine the holes for the device on the portable unit 4 Place t...

Page 46: ...5 7 Completing assembly page 80 Result The device is attached to the portable unit 4 5 3 Attaching the device to LIFE BASE 1 NG XS Applies to MEDUMAT Standard2 MEDUVENT Standard MEDUCORE Standard2 ME...

Page 47: ...ce on the spacer plate 3 Place the spacer plate on the device When doing so note The holes for the device and the spacer plate must be aligned on top of each other MEDUCORE Standard MEDUMAT Standard2...

Page 48: ...screw the device to the spacer plate 5 Connect the device to the power supply according to the instructions for use Device Part Number MEDUMAT Standard2 100 3 104 3 MEDUVENT Standard 100 3 104 3 MEDU...

Page 49: ...ly 6 Determine the hole for the cable clamp on the spacer plate 7 Place the cable for the power supply in the cable clamp 105 WM 9878 WM 9728 WM 9713 MEDUCORE Standard MEDUMAT Standard2 MEDUCORE Stand...

Page 50: ...WM 68331 04 2021 4 Assembly 8 Screw 1 cable clamp 105 and 1 protective disk 104 to the spacer plate using 1 screw 101 When doing so note The flat side of the cable clamp faces down 104 105 101 12 mm M...

Page 51: ...ble unit see 4 5 7 Completing assembly page 80 Result The device is attached to the portable unit 4 5 4 Attaching the device to LIFE BASE 1 NG and LIFE BASE 4 NG with protective hoops Applies to MEDUM...

Page 52: ...protective disks 104 and 4 plain washers 106 to screw the device to the portable unit When doing so note The holes for the portable unit and the device must be aligned on top of each other 5 Complete...

Page 53: ...syCPR Required auxiliary equipment Screwdriver with crosshead PH1 1 If available Fasten the shoulder strap to the portable unit see 4 3 Attaching the belt to the portable unit page 36 2 With MEDUMAT S...

Page 54: ...ce the spacer plate on the device When doing so note Every device has a certain position MEDUMAT EasyCPR can be attached in 2 positions to the spacer plate The holes for the device and the spacer plat...

Page 55: ...vailable Connect the device to the power supply according to the instructions for use 8 With MEDUMAT Standard2 and MEDUVENT Standard Place the cable for the power supply in the cable clamp 105 Device...

Page 56: ...late using 1 screw 101 When doing so note The flat side of the cable clamp faces down 10 With MEDUVENT Standard Screw 1 cable clamp 105 and 1 protective disk 104 to the spacer plate using 1 screw 101...

Page 57: ...IFE BASE 1 NG XL Guide the low pressure hose away to the left 12 With LIFE BASE 1 NG XL Undo the knurled screws Pull out the hangers Tighten the knurled screws 13 Place the portable unit with holes ab...

Page 58: ...portable unit or With LIFE BASE 3 NG Use 4 screws 102 and 4 protective disks 104 to screw the spacer plate to the portable unit 15 Complete attachment of the device to the portable unit see 4 5 7 Comp...

Page 59: ...he shoulder strap to the portable unit see 4 3 Attaching the belt to the portable unit page 36 2 Position the device with the control panel membrane facing downwards 3 Determine the holes for the devi...

Page 60: ...crews 100 and protective disks 104 to screw the device to the spacer plate 6 Connect the device to the power supply according to the instructions for use Device Part Number MEDUCORE Standard2 100 4 10...

Page 61: ...in the cable clamp 105 8 With MEDUCORE Standard on LIFE BASE 3 NG Screw 1 cable clamp 105 and 1 protective disk 104 to the spacer plate using 1 screw 101 When doing so note The flat side of the cable...

Page 62: ...with holes above each other on the spacer plate 11 With LIFE BASE 3 NG Use 4 screws 102 and 4 protective disks 104 to screw the spacer plate to the portable unit or With LIFE BASE 1 NG XL Use 4 screws...

Page 63: ...T Standard2 MEDUVENT Standard MEDUMAT EasyCPR MEDUCORE Standard2 Required auxiliary equipment Screwdriver with crosshead PH1 1 If available Fasten the shoulder strap to the portable unit see 4 3 Attac...

Page 64: ...vices on the spacer plate 5 Place the spacer plate on the devices When doing so note Every device has a certain position The holes for the devices and the spacer plate must be aligned on top of each o...

Page 65: ...o screw the spacer plate to the devices 7 If available Connect the devices to the power supply according to the instructions for use 8 With MEDUMAT Standard2 and MEDUVENT Standard Place the cable for...

Page 66: ...mbly 9 With MEDUMAT Standard2 Screw 2 cable clamps 105 and 2 protective disks 104 to the spacer plate using 2 screws 101 When doing so note The flat side of the cable clamps faces down 12 mm MEDUMAT S...

Page 67: ...and 2 protective disks 104 to the spacer plate using 2 screws 101 When doing so note The flat side of the cable clamps faces down 11 With LIFE BASE 1 NG XL Guide the low pressure hose away to the lef...

Page 68: ...FE BASE WM 68331 04 2021 4 Assembly 12 With LIFE BASE 1 NG XL Undo the knurled screws Pull out the hangers Tighten the knurled screws 13 Place the portable unit with holes above each other on the spac...

Page 69: ...it or With LIFE BASE 3 NG Use 4 screws 102 and 4 protective disks 104 to screw the spacer plate to the portable unit 15 Complete attachment of the devices to the portable unit see 4 5 7 Completing ass...

Page 70: ...equipment Screwdriver with crosshead PH1 1 If available Fasten the shoulder strap to the portable unit see 4 3 Attaching the belt to the portable unit page 36 2 With MEDUMAT Standard2 and MEDUMAT Eas...

Page 71: ...ices When doing so note Every device has a certain position MEDUMAT EasyCPR can be attached in 2 positions to the spacer plate The holes for the devices and the spacer plate must be aligned on top of...

Page 72: ...Connect the device to the power supply according to the instructions for use Device Part Number MEDUCORE Standard with MEDUMAT Standard2 100 5 104 5 MEDUCORE Standard with MEDUMAT EasyCPR on LIFE BAS...

Page 73: ...supply in the cable clamp 105 9 With MEDUCORE Standard with MEDUMAT Standard2 Screw 2 cable clamps 105 and 2 protective disks 104 to the spacer plate using 2 screws 101 When doing so note The flat si...

Page 74: ...Screw 1 cable clamp 105 and 1 protective disk 104 to the spacer plate using 1 screw 101 When doing so note The flat side of the cable clamp faces down 11 With LIFE BASE 1 NG XL Guide the low pressure...

Page 75: ...04 2021 LIFE BASE EN 75 4 Assembly 12 With LIFE BASE 1 NG XL Undo the knurled screws Pull out the hangers Tighten the knurled screws 13 Place the portable unit with holes above each other on the spac...

Page 76: ...it or With LIFE BASE 3 NG Use 4 screws 102 and 4 protective disks 104 to screw the spacer plate to the portable unit 15 Complete attachment of the devices to the portable unit see 4 5 7 Completing ass...

Page 77: ...ni II Applies to MEDUMAT Standarda MEDUMAT EasyCPR MODUL Required auxiliary equipment Screwdriver with crosshead PH1 1 If available Fasten the shoulder strap to the portable unit see 4 3 Attaching the...

Page 78: ...78 EN LIFE BASE WM 68331 04 2021 4 Assembly 3 Determine the holes for the device on the portable unit MEDUMAT Standarda MEDUMAT EasyCPR MODUL...

Page 79: ...so note MEDUMAT EasyCPR can be attached individually or together with MODUL to the portable unit The holes for the device and the portable unit must be aligned on top of each other 5 Complete attachm...

Page 80: ...age 36 4 If available Attach the tension belts to the portable unit see 4 3 3 Attaching the tension belts to the portable unit page 37 5 If available Attach the oxygen cylinder to the portable unit se...

Page 81: ...n all screwed unions on the oxygen cylinder and on the pressure reducer by hand only If necessary use a wrench suitable for pin index oxygen cylinders Disruption or failure of therapy due to a portabl...

Page 82: ...ly the portable unit with voltage via the charging interface When doing so note The LED for the external power supply must light up The battery status indicator must light up or flash 4 If parts are d...

Page 83: ...cylinder see 4 4 Attaching the oxygen cylinder to the portable unit page 38 4 Check the cylinder brackets for corrosion 5 If the cylinder brackets show signs of corrosion Have the cylinder brackets re...

Page 84: ...ling mounting has been checked 5 5 Checking the lock of the retaining claws 1 Fasten the portable unit or wall mounting to an equipment rail see 6 3 6 Fastening the portable unit with retaining claws...

Page 85: ...n checked 5 7 Checking the pole mounting 1 Fasten the portable unit or wall mounting to a pole or equipment rail see 6 3 Fastening the portable unit to the pole or equipment rail page 95 When doing so...

Page 86: ...the snap fasteners When doing so note The snap fasteners must not pop open again 4 Open the hook and loop fasteners When doing so note The hook and loop fasteners must be free of impurities The loop p...

Page 87: ...rve the instructions for use for devices and pressure reducers 2 Switch off all equipment 3 Check whether all the hose connections sit securely 4 Open the oxygen cylinder slowly To do this turn the mu...

Page 88: ...ifying leaks in the system page 88 Result The system has been checked for leaks 5 10 Rectifying leaks in the system Requirement The valve of the oxygen cylinder is open 1 Observe the instructions for...

Page 89: ...s according to the instructions for use for the specific device 8 Check the system for leaks see 5 9 Checking the system for leaks page 87 9 If the system still has a leak Have the damaged system repa...

Page 90: ...Risk of injury due to inadequate fastening of the portable unit Swivel the portable unit to the wall or ceiling until the locking mechanism audibly and visibly engages with the portable unit Portable...

Page 91: ...Risk of injury due to inadequate fastening of the portable unit Check that the red control pin 1 is flush with the top edge of the locking mechanism 2 and does not protrude Result The portable unit is...

Page 92: ...NG XS LIFE BASE 1 NG LIFE BASE 1 NG XL LIFE BASE Mini II LIFE BASE III LIFE BASE 3 NG LIFE BASE 4 NG Risk of injury from falling objects The portable unit can fall out of the wall mounting or ceiling...

Page 93: ...WM 68331 04 2021 LIFE BASE EN 93 6 Operation 1 Grasp the handle with one hand 2 Push the locking mechanism upwards...

Page 94: ...FE BASE WM 68331 04 2021 6 Operation 3 Swivel the portable unit forwards slightly 4 Remove the portable unit from the rail Result The portable unit has been removed from the wall mounting or ceiling m...

Page 95: ...ortable unit is not fastened properly or only suspended loosely using the hangers or holding claws the portable unit may fall off or be thrown around inside the emergency vehicle and injure people Att...

Page 96: ...he portable unit with hangers Applies to LIFE BASE 1 NG LIFE BASE 1 NG XL LIFE BASE III LIFE BASE 3 NG LIFE BASE 4 NG 1 Undo the knurled screws 2 Pull out the hangers 3 Adapt the hangers to the diamet...

Page 97: ...WM 68331 04 2021 LIFE BASE EN 97 6 Operation 5 Suspend the portable unit on the pole or equipment rail Result The portable unit is fastened to a pole or equipment rail with hangers...

Page 98: ...XS Requirement A protective bag is fastened to the portable unit 1 Open the magnetic locks on the belts on the rear of the protective bag 2 Guide the belts around the pole or equipment rail 3 Close t...

Page 99: ...nit on the pole or equipment rail with the two holding claws 2 Warning Risk of injury due to inadequate fastening of the portable unit Fasten 2 tension belts to the pole or equipment rail When doing s...

Page 100: ...of injury due to inadequate fastening of the portable unit Tighten the locking screw until the portable unit or wall mounting can no longer be moved Result The portable unit or wall mounting is fasten...

Page 101: ...portable unit 1 Suspend the portable unit on the equipment rail using the retaining claws 2 Warning Risk of injury due to inadequate fastening of the portable unit Push the locking levers outwards unt...

Page 102: ...Suspend the wall mounting on the equipment rail using the retaining claws 2 Warning Risk of injury due to inadequate fastening of the portable unit Push the locking levers outwards until the locking m...

Page 103: ...E Mini II Applies to LIFE BASE Mini II 1 Remove the portable unit from the pole or equipment rail Result LIFE BASE Mini II has been removed from the pole or equipment rail 6 4 2 Removing the portable...

Page 104: ...2021 6 Operation 2 Remove the portable unit from the pole or equipment rail 3 Push the hangers back to their original position 4 Tighten the knurled screws Result The portable unit has been removed fr...

Page 105: ...FE BASE 1 NG XS 1 Undo the belt straps by lifting the belt buckle 2 Open the magnetic locks on the belts on the rear of the protective bag 3 Remove the portable unit from the pole or equipment rail 4...

Page 106: ...ng the portable unit with holding claws Applies to LIFE BASE light XS 1 Undo 2 tension belts from the pole or equipment rail 2 Remove the portable unit from the pole or equipment rail Result The porta...

Page 107: ...ith pole mounting Applies to LIFE BASE light XS LIFE BASE light BASE STATION 1 NG 1 Hold the portable unit with one hand 2 Loosen the locking screw 3 Remove the portable unit from the pole or equipmen...

Page 108: ...IFE BASE light 1 Push the locking levers downwards until the lock disengages 2 Remove the portable unit from the equipment rail Result The portable unit has been removed from the equipment rail 6 4 7...

Page 109: ...from the equipment rail 6 5 Storing device accessories Device accessories can be stored in protective bags and accessories bags or fastened with tension belts and hook and loop straps to the portable...

Page 110: ...the same for all versions 7 1 Removing the protective bag from the portable unit 7 1 1 Removing the protective bag for LIFE BASE light 1 Place the protective bag on a flat firm surface 2 Open the hook...

Page 111: ...t on a flat firm surface 2 With the ventilator Open the hook and loop fasteners on the tension belts Remove the breathing circuit from the portable unit or With the monitor defibrillator Open the prot...

Page 112: ...isassembly 4 Open the hook and loop fasteners below and next to the handle 5 Pull the protective bag off the handle 6 Pull the portable unit backwards out of the protective bag Result The protective b...

Page 113: ...rm surface 2 Open the magnetic locks or hook and loop fasteners on the front and back of the protective bag 3 If available Pull the breathing circuit through the opening on the protective bag 4 Open t...

Page 114: ...FE BASE III LIFE BASE 3 NG and LIFE BASE 4 NG 1 Place the portable unit on a flat firm surface 2 Open the clips or magnetic locks on the protective bag 3 With LIFE BASE 4 NG with brackets Undo the hoo...

Page 115: ...ctive bag is removed from the portable unit 7 2 Removing the accessories bag from the portable unit or protective bag 7 2 1 Removing the side accessories bag Applies to Protective bags with attachable...

Page 116: ...de accessories bag off the portable unit Result The inside accessories bag is removed from the portable unit 7 2 3 Removing the accessories bag for LIFE BASE 1 NG 1 Open the hook and loop fasteners on...

Page 117: ...bag is removed from the protective bag 7 2 4 Removing the accessories bag for LIFE BASE Mini II 1 Open the hook and loop fastener on the back of the portable unit 2 Open the snap fasteners on the acce...

Page 118: ...ies bag for LIFE BASE 4 NG 1 Open the hook and loop fastener on the retaining strap 2 Pull the retaining strap out of the loop on the side of the protective bag 3 Remove the accessories bag from the p...

Page 119: ...pplies to LIFE BASE 1 NG XS 1 Open the hook and loop fastener on the shoulder strap 2 Remove the shoulder strap from the handle Result The shoulder strap is removed from the handle 7 3 2 Removing the...

Page 120: ...teners on the shoulder strap 2 Remove the shoulder strap from the portable unit Result The shoulder strap is removed from the portable unit 7 3 3 Removing the tension belts Applies to LIFE BASE light...

Page 121: ...d from the portable unit 7 4 Removing the oxygen cylinder from the portable unit 7 4 1 Disassembling the oxygen cylinder 105 mm Applies to LIFE BASE Mini II LIFE BASE III LIFE BASE 3 NG LIFE BASE 4 NG...

Page 122: ...gen cylinder out of the cylinder brackets Result The oxygen cylinder is removed from the portable unit 7 4 2 Disassembling the oxygen cylinder 115 mm 120 mm Applies to LIFE BASE 4 NG 1 Open the latche...

Page 123: ...Removing the portable unit from the wall mounting or ceiling mounting page 92 or Remove the portable unit from the pole or equipment rail see 6 4 Removing the portable unit from the pole or equipment...

Page 124: ...emoving the device from LIFE BASE light XS Applies to MEDUMAT Standard2 MEDUVENT Standard Required auxiliary equipment Screwdriver with crosshead PH1 Requirement Disassembly is prepared see 7 5 1 Prep...

Page 125: ...t from LIFE BASE light is described in a separate section see 7 5 5 Removing the device from LIFE BASE 1 NG and LIFE BASE 4 NG with protective hoops page 128 Required auxiliary equipment Screwdriver w...

Page 126: ...oving the device from LIFE BASE 1 NG XS Applies to MEDUMAT Standard2 MEDUVENT Standard MEDUCORE Standard2 MEDUCORE Standard Required auxiliary equipment Screwdriver with crosshead PH1 Requirement Disa...

Page 127: ...m the spacer plate 5 Disconnect the device from the power supply according to the instructions for use Device Part Number MEDUMAT Standard2 100 3 101 1 104 4 105 1 MEDUVENT Standard 100 3 101 1 104 4...

Page 128: ...E 4 NG with protective hoops Applies to MEDUMAT Transport Required auxiliary equipment Screwdriver with crosshead PH1 Requirement Disassembly is prepared see 7 5 1 Preparing disassembly page 123 1 Pla...

Page 129: ...m the portable unit page 119 Result The device is removed from the portable unit 7 5 6 Removing the device from LIFE BASE 1 NG XL LIFE BASE 3 NG and LIFE BASE 4 NG without protective hoops Removing th...

Page 130: ...04 2021 7 Disassembly 1 With LIFE BASE 1 NG XL Undo the knurled screws Pull out the hangers Tighten the knurled screws 2 Place the portable unit and device with the control panel membrane facing downw...

Page 131: ...3 With LIFE BASE 1 NG XL Undo 4 screws 102 from the portable unit or With LIFE BASE 3 NG Undo 4 screws 102 and 4 protective disks 104 from the portable unit 4 Remove the portable unit from the spacer...

Page 132: ...isk 104 and 1 screw 101 from the spacer plate 6 With MEDUVENT Standard Undo 1 cable clamp 105 1 protective disk 104 and 1 screw 101 from the spacer plate 7 If available Disconnect the device from the...

Page 133: ...cer plate from the device 10 If available Remove the shoulder strap from the portable unit see 7 3 Removing the belt from the portable unit page 119 Result The device is removed from the portable unit...

Page 134: ...uired auxiliary equipment Screwdriver with crosshead PH1 Requirement Disassembly is prepared see 7 5 1 Preparing disassembly page 123 1 With LIFE BASE 1 NG XL Undo the knurled screws Pull out the hang...

Page 135: ...3 With LIFE BASE 3 NG Undo 4 screws 102 and 4 protective disks 104 from the portable unit or with LIFE BASE 1 NG XL Undo 4 screws 102 from the portable unit 4 Remove the portable unit from the spacer...

Page 136: ...Undo 1 cable clamp 105 1 protective disk 104 and 1 screw 101 from the spacer plate 6 Disconnect the device from the power supply according to the instructions for use 7 Undo the screws 100 and protect...

Page 137: ...emove the shoulder strap from the portable unit see 7 3 Removing the belt from the portable unit page 119 Result The device is removed from the portable unit Device Part Number MEDUCORE Standard2 100...

Page 138: ...MEDUCORE Standard2 Required auxiliary equipment Screwdriver with crosshead PH1 Requirement Disassembly is prepared see 7 5 1 Preparing disassembly page 123 1 With LIFE BASE 1 NG XL Undo the knurled sc...

Page 139: ...IFE BASE 1 NG XL Undo 4 screws 102 from the portable unit or With LIFE BASE 3 NG Undo 4 screws 102 and 4 protective disks 104 from the portable unit 4 Remove the portable unit from the spacer plate ME...

Page 140: ...e clamps 105 2 protective disks 104 and 2 screws 101 from the spacer plate 6 With MEDUCORE Standard2 with MEDUVENT Standard Undo 2 cable clamps 105 2 protective disks 104 and 2 screws 101 from the spa...

Page 141: ...r use 8 Undo 6 screws 100 and 6 protective disks 104 from the spacer plate 9 Remove the spacer plate from the devices 10 If available Remove the shoulder strap from the portable unit see 7 3 Removing...

Page 142: ...Standard Required auxiliary equipment Screwdriver with crosshead PH1 Requirement Disassembly is prepared see 7 5 1 Preparing disassembly page 123 1 With LIFE BASE 1 NG XL Undo the knurled screws Pull...

Page 143: ...IFE BASE 1 NG XL Undo 4 screws 102 from the portable unit or With LIFE BASE 3 NG Undo 4 screws 102 and 4 protective disks 104 from the portable unit 4 Remove the portable unit from the spacer plate ME...

Page 144: ...amps 105 2 protective disks 104 and 2 screws 101 from the spacer plate 6 With MEDUCORE Standard with MEDUMAT EasyCPR on LIFE BASE 3 NG Undo 1 cable clamp 105 1 protective disk 104 and 1 screw 101 from...

Page 145: ...the devices 10 If available Remove the shoulder strap from the portable unit see 7 3 Removing the belt from the portable unit page 119 Result The devices are removed from the portable unit Device Part...

Page 146: ...evice from LIFE BASE Mini II Applies to MEDUMAT Standarda MEDUMAT EasyCPR MODUL Required auxiliary equipment Screwdriver with crosshead PH1 Requirement Disassembly is prepared see 7 5 1 Preparing disa...

Page 147: ...00 and 2 protective disks 104 from the portable unit 3 Remove the device from the portable unit 4 Remove the shoulder strap from the portable unit see 7 3 Removing the belt from the portable unit page...

Page 148: ...e portable unit and accessories after every use Carry out hygienic reprocessing of the portable unit and accessories in accordance with the cleaning and disinfection plan see 8 7 Cleaning and disinfec...

Page 149: ...the portable unit and accessories Disinfectant or cleaning agent residues can impair the functioning of the device This can injure the user and patient and result in damage to property After hygienic...

Page 150: ...6 2 Removing the portable unit from the wall mounting or ceiling mounting page 92 or Remove the portable unit from the pole or equipment rail see 6 4 Removing the portable unit from the pole or equip...

Page 151: ...cleaning solution in accordance with the specifications of the cleaning agent manufacturer 3 To remove all visible soiling Thoroughly brush down parts using a standard soft brush that is suitable for...

Page 152: ...The parts are manually cleaned 8 4 Wipe disinfecting parts Requirement The hygienic reprocessing is prepared see 8 2 Preparing hygienic reprocessing page 150 The parts have been manually cleaned and a...

Page 153: ...rts to dry fully Result The parts are wipe disinfected 8 5 Reprocessing parts mechanically Requirement The parts are probably contaminated or heavily soiled The hygienic reprocessing is prepared see 8...

Page 154: ...ection plan 1 Check all parts for damage due to use e g cable breakage 2 Replace damaged parts 3 If available Attach the belts to the portable unit see 4 3 Attaching the belt to the portable unit page...

Page 155: ...uses mycobacteria fungi and vegetative bacteria but not bacterial spores Low Level Disinfection A germ killing process using a disinfectant that kills some fungi vegetative types of bacteria and lipid...

Page 156: ...ted Not permitted Not permitted Bags and straps Protective bags Intermediate Level Disinfection Wipe down smooth surfaces with neodisher MediClean forte Dr Weigert Dosage 10 ml l Treat all surfaces at...

Page 157: ...terval Maintenance by Portable unit Maintenance free Wall mounting and ceiling mounting Accessories Device Individual intervals apply for the devices Refer to the instructions for use supplied with th...

Page 158: ...ace in the protective bag if available 4 Also observe maintenance intervals for devices in storage The devices can otherwise not be used after removal from storage Result The portable unit has been st...

Page 159: ...WM 68331 04 2021 LIFE BASE EN 159 11 Transport 11 Transport You can transport a portable unit in the following ways In the protective bag from WEINMANN Emergency By the handle With the shoulder strap...

Page 160: ...its and accessories with a charging interface 12 3 Contaminated parts Do not dispose of contaminated parts in household waste Consult an authorized certified special waste disposal company for proper...

Page 161: ...288 WM 9890 LIFE BASE 1 NG XS with charging interface For MEDUMAT Standard2 or MEDUCORE Standard2 04054685006174 WM 9871 LIFE BASE 1 NG XS For MEDUMAT Standard2 MEDUVENT Standard MEDUCORE Standard2 or...

Page 162: ...EDUMAT EasyCPR MODUL CPAP MODUL Oxygen 04054685004231 WM 9173 LIFE BASE III For MEDUMAT Standarda MEDUMAT EasyCPR MODUL CPAP MODUL Oxygen 04054685010720 WM 9473 LIFE BASE 3 NG with charging interface...

Page 163: ...For MEDUMAT Standard2 MEDUCORE Standard 04054685003630 WM 9707 LIFE BASE 4 NG with charging interface For MEDUMAT Standard2 MEDUCORE Standard 04054685003920 WM 9708 Wall mountings and ceiling mountin...

Page 164: ...ceiling mounting For LIFE BASE 1 NG XS 04054685271091 WM 9798 BASE STATION Mini II For LIFE BASE 1 NG XS LIFE BASE 1 NG LIFE BASE 1 NG XL LIFE BASE Mini II 04054685050573 WM 8160 BASE STATION Mini II...

Page 165: ...th charging interface 12 V plug for power supply unit and charger For LIFE BASE III LIFE BASE 3 NG LIFE BASE 4 NG 04054685051211 WM 8237 BASE STATION 3 NG with charging interface 12 V vehicle combinat...

Page 166: ...AT Standard2 and MEDUCORE Standard on LIFE BASE 1 NG XL WM 9692 Protective bag with accessories bag for LIFE BASE 3 NG For MEDUMAT Standard2 MEDUMAT Standarda MEDUMAT EasyCPR MEDUCORE Standard2 MEDUCO...

Page 167: ...ight WM 8023 Protective bag slim for MEDUMAT Standard2 on LIFE BASE 1 NG XS WM 9889 Protective bag for MEDUCORE Standard on LIFE BASE 1 NG XS WM 9886 Protective bag for MEDUCORE Standard2 on LIFE BASE...

Page 168: ...XL LIFE BASE 3 NG WM 9670 Accessories bag for protective bag for MEDUMAT Transport on LIFE BASE 1 NG for ceiling mounting WM 9622 Accessories bag for MEDUMAT right on LIFE BASE 3 NG WM 8273 Accessori...

Page 169: ...LIFE BASE 4 NG WM 8274 Straps hook and loop straps and clips Shoulder strap for LIFE BASE 1 NG XS WM 9879 Shoulder strap with fastening loops For LIFE BASE 1 NG LIFE BASE 1 NG XL LIFE BASE Mini II LI...

Page 170: ...LIFE BASE III WM 15209 Spacer plates Spacer plate for LIFE BASE 1 NG XS For MEDUMAT Standard2 MEDUCORE Standard2 WM 9713 Spacer plate for LIFE BASE 1 NG XS For MEDUMAT Standard2 MEDUCORE Standard WM...

Page 171: ...ment rail For BASE STATION LIFE BASE light XS LIFE BASE light WM 15795 Kit retaining claw with locking screw for fastening to equipment rail For BASE STATION Mini II BASE STATION 3 NG WM 15881 Set of...

Page 172: ...d screw M4 12 WM 51402 102 Oval head screw M4 16 WM 51406 103 Oval head screw M4 30 WM 51430 104 Protective disk diameter 4 mm WM 3566 105 Cable clamp diameter 5 mm WM 10787 Set of 4 vibration absorbe...

Page 173: ...mm Weight Empty With equipment 0 8 kg max 4 0 kg 1 1 kg max 7 7 kg 0 9 kg max 6 0 kg 2 0 kg max 9 3 kg Temperature range Operation Storage Humidity 20 C to 60 C 40 C to 70 C Up to 95 RH without conden...

Page 174: ...670 mm x 315 mm x 250 mm 520 mm x 340 mm x 300 mm 760 mm x 440 mm x 300 mm 760 mm x 520 mm x 300 mm Weight Empty With equipment 2 2 kg max 11 6 kg 2 5 kg max 11 2 kg 2 9 kg max 14 6 kg 4 4 kg max 18 2...

Page 175: ...ifier UDI Enables unambiguous identification of specific medical devices on the market Medical device Do not dispose of device in household waste Observe the instructions for use Follow the instructio...

Page 176: ...ASE WM 68331 04 2021 15 Symbols Maximum weight Do not iron Wash at 30 C Do not tumble dry Shows how to release the lock and remove the portable unit from the wall mounting Input voltage 12 15 V Symbol...

Page 177: ...evice and the warranty periods listed below The warranty terms and conditions are available at www weinmann emergency com On request we will send you the warranty terms and conditions by mail If you w...

Page 178: ...ty WEINMANN Emergency Medical Technology GmbH Co KG declares herewith that the product complies fully with the respective regulations of the Medical Device Regulation EU 2017 745 The unabridged text o...

Page 179: ......

Page 180: ...for Production Logistics Service WEINMANN Emergency Medical Technology GmbH Co KG Siebenst cken 14 24558 Henstedt Ulzburg GERMANY Manufacturer WEINMANN Emergency Medical Technology GmbH Co KG Frohb se...

Reviews: